Broken Half-Nut Woes

I would like to extend a thank you to WarrenP for bringing up the clearance adjustment issue. This was something I really didn't think about it and could have potentially been a big issue. It just happens to turn out that I would have been ok just by pure dumb luck, but it's always good to check through these issues to be sure.

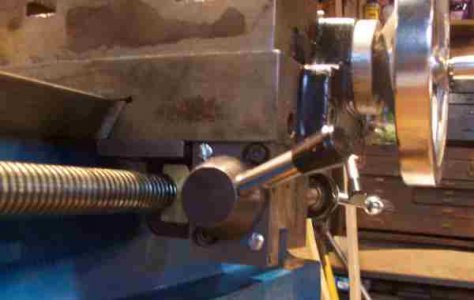
I put the half-nut lever back together and assembled the lead-screw, half-nut and lever together to check for clearance.
(see photo below)
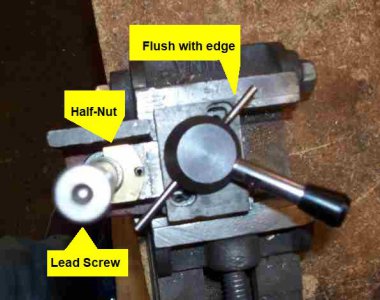

286343

It just happens to turn out that when the plate holding the half-nut level is precisely flush with the half-nut cage assembly it's at the perfect adjustment. This is exactly what I was planning on doing, but I really didn't think in advance whether this was indeed the right position. Now I can be certain that this will work perfectly.

As far as any fine adjustments are concerned I don't think there will be any need for that kind of precision. There is a spring-loaded ball detent that holds the half-nut lever in position. That ball detent is not the most precise mechanism, especially as manufactured in this case. The half-nut lever has wiggle room when locked in place by this ball detent. So the half-nut will actually be riding against the spring tension of the ball detent. This will give it room to move rather than bind should it happen to encounter a tight spot on the lead-screw.

I think it will be just fine if I anchor this plate flush with the side of the half-nut cage.

So I'm good to go. Now I can move forward to actually drilling and tapping the holes for the new bolts.

Thanks for bringing this to my attention WarrenP. It was worth looking into. In this particular case I would have been ok without checking, but things could have been different so it was well worth checking before committing.
 
Absolute Disaster!

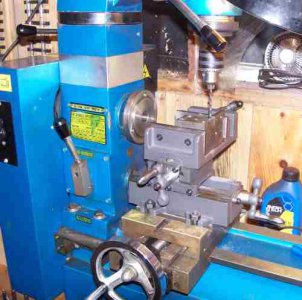
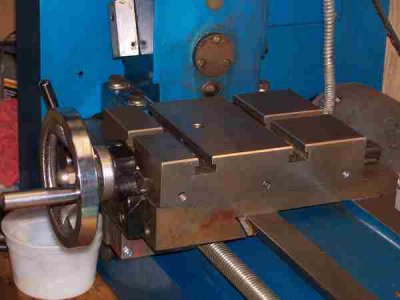
The day in the shop started out pretty nice. Even though I can't use the lead screw on the lathe right now I can use the milling head. So I set up the lead-screw half-nut cage in my nice new X-Y vice.

286576

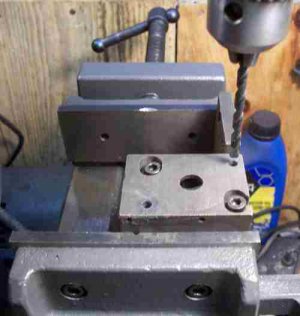
I haven't used the milling head much so this was a fun little project to drill these holes precisely where I wanted them. I realize that I could have just used my drill press for this, but it's more fun doing it on the milling head.

The holes drilled beautifully. Precisely where I wanted them. I drilled these for M5 x 0.8 threads. Actually I didn't have a metric drill size so I used an imperial drill size. This makes the hole slightly larger than what an M5 tap calls for. So this should make the tapping operation all that much easier right?

286575

The drilling operation when very smoothly. I could tell from the chips that this was some kind of cast material. It was coming out like a very fine dust. Not the kind of chips you get when drilling into steel.

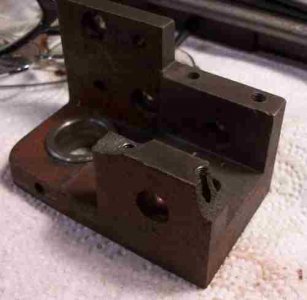
None the less the drilling operation when well. But when I went to tap the hole things went very wrong. I was really taking my time tapping this too. I only when down a thread or two and backed out to clean the tap. But by the time I got about 6 threads deep, this thing broke apart like a piece of glass.

286574

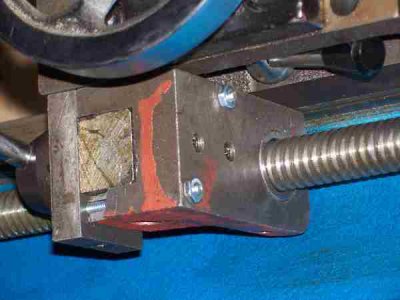
The break on the right side was the original break. The break on the left side fell off when I was trying to tap this. What a bummer!

I instantly went from feeling great to feeling totally defeated. I just wanted to cry.

So now for the good news.

First, I think this is the only part on this lathe that made from this crappy cast junk. Everything else appears to be made of real steel. So that's encouraging.

Secondly, this part can still be salvaged. Now I'm just going to drill clear though the whole thing and bolt it together with 8-32 stainless steel screws. I just ordered the screws. With the screws going through the whole piece with nuts on the back side that will be much stronger than the original casting.

I'll just put it back together with these 8-32 screws for now and see how it works. If this turns out to be the only serious problem with this lathe I might end up making a whole new half-nut cage out of actual steel. I could weld something up and then machine it using this milling head.

So that's where I'm at. I'll have to wait for the screws to come in. If this would have tapped out ok I would have had it back together tonight. I want to get back to work on my original projects.

I don't want to give up on this lathe yet. And besides, if I go to sell it I'll want to fix it up in good working order first.

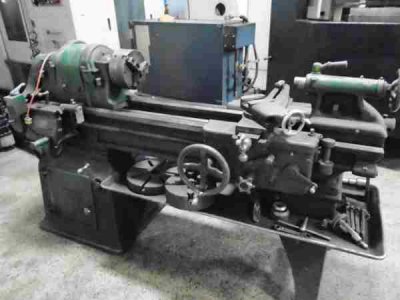
I do have my eye on another lathe. It's a south bend, quite a bit larger.

What do think?
It doesn't have a milling head so I'd need to buy a small Bridgeport mill too then.
But this does look pretty nice. It comes with a 3-Jaw chuck, 4-Jaw chuck, large face place, taper attachment, 5C collet handwheel drawbar, and quite a few tool holders. This is very much like the one I used to own years ago. I'd feel right at home with this machine. There won't be any cheap cast garbage on this lathe.

286579
 
I finally finished this repair. It's not as professional as I had originally intended. But it's still going to be better than it was before.

I was going to use four M5 cap screws just like the two original screws. But when I went to tape the holes the casting broke. So I gave up on the professional repair and decided to just drill thru-holes to accept 8-32 screws. Fortunately the tap drill for the M5 screws was the perfect clearance hold for the 8-32 screws. So I was able to just finish drilling those same holes clear through. It's also a good thing that I didn't mill the clearance slots for the M5 cap screws yet. It works out better to just let the 8-32 screws rest against the face of the half-nut lever plate.

Here's a view from the front with the two additional screws. I also used longer M5 screws to replace the originals. In fact, if you recall the upper screw was never installed at the factory. I had to mill that hole out to allow for the cap screw to fit.
286936

This actually turned out to be the perfect location for the half-nut lever. So it's good for now until the half-nut wears down. Hopefully that won't be too soon. I make remake this entire half-hut cage assembly some day using better steel. In the meantime I think this will work. It most likely wouldn't have ever broke in the first place if it had both the original screws installed properly.

The next photo shows the back side where you can see the nuts of the 8-32 screws. These are currently just some cheap screws I picked up at Walmart just to finish the job. I have some stainless steel screws ordered with locking-nuts. When the new screws come in I can just pop them in without any further disassembly. They also have Philips heads.

286937

You can see in the above photo where the casting broke when I tried to tap the hole. I didn't realize it was this fragile. I might have been able to prevent that breakage by holding it more carefully in the vice. But I don't think this will hurt anything. It just doesn't look very pretty, but this will work.

After fixing the half-nut lever I also removed the cross-slide table. It's a good thing I did because I learned a lot about how the adjustment screws work on the gib. I didn't fully understand how they worked before taking this table apart. There are only two adjustment. On front and one rear. These are made with tiny set screws that just have a flat-head screwdriver slot in them. In fact, the slots were very shallow so I cleaned them up real nice with a hacksaw. Then I was able to adjust the gib using a long flat-head screwdriver. Then you put two more set screws in that accept an Allen key and those are just used to lock the adjustment screws in place. The center hex screw pushes on a pin that locks the cross-slide in position. So I got that all squared away too. It's much better now. There is some play in the hand-wheel bearing. As far as I can see there is no way to adjust that play out save for making a shim. So that's a project for another day.

286938

Finally I took the compound rest off it's ways too and cleaned that all up. The bronze nut that the compound screw goes into has some play. I was going to tighten that nut down but when I went to do that I saw that it's not screwed on. Instead it appears to be swaged on like a rivet. So again, a project for another day. To fix it right I'll most likely need to make a whole new nut and mill in my own mounting holes. In the meantime I'm going to use it as is for now. The lathe seems to cut ok without any chattering or signs of anything being loose. I tend to lock down any ways that I'm not actually using. So that always helps too.

Anyway, I thought I'd post this final update. I'm done repariing the lathe for right now, and I'm going back to working on the MT3 collet drawbar. That's where I left off when the half-nut lever broke.
 
Good fix, I was going to suggest you could use JB weld to reattach the broken off pieces, probably be stronger than the parent material
If you haven't used JB weld before it's handy stuff
mark
 
Back
Top