Blacksmith Post Vise Rehabilitation

wachuko

Professor of Pending Projects
H-M Lifetime Diamond Member
Joined
Aug 6, 2015
Messages
4,208
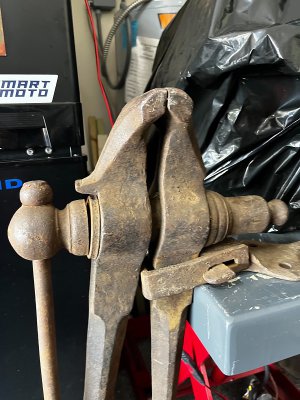
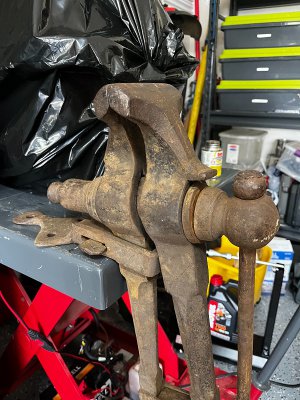
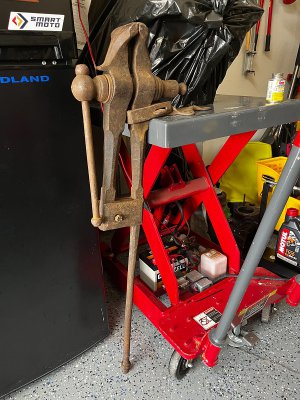
Bought this locally... 4" wide jaws.

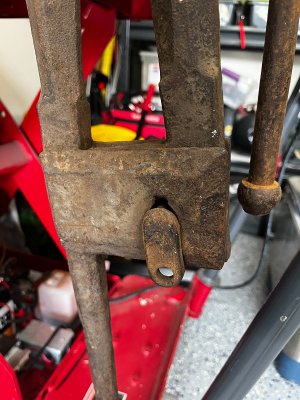
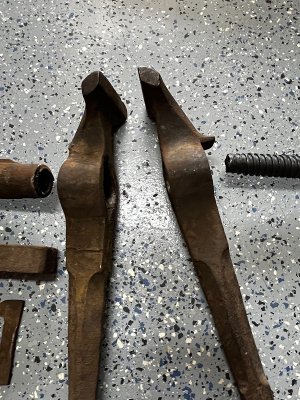
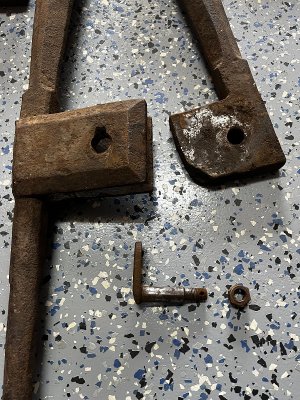
I could not find a brand/maker on any of the parts... Missing a wedge and the spring. Cost was US$75.00.

Photos from when I got it home...
IMG_2129.jpeg

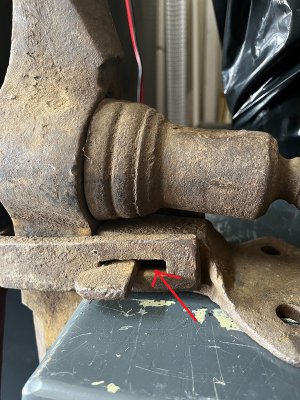
Here you can see where the missing wedge goes...
IMG_2126.jpeg

IMG_2128.jpeg

IMG_2131.jpeg

IMG_2132.jpeg

The plan is to make the wedge and spring, clean it, paint it and bring it back to life... Oh, and would like to eventually make a stand for it. Something like this:
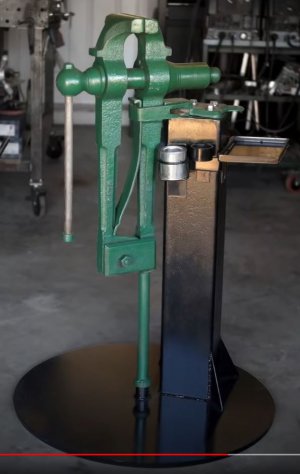
Final Product.JPG

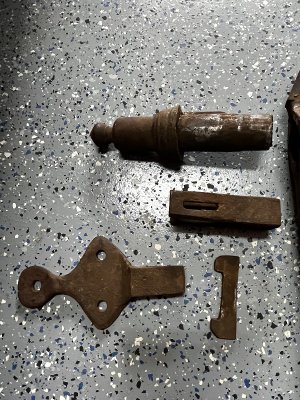
Can't do much until next week, but started to take it apart at least... oh, and also ordered some material to make the wedge and spring...
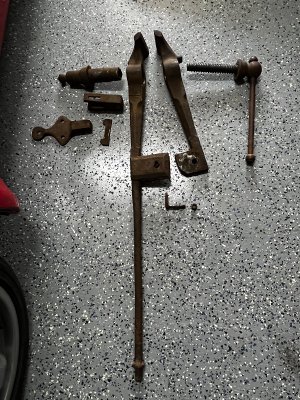
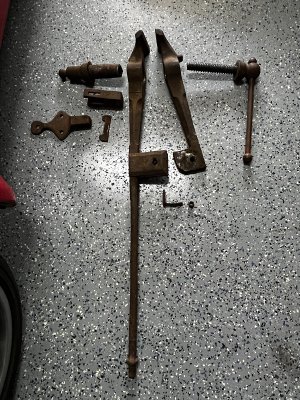
IMG_2133.jpeg
IMG_2134.jpeg
IMG_2135.jpeg
IMG_2136.jpeg

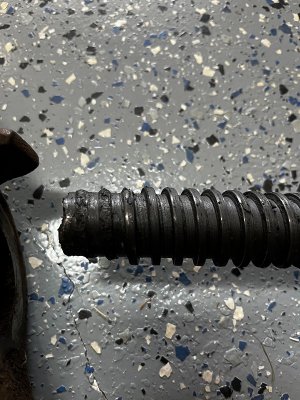
The first few threads on the beginning of the screw are gone, I hope that is not a big issue... the rest looks great... I need to check where exactly the thread grabs... I did not take it all out when I went to pick it up. I saw the initial threads that were fine and figured the whole thread rod was fine... oh well...
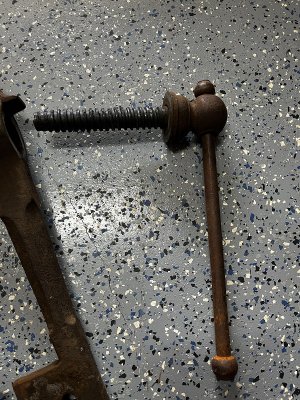
IMG_2137.jpeg
IMG_2138.jpeg
IMG_2140.jpeg

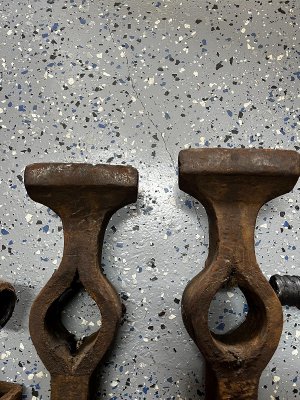
Might want to clean and make some soft jaws for it??
IMG_2141.jpeg

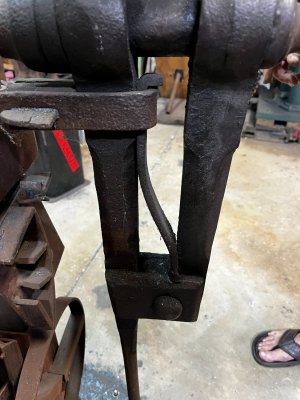
That is all for now. I do need help on how I am going to get the 5160 flat stock that I ordered, bent to the shape needed... Needs to look like this one...
IMG_2113.jpeg
 
Last edited:
When you get it really cleaned up you might find maker's marks on it. Sometimes they're on the front or rear jaw, but more often on the flat sections on the side below the jaws (easier to stamp on a flat part).

You can go with one wedge, but two works a little better...you drive them in from opposite sides and that keeps the U-shaped part square to the vise, so a little nicer. Some people made the U part with an angle on the back that corresponded to the angle on the wedge so they stayed square to the body, but yours doesn't look that way.

The pivot bolt isn't original. That vise is definitely old enough that it would have had a square-headed bolt and nut. The general age is based off the box at the back of the nut (yours is an English style, somewhat more elegant than the U.S. versions) and the mounting hardware. Yours has all forged parts that are clearly not mass-produced on a machine. I'd have to go find my references, but I'd say easily 100 years old and likely older.

Do you have a forge of any kind to heat your 5160?

Thank you for your analysis based on the photos!

I have a 1/2"x13 x 3" square head bolt and nut. I will replace the pivot bolt that is currently in there.

I do not have a forge... this vise is just the start of another rabbit hole...
 
Last edited:
I'm curious about the when and the why leg vises (or post vises, or is there a difference?) went out of vogue. These forged, long-leverage tools are interesting, so why are they no longer made? What is it about the bench/swivel vise that makes it the modern choice, completely and totally replacing the leg vise in the metal shop? I know woodworkers use a version of the older mechanics; every woodie that ever built a woodworking bench seems to have one, but I assume it's for the clamping range.

The resto vise that you are aiming towards looks really neat.

The way I understood it... they are still being used and are preferred by blacksmiths because of how they are designed to take a beating. The post/leg helps with the force distribution when hitting the part on the vise.

Also the floating screw setup that has all the threads covered... so you do not get hot debris on it...

Of course, none of this matters for me... I just find it cool and wanted to have one... hehehehehe... The risk I run, and the reason for my rabbit-hole comment, is that I would like to try melting metal, sandcasting, and forging... just to give it a try... For fun... not for any other reason...

Oh, and you can still buy new vises - link
 
Last edited:
Thank you for your analysis based on the photos!

I have a 1/2"x13 x 3" square head bolt and nut. I will replace the pivot bolt that is currently in there.

I do not have a forge... this vise is just the start of another rabbit hole...
The one thing to check is that the bolt threads aren't rubbing on the vise parts or they'll get grooved. I forgot about the end of the screw you mentioned earlier...that doesn't matter until you have it opened up really wide, so probably not a factor.

I'm still looking for my reference, but can't seem to find it. Going off memory, that style of mounting hardware started around 1850 or so where the U-shaped bracket was forged to wrap around the stationary part of the vise for use with the mortise and wedge (think that's what they call them). Then sometime after 1900 the mounting hardware was mass produced with the mounting pad that has the bolt holes often being a casting. Many of the cast mounting pads had manufacturer's info on them. As time went by many became a bit more basic with less decorative touches.

Only two things really matter for the spring other than having some sort of arch to it: The 90* bend at the top to catch on the bracket hardware, and the tabs at the bottom which wrap around the edges of the moving jaw arm. It's better if the spring tapers from thick to thin top to bottom as well. For the top bend you could clamp the end of the stock to a sturdy bench and then heat the bar until it's at least orange and then use something like vise grips to grab the free end of the bar and bend down. For the tabs you'll have to forge the end of the stock down so that it's thinner and wider, then fold the ends back in on itself to make a U. You can actually use the vise itself as a die to hammer the tabs around so they fit properly. The tabs keep the spring from walking off the arm constantly. There are YouTube videos on making a vise spring that are worth watching.

Great to know that the screw is fine. And the threads do not touch anything on the vise. So that is good as well.

I have been watching a lot of videos on these vises and now on making that spring. Thank you for the coaching on how to tackle it.

It would have been great to start with some leaf spring material... too bad I got rid of some old leaf springs I had from when we refreshed the suspension on a small trailer we had. This was many years ago... now, when I see something on the side of the road that folks are getting rid of (everything my wife calls junk), I see raw material for some future project...

Links to the videos for reference:


What I really need now is an anvil (I do have that piece of trail track) and a furnace.... LOL.... rabbit hole I tell you...
 
Last edited:
@G-ManBart - I know this might be sacrilegious, but what about welding tabs?

EDIT: Never mind... I am watching another video (now in the previous post) where he heats the metal on a grill with coal... I can try that...
 
anvils can be a rabbit hole too. If one is careful and patient you can get a good anvil at decent prices. Once you have used a good one, you understand the differences.
 
Back
Top