Atlas 10f Reverse Gearbox Bearing

Ok Guys,
I'm in holding pattern. It appears the original idea of pressing the old bearing out has merit and is still doable. I have a rudimentary plan to assemble the necessary pieces and try it; additionally I have sourced some bronze bearing material at the approximate correct size. Schor, what was your suggestion about a replacement housing?
Lou O.
 
I have a gearbox case at a friends in California, the bushing is in good shape as far as I can remember. I would sell it to you at a fraction of what Clausing is going to sell you one for, plus you pay the shipping from Cali. What did they quote you in the first place? I am thinking the $20-$30 range for the part plus shipping.

You can also remove the one you have and get a new bushing.

So you have options, let me know if you want the one I have.
 
Another option would be to machine the old one out and insert a new one with the OD of the new bushing to match the ID of the casting.
Pierre
 
Several people were writing while I was. To clarify, That (*** the puller made from long bolt or threaded rod, puller disk (socket as shown), receiver cylinder and one or two nuts ***) is essentially what I suggested earlier, except that the piloted puller disk is much safer as it is self-aligning and can't slip out of alignment as the socket can. If it does slip and you don't catch it before taking up on the pulling nut, you can and most likely will ruin whatever you are pulling the bushing out of.
 
Several people were writing while I was. To clarify, That (*** the puller made from long bolt or threaded rod, puller disk (socket as shown), receiver cylinder and one or two nuts ***) is essentially what I suggested earlier, except that the piloted puller disk is much safer as it is self-aligning and can't slip out of alignment as the socket can. If it does slip and you don't catch it before taking up on the pulling nut, you can and most likely will ruin whatever you are pulling the bushing out of.
I agree with you . I would not recommend this to anybody working on there in use machines. That was my quick and dirty try just to see if it would move at all. I was surprised when it was so loosely held in there. I would normally take a few minutes to make a stepped disk as you mentioned. That is what I did for the QCGB .
WH
 
OK. I've done the same thing in the past. You just have to be extra careful about keeping everything properly aligned until you take a strain on the puller screw. After that, it usually works OK. It doesn't usually matter if you mark up the end of the old bushing a little.
 
Schor;
I had been away from this message chain and didn't see your last request/invitation. Clausing wants $146 + shipping for a new gearbox case w/bearing. Your offer of $20-30 + shipping sounds very reasonable *if* the used bearing is still within acceptable limits. I would get someone to mike it and check before sending...if OK, let's do the deal. Contact me offline for mailing instructions, thanks.
Lou O.
 
Lou, I don't always have time to look at the forums, pm me and we can probably make it happen.
 
Gentlemen;

Forgive me for overcomplicating this procedure; I didn't want to destroy the gearbox casing or the hole for a new bearing, so I carefully considered all the information posted and came up with this plan:

First, I had to make a guide that would fit inside the existing bearing, with a shoulder to grip the edge and push it out;
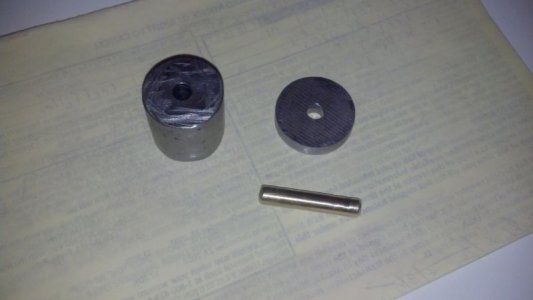
Gear10.jpg

Since the lathe wasn't operational I couldn't turn the 'puller' from the solid, so I cut the required pieces from bar stock and assembled them for a brazing operation;
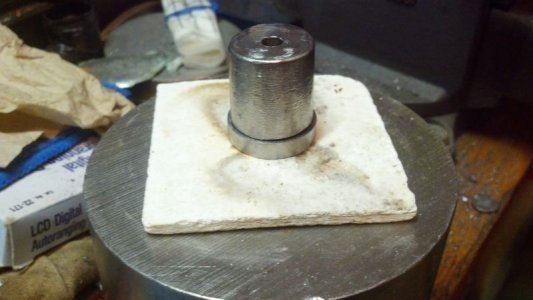
Gear11.jpg

The assembly was brazed together, then tapped 1/2" x 13 to match the all-threaded rod I had on hand:
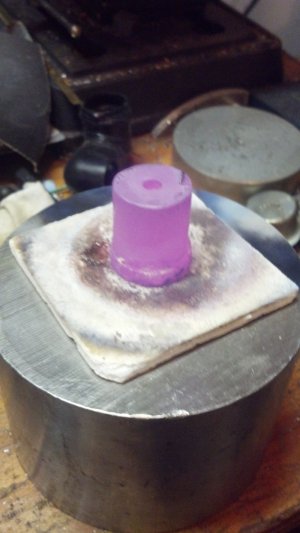
Gear1.jpg

The brass rod guide for the two brazed pieces was drilled out, and the assembly tapped:
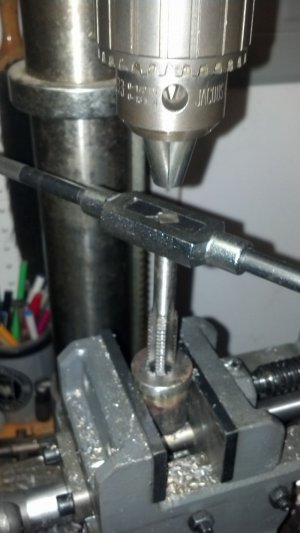
Gear2.jpg

The finished 'pusher' was then ready to go; I had to do some clean-up filing on the shoulder to insure a good fit;
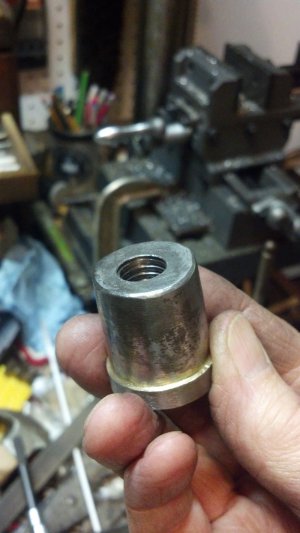
Gear3.jpg

I had a 28mm socket, 1/2" drive that fit the all-thread and allowed the exiting bearing to come out straight, but I needed additional spacing due to the length of the bearing, so I made a spacer out of a PVC pipe adapter, cutting recesses at both ends for the gearbox & the socket with a flycutter;
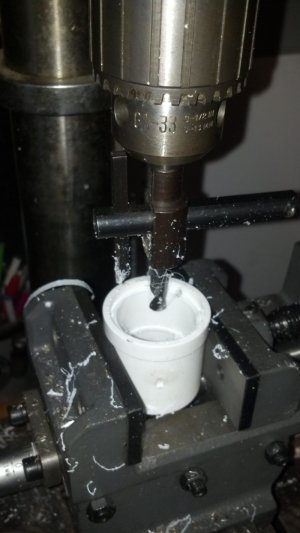
Gear4.jpg

Assembling all the parts, this is what I ended up with;
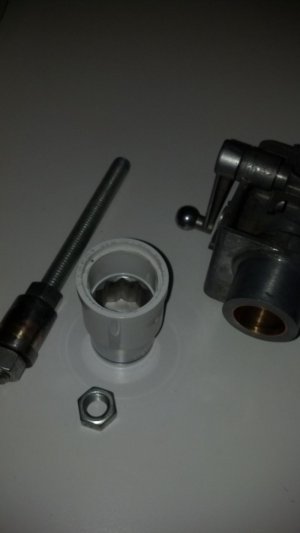
Gear5.jpg

Putting them in place, I ended up with this;
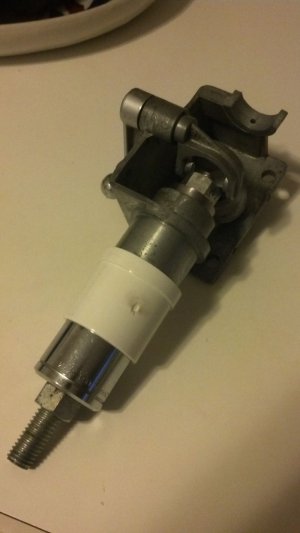
Gear6.jpg

The contraption must have kept everything in reasonably good alignment, because, after heating everything up in Wifey's oven to 175 F (she wasn't home), a few quick turns of the nut on the socket, I ended up with this;
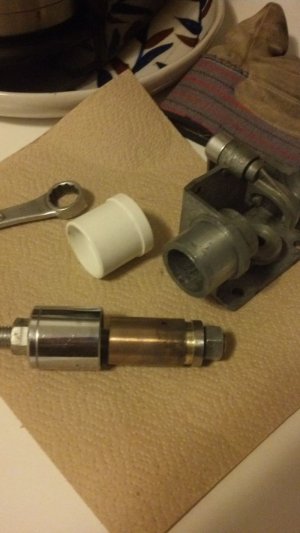
Gear7.jpg

The old bearing survived with 'nary a score mark anywhere, coming out really smoothly;
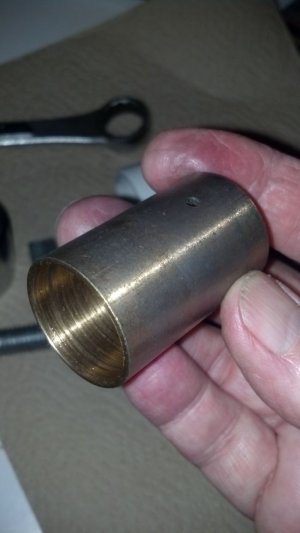
Gear8.jpg

Here you can see the wear on the right side compared to the left; enough to make the shaft holding the gear wobble;
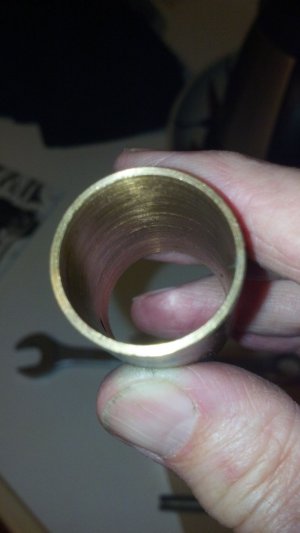
Gear9.jpg

I'll post a couple of pics of the installation once I get the new bearing; the reverse steps should be similar.

Since putting all this stuff together was rather time consuming, I'm thinking about making the parts available to anyone on the website contemplating this repair. If enough 'goodwill' would prevail, we could mail the parts around for the shipping cost; once you obtain a new bearing, the repair would only take about an hour to accomplish - your thoughts on this?

Lou O.
 
Back
Top