Another order of operations question... re: saw arbor

You want the diameter that the cutter centers on to be concentric with shaft that fits into the collet.
As concentric as possible. Nigh on zero highly desirable.
How best to achieve that goal? Cut all critical features in one part in one setup. OR..
Turn it on centers. Perfect concentricity. Can be flipped end for end without losing concentricity.
Make the cap with a recess to fit loosely over the stub the cutter sits on.
Drill and tap the end of the arbor for the attaching screw. If you made your initial center large enough, there will still be some center left after tapping. Bonus!
The cap is just a fancy glorified washer that contacts the cutter at the outside diameter. It has no functional need to be concentric.
You want the cup to contact at the od so the holding torque is maximized for a give bolt clamp load.
Last thing you want is a flat washer that potato chips under bolt load and grips the cutter near the inside radius. That is asking for the cutter to slip.
 
Really the design just depends on the accuracy of one's machines and skill set. I can't hold super good tolerances on my machine, it's just too crappy, so the one piece post design with cup is a better choice for me
 
First attempt at this... Got the cap to mike at 0.9991, not 0.9995. I set the compound angle to 14.47 degrees so that a 0.001" movement would result in a 0.0005" diameter reduction. (sin(14.47) = 0.25) My DRO allegedly can measure down to 0.0005". Must of had a senior moment, had 0.0034" to go and thought I worked out the math, but not quite. Oh well. Considering all the flub ups while doing this, it came out pretty well. (Never tried to hit 4 decimal places before...) Had problems with tool height and carbide chipping. The tool was periodically diving into the work, making grooves. It drove me crazy until I figured it out. (Tool was too high. QCTP wasn't quite going to the same height every time...) Grabbed a HSS tool to find it had a tiny chip on the tip. Had to re-hone it to get rid of a tiny chip. The HSS tool was easily able to shave off 0.00025" at a time. Made the tiniest of chips.

The shank machined nicely to 0.750. (Second time at 14.5 degrees was the charm!) Bought some carbide router bits, going to try putting in the radius like @JimDawson did. Shank is still on the chuck. Test fit a 3/4" R8 collet on it - fits nicely.

Measured the saw ID with telescoping bore gage tool and a micrometer. Got 1.0000" I was amazed it came out to that. Took me a couple of tries just to use the bore gage. The saw only being 1/16" thick made it a challenge just to get the bore gage in the right place. So the cap will have play. I'll keep on plodding away at this. Pictures on next post. Still need to clean up some stuff, both figuratively and literally. Tiny chips everywhere, in my hair, my pockets, my shirt...
 
I like the Router bit radius tool idea, will have to try it myself. Also like the idea of clamping with a hose clamp and sand paper!

Richard
 
Used the router bit today. Have to take micro cuts on a mini-lathe. Chatters quite a bit. Nonetheless, made a nice rounded fillet.
 
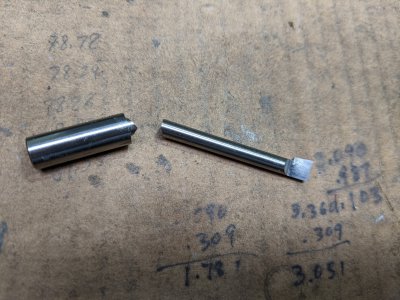
With 0.025" to go (bore was at 0.975") I snapped my Micro 100 boring bar. Drat! Noticed it wasn't cutting like normal, the bore quality wasn't as nice as usual. Eased the bar to the bottom by hand. Apparently not gently enough. Thought I was getting pretty good at it. Not this time. Pop! Snap!
IMG_20200813_204942.jpg
Oh well. Well at least the hole was big enough to use my normal boring bar! Got to the point I thought I'd better get serious about measuring the bore carefully. At 0.998" bore, I stopped, because I wasn't consistently measuring the bore. I'll try again tomorrow.
 
About 3 years ago I started this thread on slitting saw arbors, got great replies and a couple of easy to follow plans from members here, the one I copied is (2nd link with the diagram) came out much better than I expected, could hear the suction sound every time I removed the cap from the body , it was a rewarding project but couldn't have done it without the help I received :

1510265658402.png
 
@Ken from ontario that's what I have been following. Been having a little trouble though with both pieces. Bore seems to have a taper, so the cap doesn't fully seat. It stops at 0.75" in. Also having trouble getting the saw to seat to the edge of the cap. I'm about 0.020" from seating. I've attempted to make a cut so the saw doesn't seat on the full cap, but only on the outer edge. I've found this to be quite challenging so far. Everything is done save for milling the flats, a little touch up and the final fit. The final fit has me scratching my head on how to come to successful closure.
IMG_20200814_181908.jpg
 
WobblyHand, there's no shame in starting all over again although some experienced machinist members here might know a way to salvage that arbor but I'm not even going to attempt to give you advice on saving it, what I can tell you is what I would do .
I would be curious to know whether my lathe cuts straight or tapered, first verify that and then take it from there.
There are tons of videos on "shop made slitting saw arbor" , the one I followed and recommend you to watch is Pragmatic Lee's video ,I followed it step by step but using the measurements from that plan I linked (post #17). you will soon find out where you went wrong, whether it was the process or your lathe itself was the culprit.
Best of luck.

 
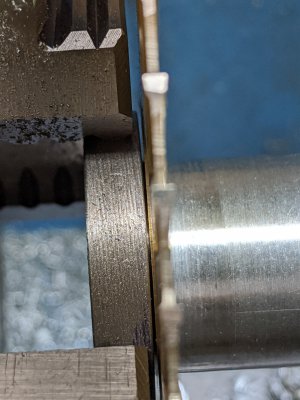
@Ken from ontario I'll watch that video. Knowing me, probably doing everything wrong or out of order... With a lot of effort, a bit of drudgery, and a little luck, I was able to take off just enough of the corner of the cap for the blade to be able to go up to the edge and still have a very tight fit. Used a knife blade tool, honed with super fine diamond for the last little bit. I had the angle of the compound at 7.2 degrees. (0.001" movement results in 0.000250" change in diameter. 0.000125" change in radius) I could see just a tiny bit of dark grey shavings at the tip where I was reducing the cap radius. When I was done the grey shavings on the tool bit was about 1/32 by 1/32. Not much, but that worked.

The big piece, hmm, I'm at a loss. Need to walk away from it for a few days. When I was chucking it up again this morning, everything seemed to be off. I dialed in the 4 Jaw near the chuck, got 0.00015 total run out. I then moved the dial indicator out 3 inches or so and got 0.010 movement. Tapped the piece, but the run-out was still pretty large. Never could get better than 0.005" Of course, what I care about is the bore run-out. It wasn't so good either. I don't have a way to measure the ID run-out. My DTI only has a short lever, so I'm limited to 0.4". Even over that limited range, I could see more variation than desired.

I tried adding Prussian blue to cap and inserted the cap into the main piece. To be honest, I couldn't figure out what it meant. I do know that by machining the cap, (as described above) I was able to insert the cap with a 0.170 gap, which is closer than before. (Previously it was 0.250) So assuming a 0.0625 blade, only 0.110 to go! So close, yet so far... I do know there is an interference fit somewhere. Wish I could figure out where the interference is.

Next step, watch the video. Ok, watched it twice. Hmm, he made it look so easy. I didn't use the live center.

Suspect my tailstock is off center. Going to have to dive down that rabbit hole. I've been putting it off, and it seems to bitten me in the posterior.
 
Last edited:
Back
Top