- Joined
- Feb 8, 2014
- Messages
- 11,176
I was making a servo motor mount today and found a bit of a problem with my machine. 
Cutting pressure was minimal, 0.250 end mill, 0.025 finish pass, 0.60 DOC with a spiral lead in, 0.750 mild steel. This is acceptable for this particular part, but I need to cut some bearing pockets for the same project and I'm going to have to bore those because those have to be right.
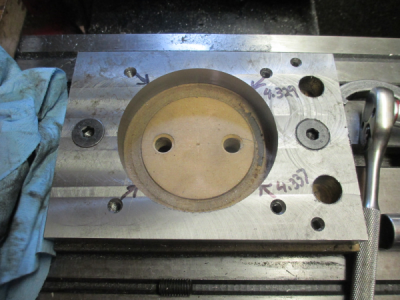
It has always interpolated circles about 0.001 out of round but this time it's really bad, about 0.008 out of round. So time to do some checking.
I noted about 0.010 backlash in the X axis so I'm starting there. First time I have noted any backlash in the X axis, the Y axis has had known 0.004 backlash for some time, but the computer was compensating for that, pretty much.
First check the end play in the lead screw. Put an indicator on the end of the ball screw to check the end play.
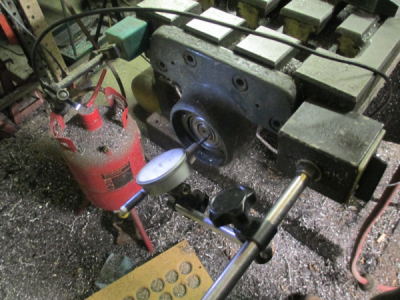
With the table locked, I was able to get a max of 0.005 end play. But this was by putting much more load on the ball screw than would ever be on it in normal operation. I noted about 0.0003 end play with the table unlocked.
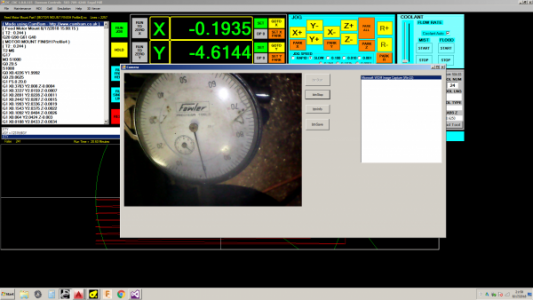
I set up my little USB camera (the small indicator base in the picture above) so I could watch the DRO and the dial indicator at the same time. I have a camera function built into the CNC program. Here is a screen shot.
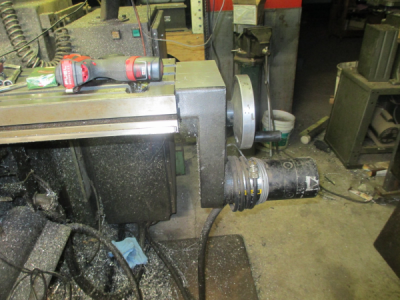
The bearing on the left side is just a support bearing and floats in the housing. The thrust bearing, back to back angular contact bearings, is on the right end of the table.
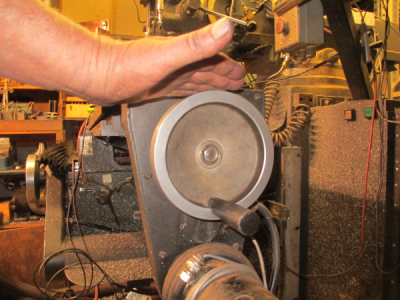
The nut in the center of the handwheel sets the preload on the thrust bearing, I tightened it a bit and got the loaded backlash down to about 0.004, better but not good enough. So tomorrow I'll go into the housing and see what I can do about setting the preload. I'm guessing a shim behind the bearing set will do it.
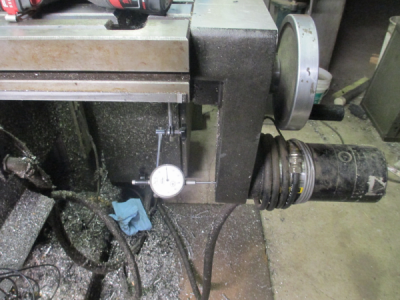
I put an indicator on the case to look at the loaded deflection and at max load it was only about 0.001 about 8 inches from the bearing, so that is acceptable.
But, removing the endplay in the ball screw is not going to solve the whole problem. There is still about 0.010 backlash in the ball screw. As it turns out the ball screws are single nut (I think, not totally sure) so not adjustable for wear, so I have a few choices. 1) install larger balls and hand fit the preload, you can buy balls in 0.0001 increments, 2) add a second nut, which I may do in any case, 3) sent the ball screws out for rebuild, and 4) last but not least, buy new ball screws and nuts.
I have some time to think about this, I can't tear the mill down until I get the current project out the door so it will be a couple of weeks before I can get to this. And I'll just have to bore any precision holes, the linear positioning for bolt patterns, slotting and profiling is fine and within tolerance due to the inherent backlash comp in my system.
Stay tuned and I'll post the ultimate solution to the problem when I can get to it.
Cutting pressure was minimal, 0.250 end mill, 0.025 finish pass, 0.60 DOC with a spiral lead in, 0.750 mild steel. This is acceptable for this particular part, but I need to cut some bearing pockets for the same project and I'm going to have to bore those because those have to be right.

It has always interpolated circles about 0.001 out of round but this time it's really bad, about 0.008 out of round. So time to do some checking.
I noted about 0.010 backlash in the X axis so I'm starting there. First time I have noted any backlash in the X axis, the Y axis has had known 0.004 backlash for some time, but the computer was compensating for that, pretty much.
First check the end play in the lead screw. Put an indicator on the end of the ball screw to check the end play.

With the table locked, I was able to get a max of 0.005 end play. But this was by putting much more load on the ball screw than would ever be on it in normal operation. I noted about 0.0003 end play with the table unlocked.
I set up my little USB camera (the small indicator base in the picture above) so I could watch the DRO and the dial indicator at the same time. I have a camera function built into the CNC program. Here is a screen shot.

The bearing on the left side is just a support bearing and floats in the housing. The thrust bearing, back to back angular contact bearings, is on the right end of the table.

The nut in the center of the handwheel sets the preload on the thrust bearing, I tightened it a bit and got the loaded backlash down to about 0.004, better but not good enough. So tomorrow I'll go into the housing and see what I can do about setting the preload. I'm guessing a shim behind the bearing set will do it.

I put an indicator on the case to look at the loaded deflection and at max load it was only about 0.001 about 8 inches from the bearing, so that is acceptable.

But, removing the endplay in the ball screw is not going to solve the whole problem. There is still about 0.010 backlash in the ball screw. As it turns out the ball screws are single nut (I think, not totally sure) so not adjustable for wear, so I have a few choices. 1) install larger balls and hand fit the preload, you can buy balls in 0.0001 increments, 2) add a second nut, which I may do in any case, 3) sent the ball screws out for rebuild, and 4) last but not least, buy new ball screws and nuts.
I have some time to think about this, I can't tear the mill down until I get the current project out the door so it will be a couple of weeks before I can get to this. And I'll just have to bore any precision holes, the linear positioning for bolt patterns, slotting and profiling is fine and within tolerance due to the inherent backlash comp in my system.
Stay tuned and I'll post the ultimate solution to the problem when I can get to it.

