Adventures in my new-to-me Enco Lathe

An overdue update for everyone. In good news, the lathe and mechanics are now all running more or less. There's a few minor things to resolve before it can be run for long periods.

First up is the pulley on the lathe. Very tight fit and had to mallet it on to the shaft. Already tested out the low RPMs and measured very close to expected. I also had to make a modification to the motor capacitor cover to fit in the motor mount. Of course they didn't provide dimensions for this motor and it didn't fit.
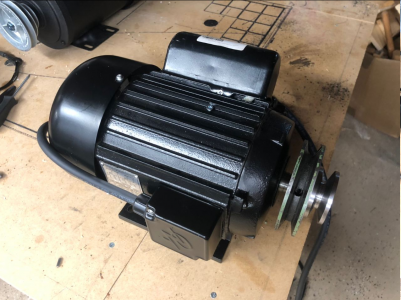
1600719403533.png

1600719420785.png
I ordered an additional length of belt to have a different length for the other pulley combination. Figured that was the easiest way to get me the speeds easily.


The back gear is in, and the first part on the lathe is the spacer I needed for the backgear I bought. This gear was for a Jet lathe and has the right teeth profile, but the size and spacing is just a little bit off. You can see the gap in the first photo where the gear would shift.
1600719523535.png
Here's the spacer in place.
1600719585584.png
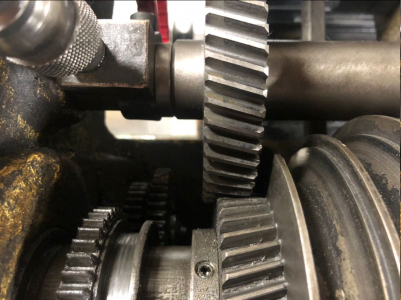
You can also see the sacrifice I've had to make in teeth engagement. It makes me pretty worried but I think it will work as expected.

1600719671934.png
Hard to tell, but it's biased such that more of the small gear makes contact.

I'm trying to decide if I red grease the back gear teeth or just some white lithium spray.

The next thing I'm tackling is ball oilers and grease fittings. The back gear was missing a zerk fitting, As you can seen in my other picture they had just thrown a set screw in when they ruined the last back gear. I ordered a few ball oilers from McMaster and 10 from Grizzly since they were so much cheaper.

The wiring was a bit annoying to figure out, but it's running and in a good state. I should have checked more closely on the contactor I had, who knew a solenoid running at 4x the power wouldn't last very long?
1600720082986.png
No big loss as that contactor was already a bit questionable, and upgrading to some automation direct ones was only ~$23/ea. Now I have a contactor set actually rated for 240v.
1600720301495.pngI think only other thing to do on the wiring is replace the light with a working one that runs off the right voltage. I'm tempted to add an estop button but I think that will have to wait for a new electrical cabinet.

I'm pretty excited it's all running. The gearbox sounds very metal on metal so I'm avoiding running that until I can do a teardown and rebuild of it. The other big thing is that the whole thing shakes quite a bit. There's not much weight in the base and I think that's most of it, but I'm thinking I should also look into some ground supports or something

I set up my collet draw bar for cleaning and got it nice and polished up:
1600720404766.png
1600720422875.png

I could use some advice on how to use the draw bar items in the front of the face plate.
1600720487056.png

Thanks for checking in.
 
An overdue update for everyone. In good news, the lathe and mechanics are now all running more or less. There's a few minor things to resolve before it can be run for long periods.

First up is the pulley on the lathe. Very tight fit and had to mallet it on to the shaft. Already tested out the low RPMs and measured very close to expected. I also had to make a modification to the motor capacitor cover to fit in the motor mount. Of course they didn't provide dimensions for this motor and it didn't fit.
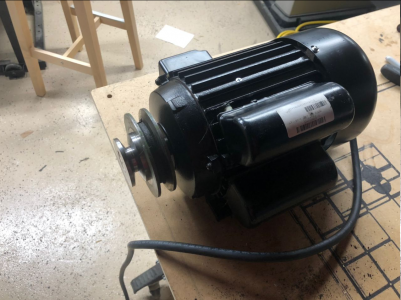
View attachment 337833

View attachment 337834
I ordered an additional length of belt to have a different length for the other pulley combination. Figured that was the easiest way to get me the speeds easily.


The back gear is in, and the first part on the lathe is the spacer I needed for the backgear I bought. This gear was for a Jet lathe and has the right teeth profile, but the size and spacing is just a little bit off. You can see the gap in the first photo where the gear would shift.
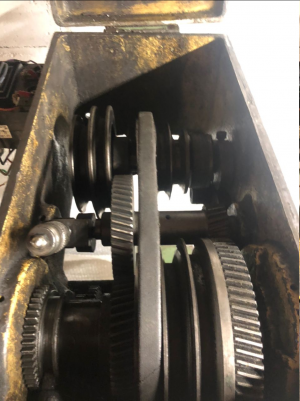
View attachment 337835
Here's the spacer in place.
View attachment 337836
You can also see the sacrifice I've had to make in teeth engagement. It makes me pretty worried but I think it will work as expected.
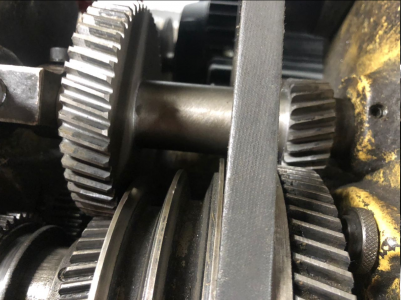
View attachment 337837
Hard to tell, but it's biased such that more of the small gear makes contact.

I'm trying to decide if I red grease the back gear teeth or just some white lithium spray.

The next thing I'm tackling is ball oilers and grease fittings. The back gear was missing a zerk fitting, As you can seen in my other picture they had just thrown a set screw in when they ruined the last back gear. I ordered a few ball oilers from McMaster and 10 from Grizzly since they were so much cheaper.

The wiring was a bit annoying to figure out, but it's running and in a good state. I should have checked more closely on the contactor I had, who knew a solenoid running at 4x the power wouldn't last very long?
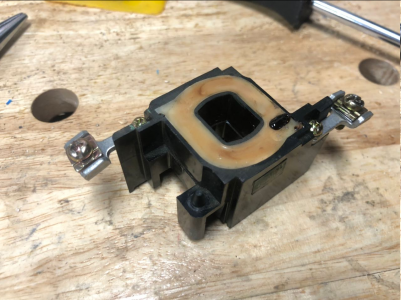
View attachment 337838
No big loss as that contactor was already a bit questionable, and upgrading to some automation direct ones was only ~$23/ea. Now I have a contactor set actually rated for 240v.
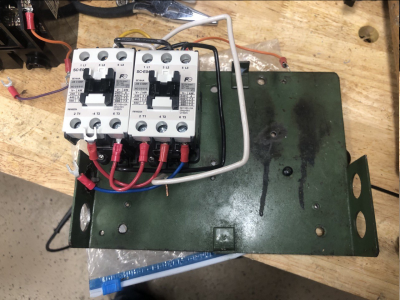
View attachment 337839I think only other thing to do on the wiring is replace the light with a working one that runs off the right voltage. I'm tempted to add an estop button but I think that will have to wait for a new electrical cabinet.

I'm pretty excited it's all running. The gearbox sounds very metal on metal so I'm avoiding running that until I can do a teardown and rebuild of it. The other big thing is that the whole thing shakes quite a bit. There's not much weight in the base and I think that's most of it, but I'm thinking I should also look into some ground supports or something

I set up my collet draw bar for cleaning and got it nice and polished up:
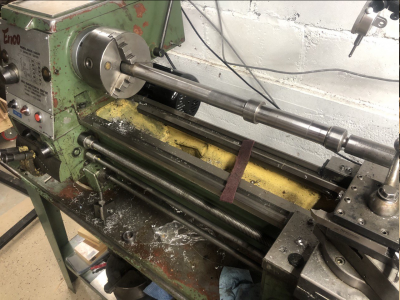
View attachment 337840
View attachment 337841

I could use some advice on how to use the draw bar items in the front of the face plate.
View attachment 337842

Thanks for checking in.
On the back gear spacing:
On my lathe which is a United Machinery, and as far as I can tell it is identical in every way to yours. If so, I'll be referencing the outboard bushing that support the backgear shaft. On mine all that secures it in the headstock is a set screw. So while it will leave a "dish" that will be visible on the outside of your headstock, you should be able to slide said bushing inward to take the unwanted spacing out and lock it down with set screws. Mine doesn't even have dimples to locate the set screws so it shouldn't matter either way. If you need any measurements, pictures or new slurs to hurl at it, just let me know. It's like I told my wife when she asked why I had worked/still piddlin with mine so much, these types can be a PITR but it ain't a pill or a pipe and I ain't running up and down the road all night flirting with women and danger. We gotta have something to do:)
 
" The other big thing is that the whole thing shakes quite a bit."
That's a sign that something is out of balance. Generally not good for bearings. It could be caused by a bad bearing also. You can use a mechanic's stethoscope &/or an infrared thermometer to check individual bearings while they run.
 
Rather than changing belts/pulleys, has anyone thought about wiring in a VFD and then just leave the pulleys on the highest speed setting and using the VFD for speed changes?
 
So while it will leave a "dish" that will be visible on the outside of your headstock, you should be able to slide said bushing inward to take the unwanted spacing out and lock it down with set screws.
Yeah i tried that. Because I had to slide it so far in it wasn't really working on for the spacing. The spacer "works" but I've been thinking more and more about splitting my new gear and joining the old one with the new one. Though I'm not sure it's really "necessary" if I go ahead with a VFD.

Definitely a good way to kill time, and money :) Thankfully this last year's been good for me so I'm feeling pretty comfortable these days

" The other big thing is that the whole thing shakes quite a bit."
That's a sign that something is out of balance. Generally not good for bearings. It could be caused by a bad bearing also. You can use a mechanic's stethoscope &/or an infrared thermometer to check individual bearings while they run.
Good advice. I think there's a bad bearing in the headstock unfortunately. But I'll pick up a mechanics stethoscope so I can suss it out.

Rather than changing belts/pulleys, has anyone thought about wiring in a VFD and then just leave the pulleys on the highest speed setting and using the VFD for speed changes?
It's on my to-do list. I especially love how quiet it is when it's in belt mode, so avoiding using the backgear is worth the investment in a VFD. Initially I just wanted to get it running, but after cutting some steel the other day I really can't stand the noise from the backgear

Just decided I'd try this ATO: https://www.amazon.com/gp/product/B089PWJ3MG?psc=1 wish me luck


Next up on my hitlist is rebuilding the X axis slide. It has a ton of backlash in it and I think it's causing some issues with cutting. At least i hope that's what happened because otherwise I have some issues on the ways.

I did get my phase 2 tool post installed. The stock clocking one was cool but couldn't adjust height at all.

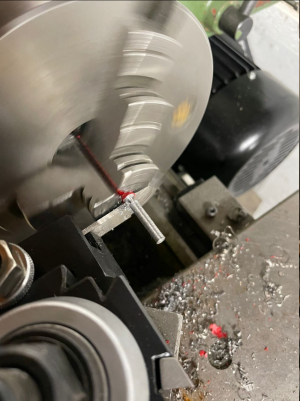
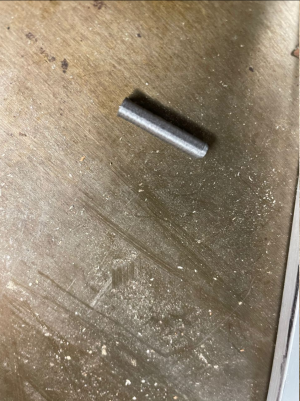
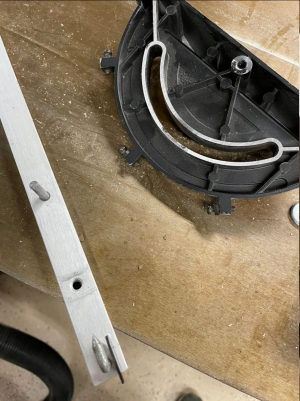
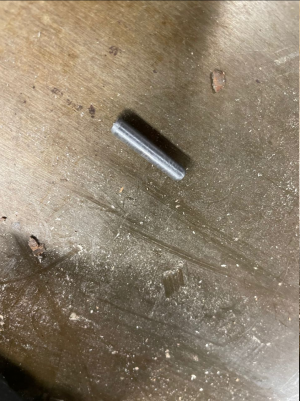
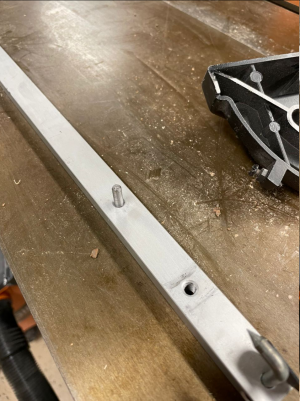
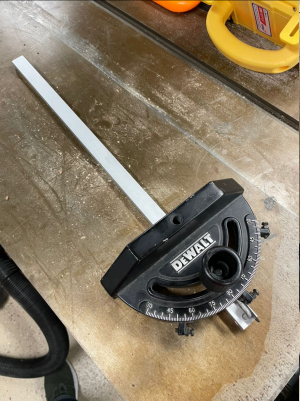
Anyways here's the dowel pin I turned down to fix the one that broke in my miter gauge. I tried turning one in 303 stainless and I forgot how much I hated machining stainless. Unable to part it off. Steel is fine though...

Parting it off. Using some steel I cut from drink holders you stake in the ground hence the red coating.
1609524292147.png
Parted off. Lots of chatter.
1609524313031.png
Test fit before face and chamfer. Aligns well and enough interference for the press.
1609524321432.png

Hit it with some 240grit sandpaper to try and improve the surface finish. It's acceptable.
1609524644345.png

All pressed in:
1609524707849.png
"Fixed" Not quite a perfect fit but good enough.
1609524720808.png

Will update on how the X axis rebuild goes.
 
An overdue update for everyone. In good news, the lathe and mechanics are now all running more or less. There's a few minor things to resolve before it can be run for long periods.

First up is the pulley on the lathe. Very tight fit and had to mallet it on to the shaft. Already tested out the low RPMs and measured very close to expected. I also had to make a modification to the motor capacitor cover to fit in the motor mount. Of course they didn't provide dimensions for this motor and it didn't fit.
View attachment 337833

View attachment 337834
I ordered an additional length of belt to have a different length for the other pulley combination. Figured that was the easiest way to get me the speeds easily.


The back gear is in, and the first part on the lathe is the spacer I needed for the backgear I bought. This gear was for a Jet lathe and has the right teeth profile, but the size and spacing is just a little bit off. You can see the gap in the first photo where the gear would shift.
View attachment 337835
Here's the spacer in place.
View attachment 337836
You can also see the sacrifice I've had to make in teeth engagement. It makes me pretty worried but I think it will work as expected.

View attachment 337837
Hard to tell, but it's biased such that more of the small gear makes contact.

I'm trying to decide if I red grease the back gear teeth or just some white lithium spray.

The next thing I'm tackling is ball oilers and grease fittings. The back gear was missing a zerk fitting, As you can seen in my other picture they had just thrown a set screw in when they ruined the last back gear. I ordered a few ball oilers from McMaster and 10 from Grizzly since they were so much cheaper.

The wiring was a bit annoying to figure out, but it's running and in a good state. I should have checked more closely on the contactor I had, who knew a solenoid running at 4x the power wouldn't last very long?
View attachment 337838
No big loss as that contactor was already a bit questionable, and upgrading to some automation direct ones was only ~$23/ea. Now I have a contactor set actually rated for 240v.
View attachment 337839I think only other thing to do on the wiring is replace the light with a working one that runs off the right voltage. I'm tempted to add an estop button but I think that will have to wait for a new electrical cabinet.

I'm pretty excited it's all running. The gearbox sounds very metal on metal so I'm avoiding running that until I can do a teardown and rebuild of it. The other big thing is that the whole thing shakes quite a bit. There's not much weight in the base and I think that's most of it, but I'm thinking I should also look into some ground supports or something

I set up my collet draw bar for cleaning and got it nice and polished up:
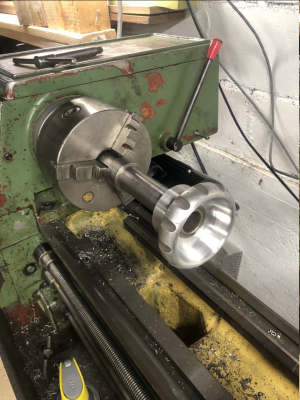
View attachment 337840
View attachment 337841

I could use some advice on how to use the draw bar items in the front of the face plate.
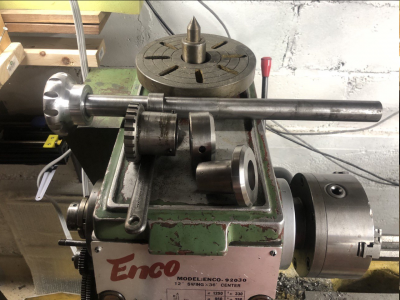
View attachment 337842

Thanks for checking in.
I know this is an older post, But as far as clearance issues with the capacitors not having clearance, They can be remotely mounted. The older Jet 12x36 machines had them mounted on the back of the lathe body casting because that is pretty tight where they have the motor.
 
Back
Top