80mm long focal length refractor

savarin

Active User
H-M Supporter Gold Member
Joined
Aug 22, 2012
Messages
4,260
I came into possession of a matched pair of Jaeger 83mm dia lens of f15 focal length.
Although a focal length this long is somewhat against current practice I thought it might make a good project.
As this project is a long one I thought rather than just put the odd bit in the “what did you do in your shop today” I would do a complete build blog in case it might be of interest to others.

I started by making a 3d model with the full light cone to give me all the dimensions and hopefully how I could fit it all together.
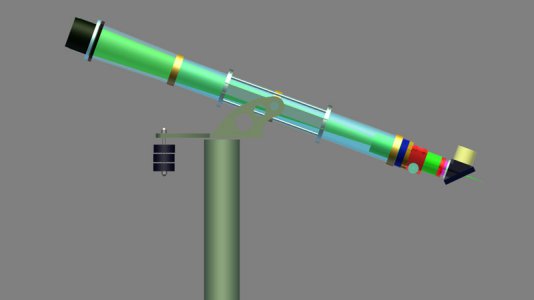
scope2.jpg
Most amateur telescope makers start with the scope then go on to the mount.
I wanted to check out a few things so opted to start with the mount first.
So a quick render of how I wanted the feet.
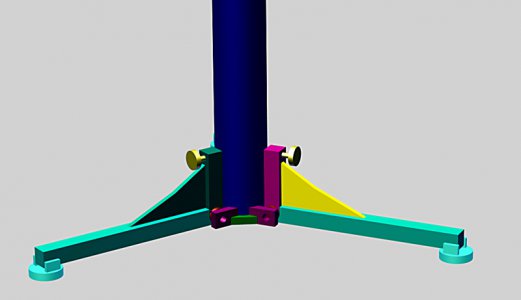
feet.jpg
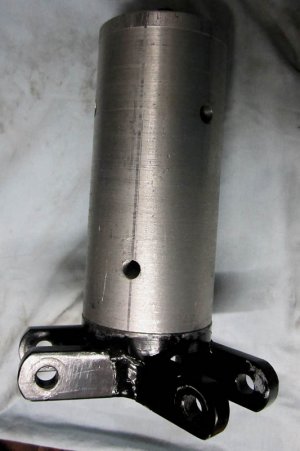
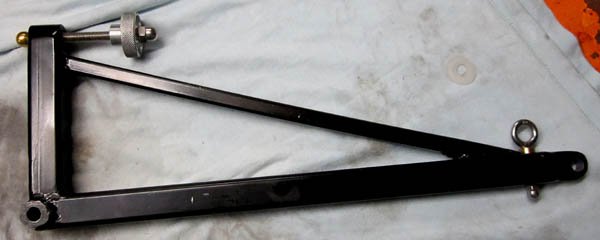
And the following welded structure came about times 3
foot1.jpg
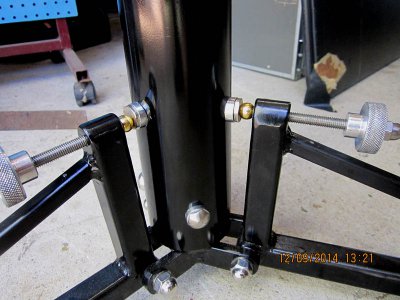
Todays job was drilling and tapping the end for the eye bolt.
The screw and knurled knob is to angle the leg downwards to adjust the central pier to sit perfectly vertical.

scope2.jpg feet.jpg foot1.jpg
 
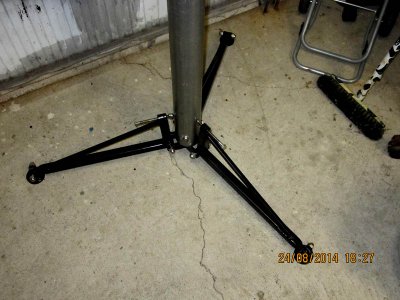
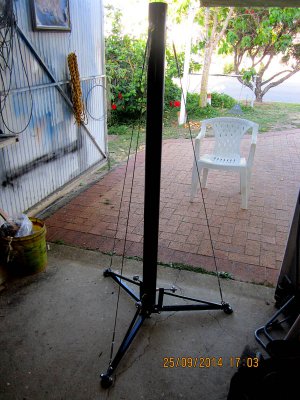
As conventional tripods have to be massive and heavy to stop flex and twist I went down a different route with a tall central pier with wide feet and using guy wires to tension the feet. I felt this would produce a solid base and such seems to be the case so far
base.jpg
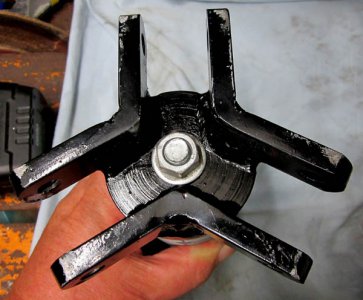
The base is 3 angles from 25x10mm steel welded onto a 12mm thick steel disk turned to fit inside the central pier.
I cast and turned a chunk of aluminium to fit inside the pier as well. This is bolted to the base with a 14mm long bolt to provide a solid unit.plug.jpg
The three feet pivot in these.
and these pads pivot on the ends of the feet.
foot pad1.jpg

feet2.jpg
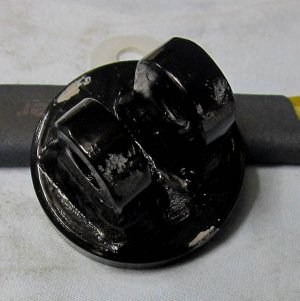
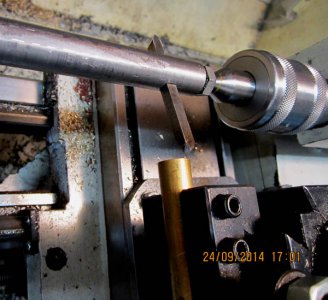
After I built the ball turner I made the brass ones for the adjusters, hollowed the bolt heads and rounded the other heads off.
feet.jpg

base.jpg plug.jpg foot pad1.jpg feet2.jpg feet.jpg
 
The contoured aluminium spacers I made the same way as these brass ones.
flycutter.jpg
The bit is set at the radius of the outer tube dia. Drilled, flycut then parted off, repeat again.

flycutter.jpg
 
Nice work Charles,
Looks good. Does tensioning the guy wires happen after you have levelled the column/feet?
Will the guy wires run to the eye bolts on the ends of the feet?

cheers Phil
 
Nice work Charles,
Looks good. Does tensioning the guy wires happen after you have levelled the column/feet?
Will the guy wires run to the eye bolts on the ends of the feet?

cheers Phil
Thanks Phil,
as to tensioning order I am not sure what will be best, probably level then tension. They only need just over finger tight to work. I feel a knurled ring about 25mm dia fitted over the middle of the bottle screw will aid in this. (and maybe look cool)
I only finished installing the wires and eye bolts yesterday.
I would like to take this opportunity to thank Rob Herd from http://www.steel-fittings.com/miami_stainless/index.htm for all the help and patience in making up the wires and tensioners. Nothing was too much trouble. No affiliation to the company just a very satisfied customer.

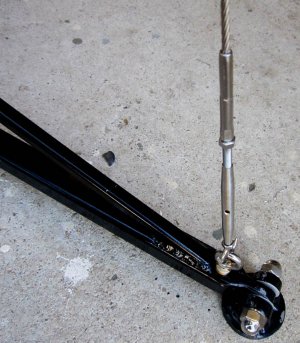
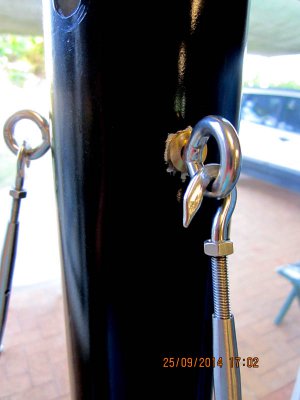
I used hooks at both ends for ease at night with no tiny clips or parts to lose in the dark.

At the bottom

bottom guys.jpg

and at the top

top guys.jpg

Those little brass washers are the ones I was contouring above.
The black paint is only a quick spray to stop rust. All the black parts will eventually be powder coated.
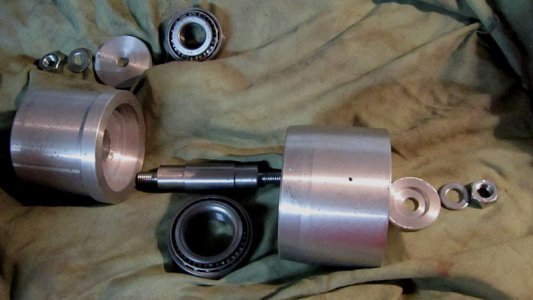
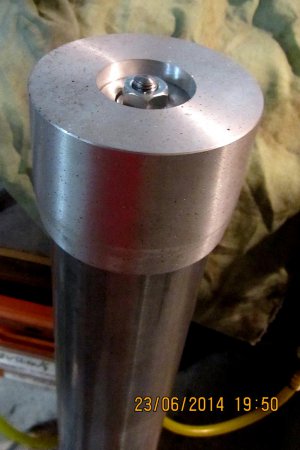
The azimuth bearing at the top is a casting turned to fit a set of taper trailer bearings

az-bearing-bits.jpg

az-on-the-post.jpg

A flat plate will be bolted to this with the altitude bearings on it.
I will replace the nuts with nylocs once Ive finished playing around.
The eagle eyed amongst you will notice the porosity in the castings.
I will be making this unit again with some "wheelium" and degassing tablets in the hope of getting a solid cast that can be polished.
I also screwed up the alignment of the three fixing bolts. All three are out just a tad so they dont lay flat on the contoured aluminium washer. (no photo)
Still, there is room to re-drill and tap them again.

bottom guys.jpg top guys.jpg az-bearing-bits.jpg az-on-the-post.jpg
 
Charles,
Do you think the tension on the guy wires will upset the levelling?

Aside, on my recent handle castings I melted a fair amount of ally, and because it was a larger amount in the pot I doubled the amount of dry chlorine degas i usually use. It has given me a much better finished product. I did notice the "out of the mold surface" was a lot grayer and more textured than I have got in the past but I am thinking now I have just not been using enough to degas properly.
But if I melt half the qty of ally and use half the qty of CL then it doesnt degas properly? So maybe I need a specific volume of CL to get the required reaction?

Cheers Phil
 
Charles,
Do you think the tension on the guy wires will upset the levelling?
Probably but the adjusting knobs on the feet have plenty of leverage to add more tension.

Aside, on my recent handle castings I melted a fair amount of ally, and because it was a larger amount in the pot I doubled the amount of dry chlorine degas i usually use. It has given me a much better finished product. I did notice the "out of the mold surface" was a lot grayer and more textured than I have got in the past but I am thinking now I have just not been using enough to degas properly.
But if I melt half the qty of ally and use half the qty of CL then it doesnt degas properly? So maybe I need a specific volume of CL to get the required reaction?

Cheers Phil
what type of chlorine do you use for degassing?
 
Just dry chlorinator granules for pool use

Cheers Phil
 
Good day today.
Picked up the aluminium plate and the aluminium tube for the scope body.
Also re-drilled and tapped the three holes in the azimuth casting that I had buggered up before.
Now they are on the diameter and bolt up flat.
How? with a highly precise mark one eyecrometer.
 
Back
Top