2019 POTD Thread Archive

The shop won't balance the rotating assembly? They should be happy to take your money to do that. A racing balance job from harmonic damper to clutch diaphragm, including crank, pistons, rods, wrist pins is standard fare. Even multi-diaphragm clutch packs can have the tabs indexed with a punch or paint to facilitate disassembly and reassembly after balancing. Of course, if you're shifting below 3K it's a non-issue. Like, not at all.
 
We are talking about a Ford flathead that will never be turning 6K, more like 3.5K tops. The flywheel has been resurfaced and balanced. The shop says that they don't balance diaphragm pressure plates on the flywheel.

My logic is, if it is a daily driver, or a vehicle that you need to rely on, use only oem parts and keep it as standard as possible no crazy swaps or changes. If it's a weekend toy, race car then anything is acceptable, i don't know much about flathead's but as they old design i presume RPM are low, you should be fine without balancing i've done the same operation with a hand drill and a tap on a diesel and is still running in a car close to 10 years now.
 
Actually the manufacture of the Centerforce pressure plate balances them at the factory. They say to not balance them on the flywheel as that can actually cause them to be unbalanced due to their patented design. They have a system of moving weights that increase the clutch grip force. Anyway its a none issue in my application and the PP is perfectly centered on the flywheel.
 
I made a tap follower out of shop scrap and a spring I found in my Grandfather's little tool box. Now I need to get more taps so I can screw everything up.
That was pretty punny!

Sent from my SM-G970U using Tapatalk
 
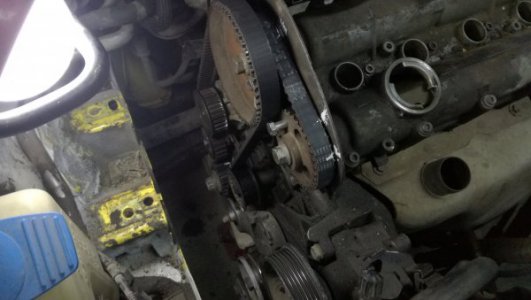
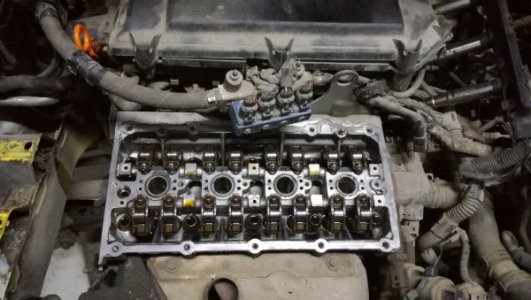
Today i'm back in the big garage up to my elbows in grease. The white Octavia has been in the back of couple of shots because i was waiting its turn to get fixed. This cars has been to 4 mechanic shops in the past two months and and is gotten worse it's started to leak oil and is running like crap. It's big problem is oil in the spark plug holes, and being coil on plug and an 08 is throwing every code it can. All the shops coated valve cover gasket replacement but none of them replaced it, because the valve cover is holding the camshafts. Yea the stupidest design ever having to take apart half the engine to deal with couple of leeks. So all the surrounding parts come off, fan belt timing belt one and two, yea twin cam with a small second belt to run the exhaust cam and after few hours i managed to get the valve cover and camshafts off. Yes this is a VW engine and you are lucky you did not get them in the US.
IMG_20190829_190425.jpgIMG_20190829_195646.jpg
 
Just finished up a " shop aid " . Made a fixture for drilling .030 holes in rubber lugs for our hollow mandrals . They've tried to tape these lugs to the OD of the mandral and try to shove the bladder thru without knocking these lugs out . When one falls out , it's 4 hours to get them back in . Now we can screw into the lugs with a 180 degree channel and they are locked in . The less experienced persons in the shop can now do it in 15 minutes or so .
 
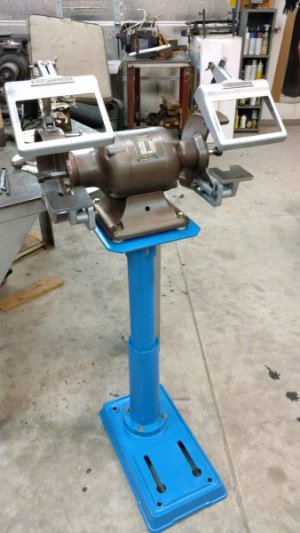
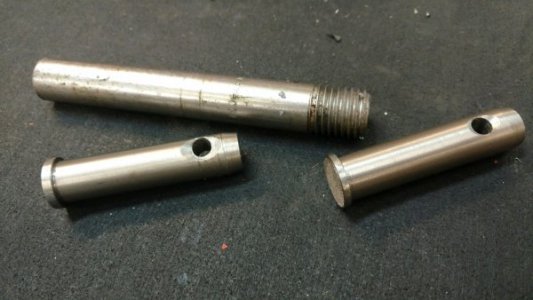
Picked up a couple bench grinders at a couple flea mkts. 1st was a Craftsman with the tool grinding jig, mounted on a stand made from a drillpress. 2nd was a Milwaukee brand, "7 in. stones", with "Skil" labeled safety shields on it. It weighs about 80 lbs, can hardly hear it running from 4 feet away. Basically just cleaned and painted the Milwaukee grinder, replaced all wiring, installed LED lights in the safety shields. I mounted the Milwaukee grinder on the drill press stand, with casters so it's mobile. Couldn't be happier with the grinder, a world of difference from the HF grinder it replacedPic is from before finish. Other pic is a couple tractor 3/4" pins for a mower mount. The factory ones were very short, with the "R" type retaining pins. I made these two pins from a valve handle(top of pic), from the brewery I used to work at before it was closed. So, the old brewery lives on!grinder.jpgtractor pins (1).jpg
 
Back
Top