-
Welcome back Guest! Did you know you can mentor other members here at H-M? If not, please check out our Relaunch of Hobby Machinist Mentoring Program!
- Forums
- THE PROJECTS AREA
- PROJECT OF THE DAY --- WHAT DID YOU DO IN YOUR SHOP TODAY?
- Project of the Day Mega-Thread Archives
You are using an out of date browser. It may not display this or other websites correctly.
You should upgrade or use an alternative browser.
You should upgrade or use an alternative browser.
2019 POTD Thread Archive
- Thread starter GoceKU
- Start date
- Joined
- Nov 23, 2014
- Messages
- 2,634
Quick POTD for my wife. She has a solar-charged LED motion-sensor flood light on the pole barn at her garden entrance. Well, the aiming post for the light broke from the wind(?). Figured aluminum would make a good replacement.
Really like these LED motion-sensor floods. Have them in the storage section of our barn for no-hands lighting
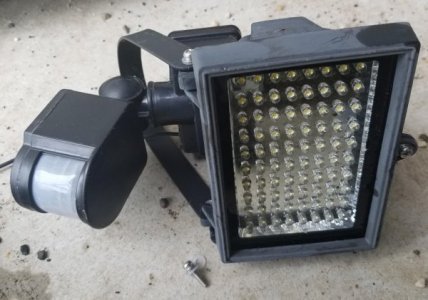
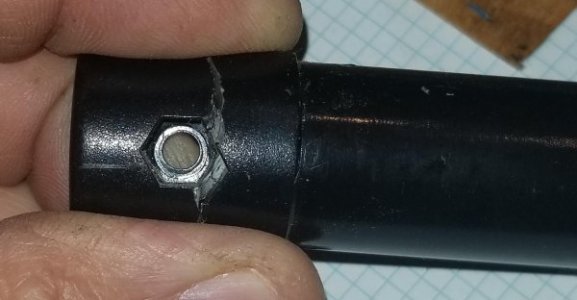
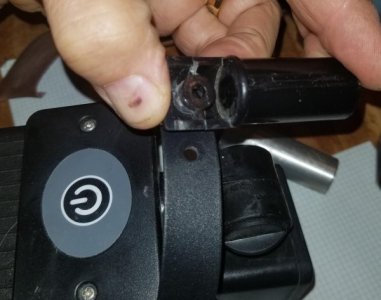
Support/aiming post broke
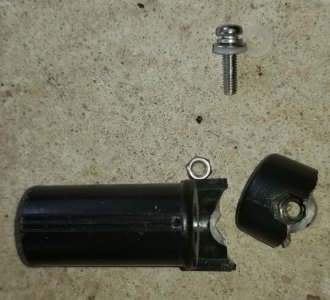
Chunk 'o 1" aluminum for a replacement
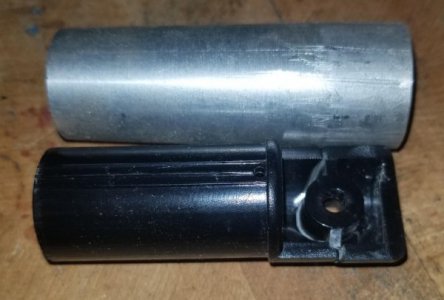
Challenge would be duplicating the ribs which engage a splined mating piece to keep the lamp from rotating.
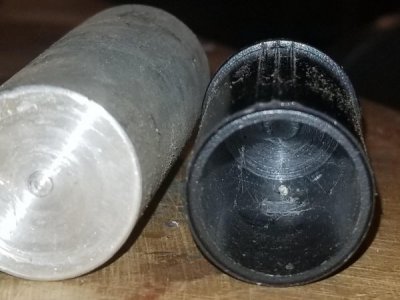
Post has an M4x0.7 nut set inside a hex-hole for attaching to the light bracket
Only challenge was the plastic shaft had three ribs that engage with a mating bracket with grooves to prevent the shaft from turning. I figured the easiest way to replicate that was to do a straight knurl on a couple of areas of the aluminum shaft. The plastic ribs stick up about 0.008", but how much for straight knurling on aluminum? Turned the aluminum blank to a known oversized diameter, mic'd and knurled with a Rockwin hand-knurler. Ended up increasing the diameter by 0.005".
Turned the shaft to final diameter and hand knurled a couple of bands.
Turn to a diameter for development of how much diameter increase would come from knurling
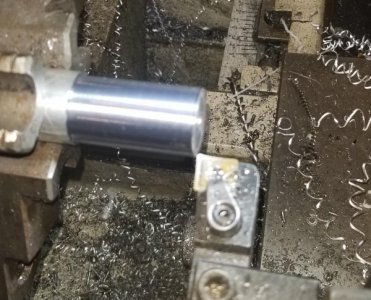
Hand knurled and mic'd the shaft at ~0.005" larger. Not quite the 0.008" of the plastic but "good enough"
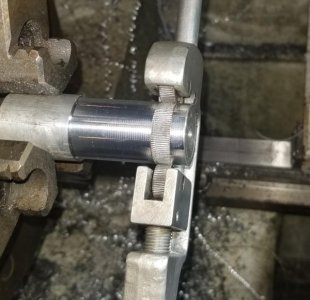
Turn to final diameter and chamfer the end
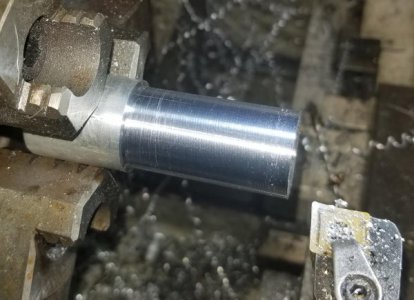
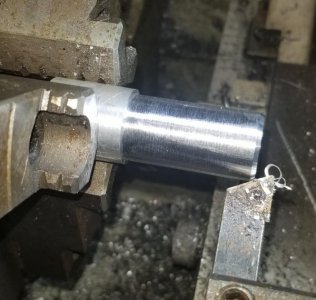
Knurled the shaft in 2 areas
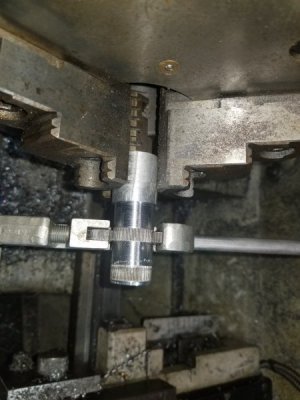
Next step was to mount the piece in a 5-C collet and square collet block and go to the mill. Found the edge of the shaft's shoulder with a laser center finder. Center in Y was easy as my mill vise fixed jaw is always at 0.000". I paint marker the width of my square collet block for easy setting to the center of the work (0.864" in this case). Milled away half of the surface (hole at the end was a leftover from a previous job).
Spot and tap drilled for an M4x0.7 thread. Tapped manually on the mill with a tap wrench with a slip-fit shaft for alignment.
Found the shoulder of the shaft with a laser center/edge finder
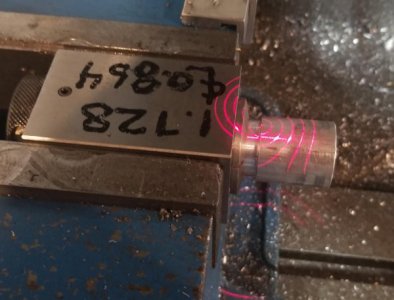
Milled away half of the top of the shaft
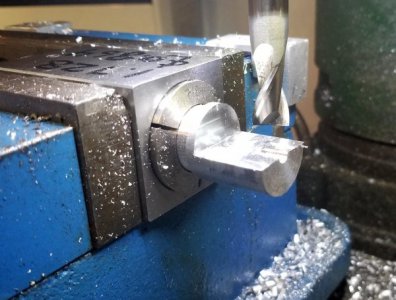
Spot and tap drill the mounting screw hole
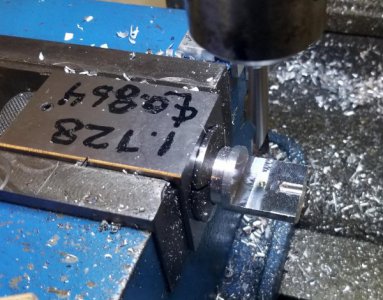
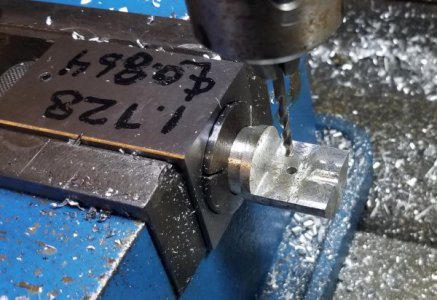
Tapped the M4x0.7
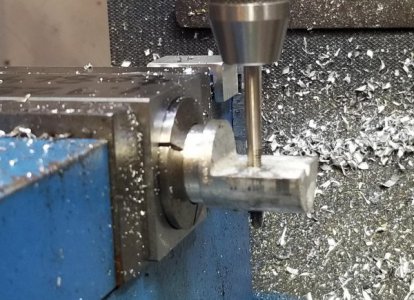
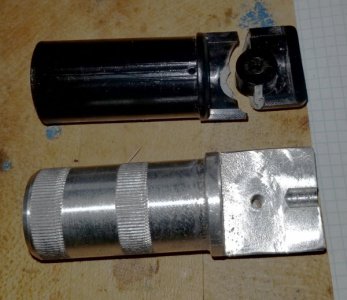
Finished part and original broken shaft
Screwed the replacement shaft to the light and remounted to the wall bracket. Works and my wife is a happy woman again!
Thanks for looking,
Bruce
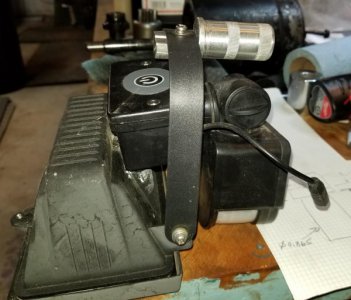
replacement shaft in place
rabbits beware . . .
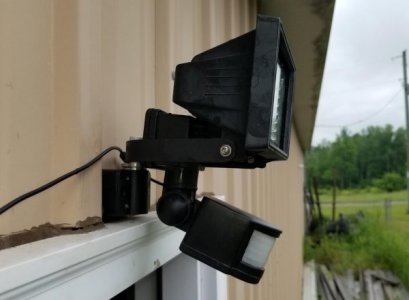
Really like these LED motion-sensor floods. Have them in the storage section of our barn for no-hands lighting

Support/aiming post broke

Chunk 'o 1" aluminum for a replacement

Challenge would be duplicating the ribs which engage a splined mating piece to keep the lamp from rotating.

Post has an M4x0.7 nut set inside a hex-hole for attaching to the light bracket


Only challenge was the plastic shaft had three ribs that engage with a mating bracket with grooves to prevent the shaft from turning. I figured the easiest way to replicate that was to do a straight knurl on a couple of areas of the aluminum shaft. The plastic ribs stick up about 0.008", but how much for straight knurling on aluminum? Turned the aluminum blank to a known oversized diameter, mic'd and knurled with a Rockwin hand-knurler. Ended up increasing the diameter by 0.005".
Turned the shaft to final diameter and hand knurled a couple of bands.
Turn to a diameter for development of how much diameter increase would come from knurling

Hand knurled and mic'd the shaft at ~0.005" larger. Not quite the 0.008" of the plastic but "good enough"

Turn to final diameter and chamfer the end


Knurled the shaft in 2 areas

Next step was to mount the piece in a 5-C collet and square collet block and go to the mill. Found the edge of the shaft's shoulder with a laser center finder. Center in Y was easy as my mill vise fixed jaw is always at 0.000". I paint marker the width of my square collet block for easy setting to the center of the work (0.864" in this case). Milled away half of the surface (hole at the end was a leftover from a previous job).
Spot and tap drilled for an M4x0.7 thread. Tapped manually on the mill with a tap wrench with a slip-fit shaft for alignment.
Found the shoulder of the shaft with a laser center/edge finder

Milled away half of the top of the shaft

Spot and tap drill the mounting screw hole


Tapped the M4x0.7

Finished part and original broken shaft

Screwed the replacement shaft to the light and remounted to the wall bracket. Works and my wife is a happy woman again!
Thanks for looking,
Bruce
replacement shaft in place

rabbits beware . . .

Last edited:
- Joined
- Jul 14, 2017
- Messages
- 2,455
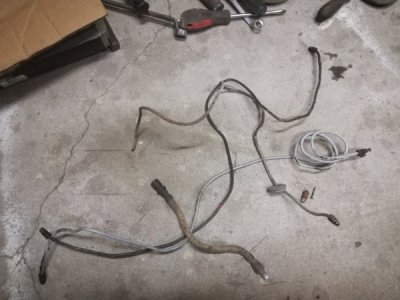
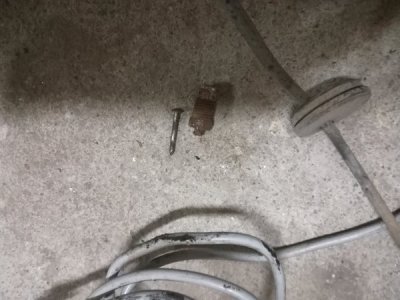
Today supposed to be a hour or two just to replace couple of hard lines, but it turns out to be a full 8 hours of taking apart the entire braking system, started with removing the metal lines from the passenger side, someone had too long of a line so he just left it all kinked, i could not find all new so i bought some and reused some of another car, then i started on braking lose all the bleeders, the little niva has 6 of them because it uses a 3 piston front caliper, this task was really hard, the bleeders are very small and all rusted and stripped, so after i loosen all of them i changed couple of them. After this i called a family member to help with the bleeding, the fronts bleed well but i wasn't getting any fluid from the back ones, so i started to chase the problem replaced one more kinked line and run wire thru the bass T for both wheels and still no fluid. i suspected the rubber line, i had a spare so i changed it, and still no fluid, i know i had fluid in front of the rubber line, but nothing after and the line is new, so i started to look at the metal line and i found a nail in it. A frickin nail, that some mechanic probably used to stop the brake fluid from leaking when doing repair to the rear axle, doing this ment hours on the ground rolling on my injured back, not fun and a bit painfull. The braking system in now bleed but i'm still not getting any braking on the drivers rear, the handbrake works but the cylinder looks like has frozen, that nail may have been inthere for 20 years or more.


- Joined
- Oct 4, 2014
- Messages
- 172
Going to cost you some money to fill all them drawers, have fun.
For the past two years whenever I've used the tail stock I'm reminded that I need to find a quicker way to lock it vs. using the wrench on the nut. I passingly looked at the Kipp style levers etc but didn't think those would've worked due to the clearance.
Just drilled and tapped the nut with an M4 tap. Then found an old Clevis pin, turned it down at the end and threaded it with an M4 die to make the lever, then some blue loctite. It works sooo much better than reaching for the 14mm wrench every time.

Just drilled and tapped the nut with an M4 tap. Then found an old Clevis pin, turned it down at the end and threaded it with an M4 die to make the lever, then some blue loctite. It works sooo much better than reaching for the 14mm wrench every time.

- Joined
- Jul 20, 2012
- Messages
- 1,255
Made an extension for an outdoor faucet that was in an inconvenient place.
Got tired of walking on rocks in bare feet to just turn the water on or off.
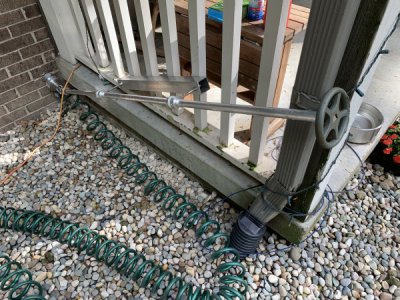
I made an extension to the front of the porch that would allow easy on and off. Needed a substantial heft to it to be sure to allow full shut off. Also did not want to put any force on the actual handle to not damage it.
I went with a love joy stainless steel universal joint, most expensive part at $60 but needed all weather use and no rust.
Was going to make up a new handle using the current one as a pattern but ended up buying a 3.5 inch piece of 3.5 inch round stock and hollowing out one side to go over the current handle held on with 4 1/2-13 stainless set screws. Other end turned to one inch for the U joint side. Work done on my Warner Swasey turret lathe. Built in 1928, still works in all respects.
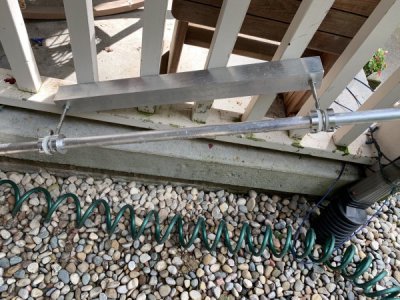
Then a solid one inch aluminum bar to a 5 inch hand wheel I got on eBay. Expanded the square hole on the Bridgeport and it tapped on very tight, likely won’t need a screw and washer to hold it on.
Mount up part made of 2 inch aluminum square. Stainless eye bolts that just fit the one inch shaft. I made those collars and nylon bushings on my Wabeco 10X22 lathe.
It feels very stout and doesn’t put pressure on the faucet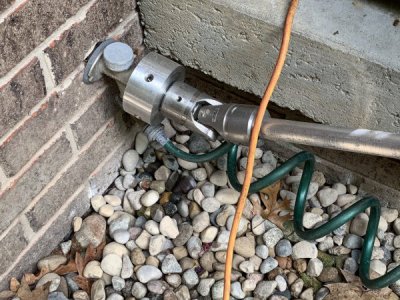


Attachments
- Joined
- Jul 20, 2012
- Messages
- 1,255
Great idea. If it too long of a stroke to lock it you might get shorter stroke replacing the screw with one with a coarser tread. I did same thing. Why reach for a wrench every time when a lever will do.For the past two years whenever I've used the tail stock I'm reminded that I need to find a quicker way to lock it vs. using the wrench on the nut. I passingly looked at the Kipp style levers etc but didn't think those would've worked due to the clearance.
Just drilled and tapped the nut with an M4 tap. Then found an old Clevis pin, turned it down at the end and threaded it with an M4 die to make the lever, then some blue loctite. It works sooo much better than reaching for the 14mm wrench every time.

- Joined
- Jul 14, 2017
- Messages
- 2,455
Made an extension for an outdoor faucet that was in an inconvenient place.
Got tired of walking on rocks in bare feet to just turn the water on or off.
Nicely executed, this looks like something i would done few years ago, nowadays i would just screw in a electric valve from a washing machine and wired in a switch.
Thanks. I like it so much that I want to figure out how to convert my carriage and compound locks to levers vs. using those darned allen keys. I think one of them is an M6 socket head and the other is a 10-32 internal socket head.Great idea. If it too long of a stroke to lock it you might get shorter stroke replacing the screw with one with a coarser tread. I did same thing. Why reach for a wrench every time when a lever will do.


