2019 POTD Thread Archive

Getting caught up on a few Labor Day weekend projects.

POTD was a job for work. I work at the Lansing Delta Township Assembly Plant in Lansing, MI where we build Chevy Traverse and Buick Enclaves. We use a detail to hold the doors open in a fixed position when the cars are painted. The details are removed in the General Assembly plant where the doors are removed for routing to the door line for assembly. The hold-opens go where the check links mount. I didn’t shoot a picture of them, but they have a base that bottoms out on the inside of the door opening, and two fixed hooks that slip over the outside surface of the opening.


Hole in the door metal for the check link. Needed to check the thickness of the metal. The hole is ~1" x 1"; could fit a mic or caliper into the hole.
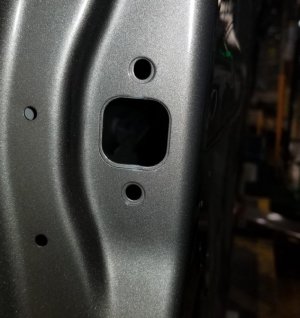
20190830_122345.jpg


Problem was, the hold-opens are sometimes difficult to remove in General Assembly. They weren’t my design . . . The distance between the surface on the inside of the door and the base of the hook is fixed at ~3 mm. If the door metal build up is thick, or the hook is tight to the base, they twist into place really hard.

The hold-opens could easily be checked for the 3 mm spacing with a feeler gauge. We wanted to check the thickness of the door metal also which was a challenge as the opening is only about 1” x 1”. Couldn’t fit a caliper or standard micrometer into the opening.

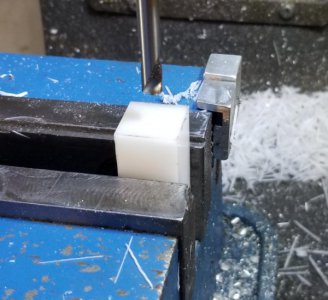
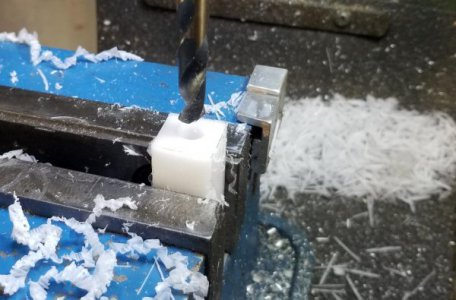
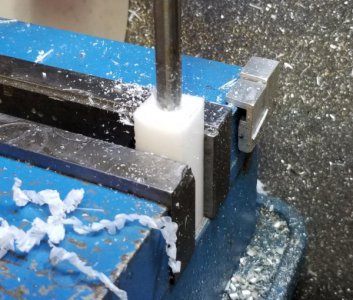
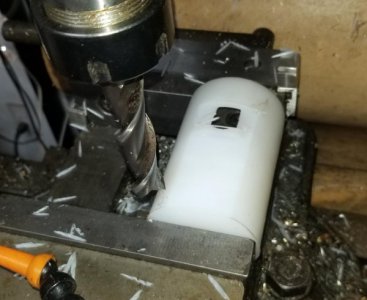
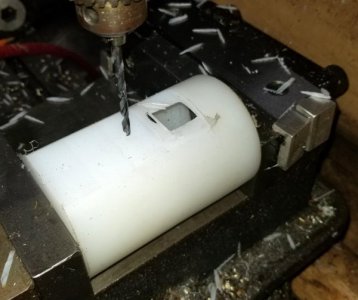
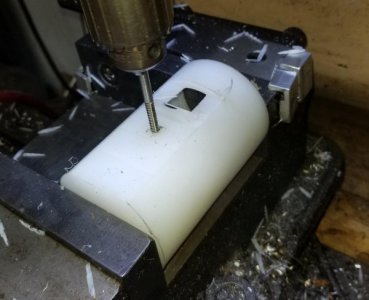
I have a hub micrometer someplace that might have worked, but couldn’t find it. So instead I made a Delrin detail to mount a dial indicator. Started by squaring up the Delrin in the mill. Then spot drilled, clearance drilled and reamed a 3/8” hole for the dial indicator. Drilled/tapped a hole for a set screw to lock the indicator in place. Then milled a relief area.


Squaring the Delrin block
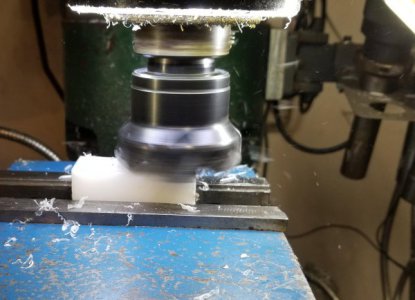
20190831_110505.jpg

Edge finder on the corner to set up the DRO
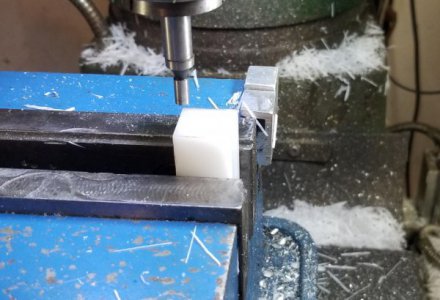
20190831_113353.jpg

Spot drill the indicator hole
20190831_113614.jpg

Undersized hole
20190831_113835.jpg

Over-sized reamer
20190831_114407.jpg

Drilled and tapped a set screw hole to hold the indicator in place
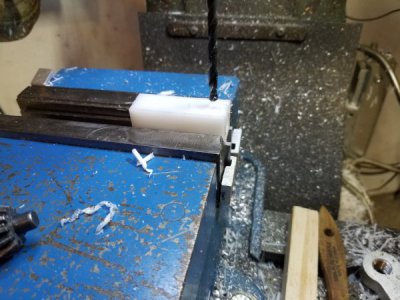
20190831_115153.jpg

Milled a relief in the middle and test fit the indicator
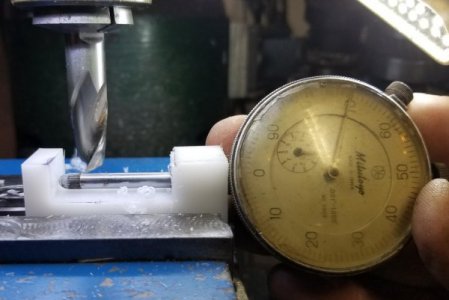
20190831_120524.jpg


In use, we pull back on the top of the indicator probe, slip the Delrin detail into the door hole, pull back on the Delrin so its anvil is on the inside surface, then release the indicator probe and read the dial. I did a late “engineering change” to narrow the end of the block so it could slip better into the corners.


Pull back on the indicator probe, set the anvil into the door opening, pull back on the block to the inside of the door and release the indicator probe to measure the metal thickness.
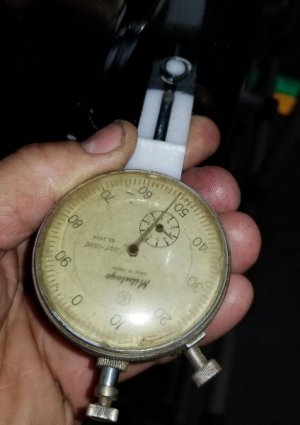
20190903_125347.jpg

Late "engineering change" to clear away the sides of the anvil area so we could measure into the corners.
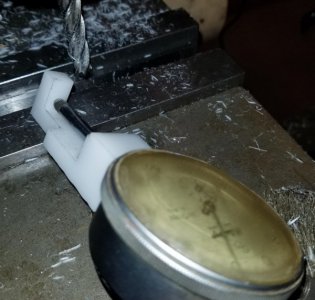
20190903_164909.jpg


Didn’t take too many checks to see we have variation in the thickness of the door metal build up contributing to the concern. Doesn’t affect the customer as the check link is bolted in place and pulls the metal together, but gonna lead to some more work on the hold-opens. Yeah, I would have gone with a spring-loaded detail so the dimension between the hook and the plate on the hold-opens wasn’t so critical. Guess we’ll have to look at doing it a second time to get it right.


Thanks for looking, Bruce
 

Attachments

  • 20190831_120440.jpg
    20190831_120440.jpg
    51.1 KB · Views: 11
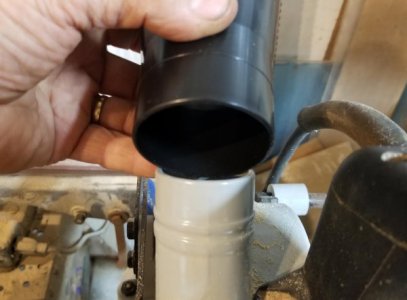
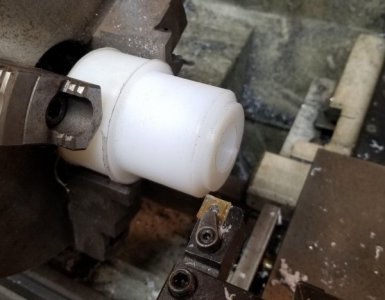
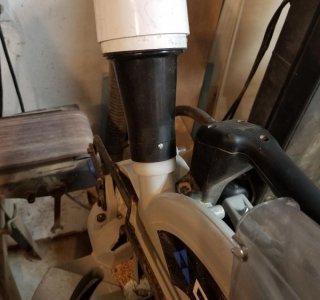
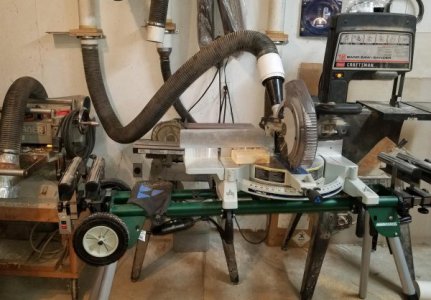
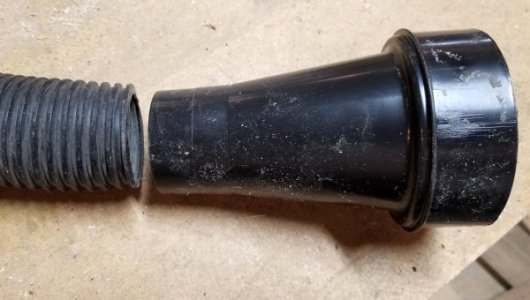
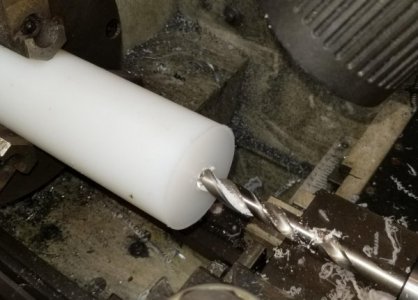
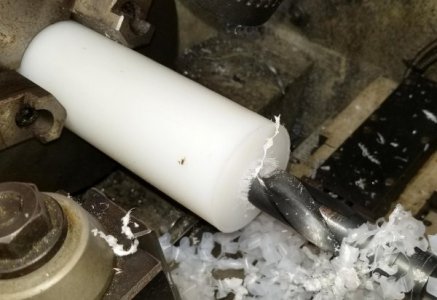
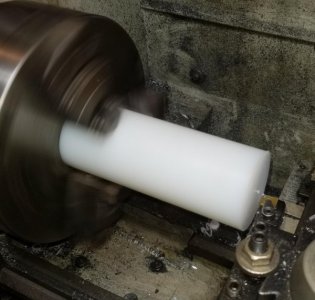
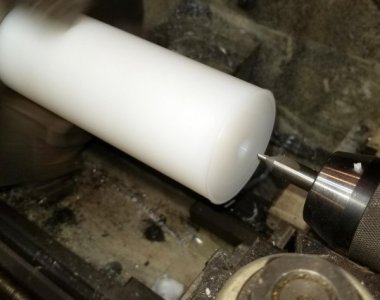
POTD was making a bushing to hook my Delta 12” miter saw to the shop’s dust collection system. The flex hoses are 4” diameter; used a 4” to 2 ½” reducer which got me close, but no cigar. I chucked up a piece of Delrin and turned the bushing to OD and ID to slip into the reducer and over the saw’s dust port.


Needed to make a bushing to hook the black reducer to the Delta's dust port
20190830_143740.jpg

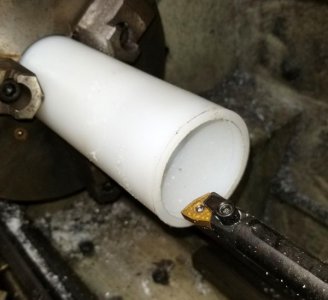
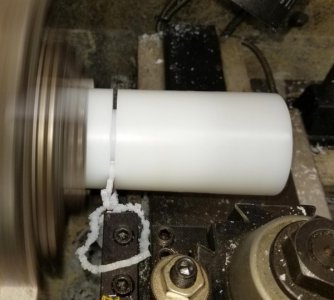
Turned a Delrin round to the ID of the reducer and faced
20190830_141645.jpg

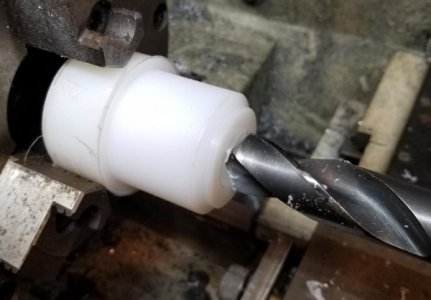
Drilled a clearance hole in prep for boring the ID
20190830_141901.jpg

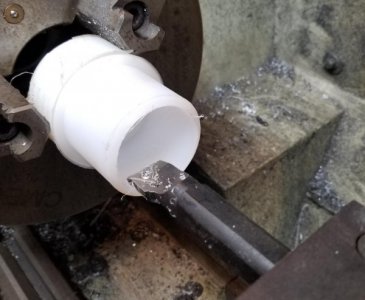
Boring to the ID to the OD of the Delta miter saw
20190830_143659.jpg

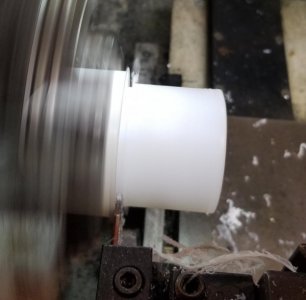
Parting
20190830_144647.jpg

Screwed the bushing to the reducer.
20190830_151013.jpg

Ready to cut trim.
20190830_163108.jpg


Thanks for looking, Bruce
 
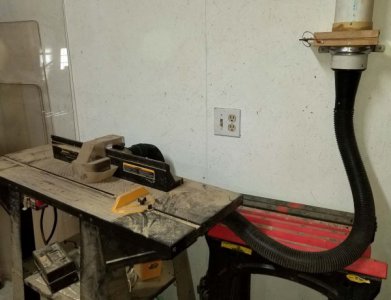
POTD was more dust collector hook up. I have a Craftsman router table with a Freud 3 ¼ HP router attached. A 3” raised panel bit can generate a lot of shavings in a hurry, so time to hook up the dust collector.


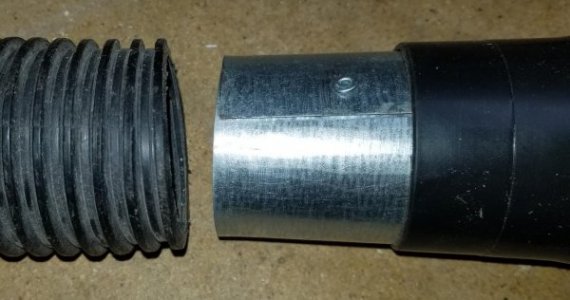
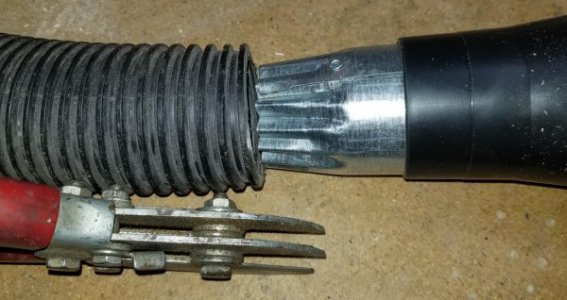
Needed to attached the shop vac hose on the left to the reducer on the right
20190830_151812.jpg


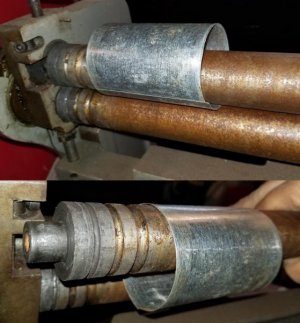
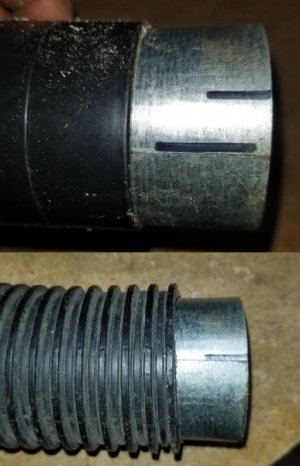
The router table has a shop vac port; started with an old shop vac hose from the router table. I needed to adapt the end of the hose to the 2 ½” end of a 4” to 2 ½” reducer. Cut a piece of 26-gauge galvanized and made a tube on my slip roll. Slipped the sheet metal tube into the hose and reducer and marked the circumferences which were unfortunately different.


Sheet metal tube on the slip roll. The upper roller can slide out for slipping a tube off the roller without having to pull it open
20190830_152811.jpg

Slipped the sheet metal tube into the reducer and hose and marked the circumferences
20190830_153124.jpg

Pop riveted the tube to the reducer's diameter and riveted it in place
20190830_154539.jpg

Used a Malco crimping tool to reduce the OD on the vac hose end for an easy slip onto the hose
20190830_154811.jpg

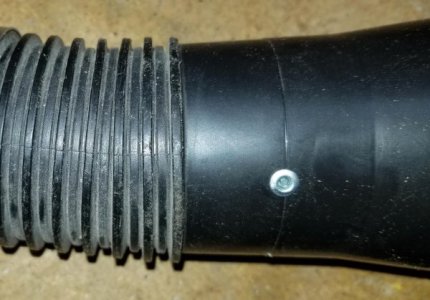
Slipped the hose over the tube and pop riveted it in place
20190830_155538.jpg

I pop riveted the tube together (too small to fit over my spot welder tongs) and pop riveted it to the reducer. Then used a Malco crimping tool to reduce the hose end for slipping onto the hose. Worked the hose into place and drilled/pop riveted it in place also. Should help quite a bit from throwing shavings all over the shop floor.


Haven't run anything through the router yet, but should help keep shavings off the shop floor
20190830_162019.jpg


Thanks for looking, Bruce
 
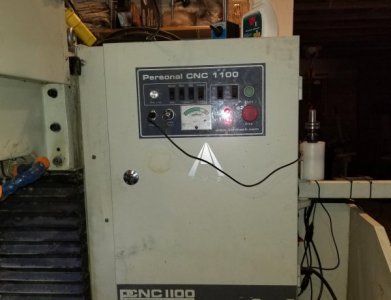
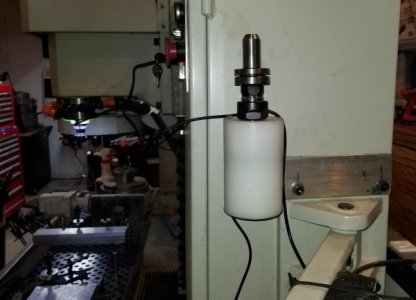
POTD was making a holder for the probe on my Tormach 1100 mill. There’s a seller on eBay who offers an aluminum holder that mounts on the LH side of the mill’s control box. Looks to be a pretty nice design; slips over a couple of screw heads and has a sliding “umbrella” detail to cover the probe. They list it for $75, so not too bad of a price, but I went the shop-made route.

Instead of mounting the probe holder on the LH side of the control box, I went with a holster on the RH side. Advantage is it’s on the hinged end of the controller door so I don’t have to unplug the probe when opening the controller’s door. It’s also out of the way of spraying coolant.

Started with a 2 ½” diameter piece of Delrin. Faced, drilled clearance holes and started boring away. Once to size, went to the mill to put a flat on the Delrin for screwing to a piece of aluminum bar stock. Drilled/tapped holes for the aluminum mount and cut a slot in the Delrin tube for the hook-up cable.

Facing the Delrin block. Yes, I know, lots of material hanging out of the chuck jaws . . .
20190902_162946.jpg

Center drill
20190902_163021.jpg

Clearance drill
20190902_163239.jpg

More clearance drilling. The final holster piece has a small through hole to comfortably clear the probe tip and allow any coolant to drain. Have steps inside for the base of the probe body to rest on.
20190902_163456.jpg

Boring the various steps
20190902_170441.jpg

Parting off the holster
20190902_171055.jpg


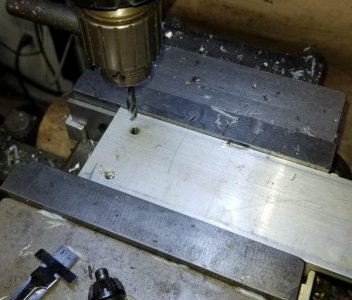
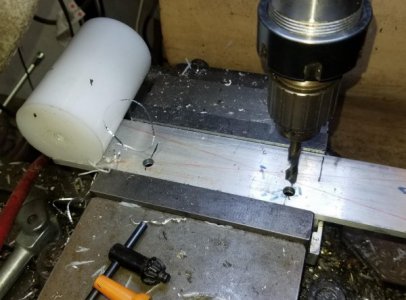
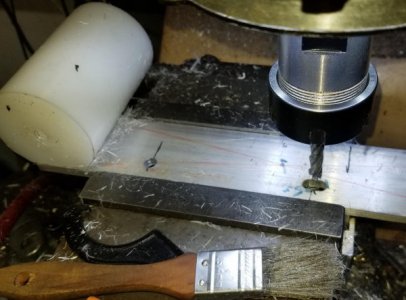
Aluminum bar stock was drilled for 10-24 mounting screws to the Delrin detail and 5/16” holes to pick up the existing swing-arm holes on the control box.


Milled a flat on the surface for screwing the holster to an aluminum plate. So what's the hole near the top? Well, marked the depth of the holster with a Sharpie with the intent of milling the flat BELOW the line. But, took a break for lunch and came back to the shop and started milling on the WRONG side of the line . . . Fortunately, the holster needed a vertical slot for the probe's wire harness to pass through . . . My dad used to say, the sign of a good machinist is how well they can hide their screw-ups
20190902_185431.jpg

Tap drilling the mounting bracket holes
20190902_185924.jpg

Power tapping 10-24 holes on the Bridgeport
20190902_190055.jpg

Drilling clearance holes in the aluminum bracket
20190902_191436.jpg

Drilling 5/16" holes for picking up the Tormach's machine arm pivot bracket
20190902_192814.jpg

Milled a slot in one of the mounting holes for "wiggle room" in case my hole to hole dimensions on the mounting bracket were off
20190902_193049.jpg

Probe holster in place on the RH side of the Tormach's control box
20190902_195129.jpg

20190902_195139.jpg


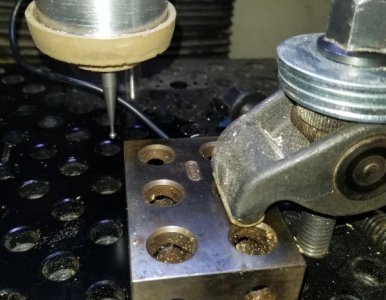
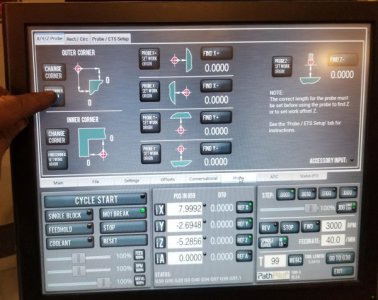
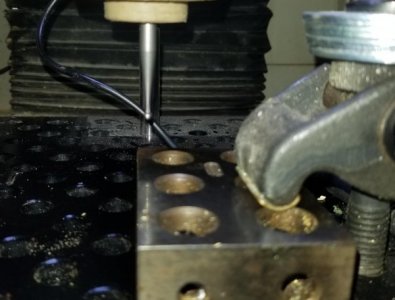
I have a few ways to find the edge of material and height. Can use a Haimer taster which is accurate to better than 0.001”, regular mechanical edge finder, electronic edge finder for conductive metals and the passive probe. Nice thing about the probe is there are canned routines in Tormach’s PathPilot software that automate the process. Jog the probe within about 3/8” of a corner of the work, hit a button and the CNC takes over and finds X and Y zeros. Move over the work, hit a button and get Z. My repeatability was within 0.002” after 20 tries on the same 1-2-3 block, so not fantastic but good enough for 99.9% of my projects.


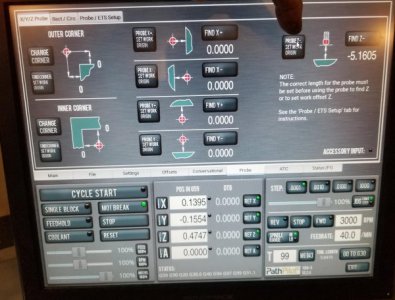
So how is the probe used? It's really quick for finding an edge or work height. PathPilot defaults to tool# 99 as it's height/edge finder tool. So, enter tool# 99 (I'd already gone through the set up routine which measures the probe's height and manually entered the diameter of the probe's ball end). Then position the probe tip to about 3/8" from a corner or edge. Press the "Find corner" button and the machine does it's thing; touches off on the X and Y and resets the mill's zeros.
20190902_195451.jpg
20190902_195433.jpg

Z setting works pretty much like the X, Y; set the probe over the work and hit the "Probe Z, set work origin" button. The machine takes over and drops down and touches off on the material height and set Z to zero.
20190902_195644.jpg
20190902_195629.jpg


Thanks for looking, Bruce
 

Attachments

  • 20190902_190845.jpg
    20190902_190845.jpg
    44.7 KB · Views: 12
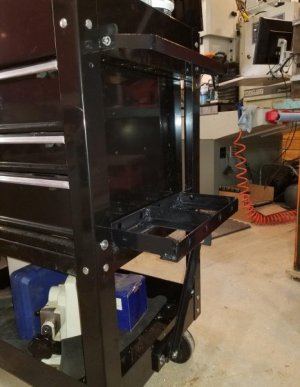
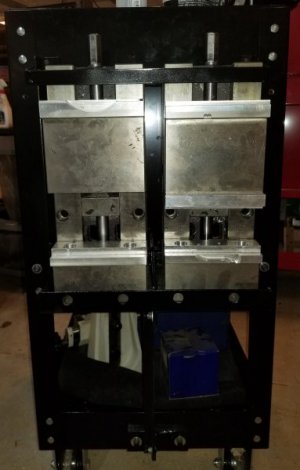
POTD was making a rack for holding the 6” Glacern vises for my Tormach 1100 mill. My mill has a Saunders tool plate which is a wonderful thing. The plate has ½” locating holes for dowel pins on 5/8” spacing. The base of the holes are tapped ½”-13 for bolting fixtures/vises in place.

Most of my projects are small, so the vises get heavy use. But occasionally I’m working on something bigger that gets secured directly to the fixture plate. The vises were taking up valuable bench space, so made an angle iron rack to store them when not on the mill.

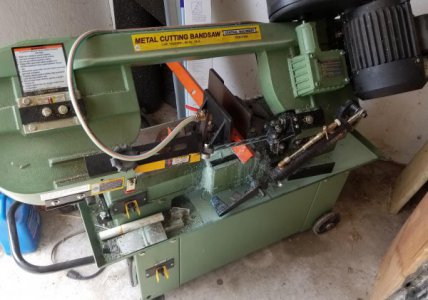
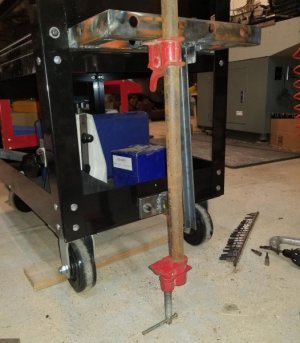
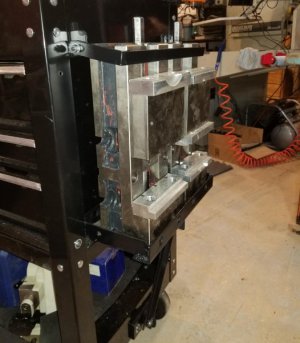
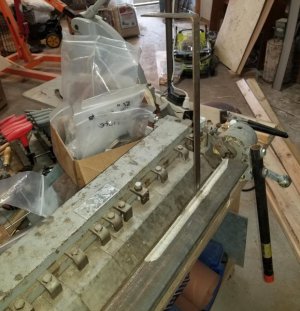
I bought a Harbor Freight 5-drawer tool chest for the Tormach’s tooling. Figured that’d be a good place to store the vises when not on the mill. I repurposed the angle iron from a HF 12-ton shop press for most of the steel. Band sawed and MIG welded the shelf and bolted it to the HF tool chest. I’m guessing the vises weigh at least 40 lbs. each, so ran a piece of angle from the base of the shelf to the bottom of the tool cart. There’d be some sag from the weight of the vises on the shelf, so used a pipe clamp to shove up on the shelf before marking the length of the angle piece that ties the shelf to the base bracket. I didn’t show it, but used a piece of 3/8” thick aluminum bar stock on the inside of the bottom tray to reinforce the lower bracket.


Band sawed the angle iron for the brackets and shelf
20190831_135030.jpg

The shelf rests on the tool carts bottom support for the tool box and is bolted to the corner framework. Figured it'd sag under the weight of two 6" vises, so cammed up on the bottom or the shelf with a pipe clamp before marking the hole location for the piece of angle running down to the bottom support bracket.
20190902_124508.jpg

Bent up an upper support rail on the DiAcro brake
20190902_130952.jpg

Upper bail brackets in place. Flip up to load the vise(s), flip down to secure
20190902_140205.jpg

Painted with black gloss Rustoleum and bolted in place
20190902_155718.jpg

Nice to have the vises off the workbench when not in use on the mill.
20190902_200235.jpg
20190902_200300.jpg


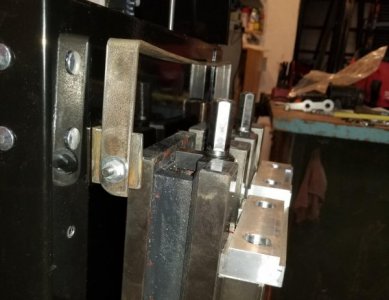
The vises set on the angle iron shelf and are secured at the top with a flip-down piece of 7/8” bar stock. Pivot brackets were more repurposed angle iron, bent the shape on my DiAcro brake.

It works great. Wire brushed and painted everything with Rustoleum primer and gloss black paint. Lined the bottom of the shelf with some sheet rubber to protect the vises. Hopefully not exceeding the weight limit of the car too much, definitely don’t want to roll the caster wheels over your toes with the vises in place!


Thanks for looking, Bruce
 
POTD was making a handle for a vise crank. I made a couple of speedy handles for the Kurt vises on my Bridgeport and Jet mills a year or two ago. Cut the cranks from ½” aluminum with the CNC BP. I made 3 of the bases at the time, but only turned handles for two of them. Well, I now have 3 mills so time to utilize the third aluminum crank.

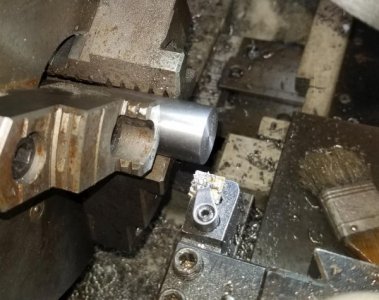
Started with a 1 ½” 303 stainless round, center drilled and turned between centers to a 1” diameter. Yeah, wish I had some 1” stock, but that’s what a lathe is for. Then turned a shoulder to 0.495” for a ½”-13 thread to screw into the aluminum crank. Also turned the area just above the ½” diameter to 7/8”. This would be a flange that’d butt up to the crank.


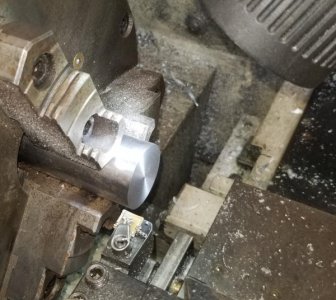
Faced
20190907_155144.jpg

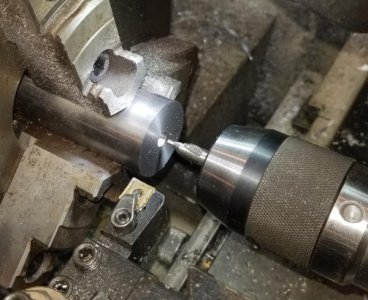
Center drilled for turning between centers
20190907_155332.jpg

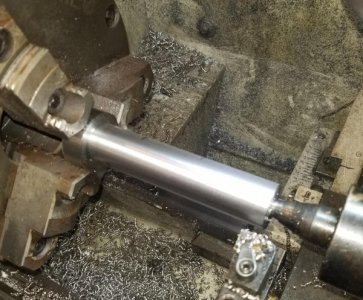
Turned the 1.5" diameter down to 1"
20190907_163436.jpg

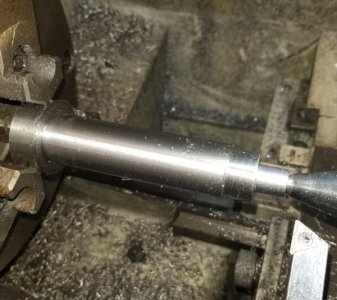
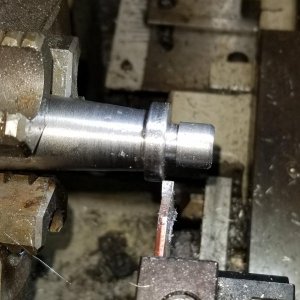
Turned a shoulder to 0.495" for a 1/2"-13 thread and another shoulder to 0.875" for a flange that'll butt up to the surface of the crank
20190907_164718.jpg


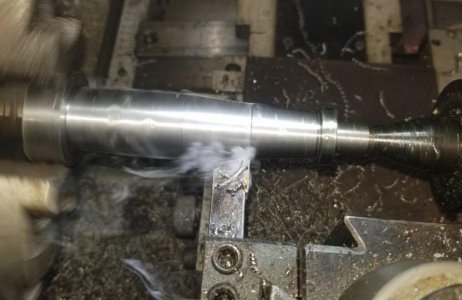
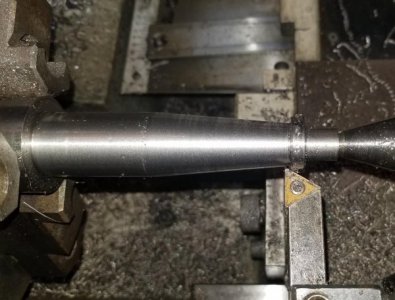
My Grizzly G0709 lathe has a taper attachment which was set to 5 deg. to transition down from the 1” diameter to whatever. I didn’t have a target on the other end with the flange, just whatever looked OK. In this case I was tapering from the headstock to the tailstock. My G0709 also has a DRO, I controlled the depth of cut by moving to the same Z coordinate near the chuck, then turned X in at 0.040” extra per pass. Once the taper was done, parted off the handle.


Set up on the G0709 with the taper attachment set to 5 deg.
20190907_192933.jpg

Last pass on the taper
20190907_194344.jpg

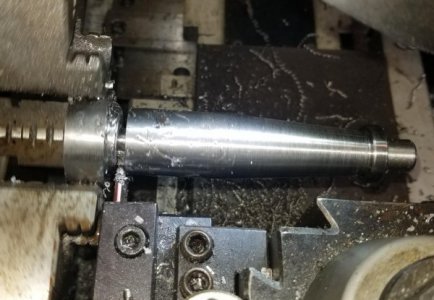
Chamfered the flange end
20190907_194733.jpg

Parted off the handle
20190907_195719.jpg


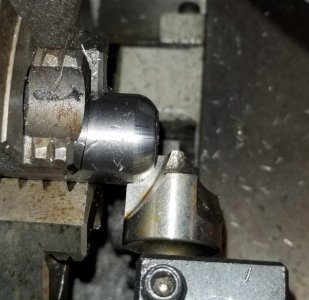
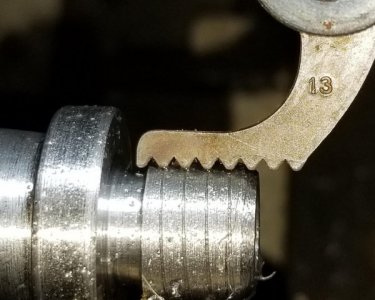
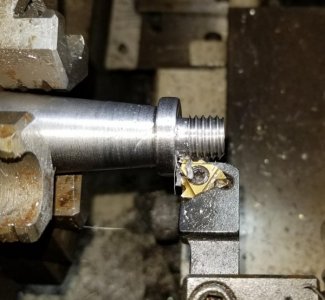
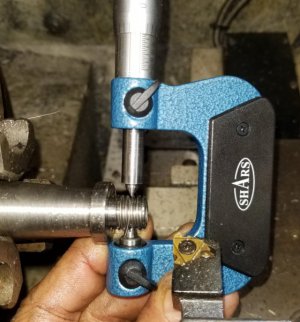
Flipped the handle in the lathe and faced the end. Then cut a radius on the end by mounting a radius end mill in a tool holder. Only one flute is doing the cutting, set up the tool by eyeballing the flute to flat to the world. Then adjusted the tool height to on center. Flipped the handle for threading. Made a scratch pass and verified with a thread gauge, then kept at it taking 0.010” every 3 passes. Verified the final thread with a screw pitch micrometer and the aluminum crank.

As an aside, I did the 13 tpi like I was cutting a metric thread. On my lathe, 13 tpi requires hitting the same number on the thread dial. It seems to go slower when I do the typical engage the half nut at "1", then disengage at the end of the thread. Turn the cross feed out 0.100" inch, crank back past the start of the thread, advance the compound by 0.003", then turn the cross feed back in 0.100". Then start the lathe up again and wait until "1" comes around before engaging the half nut.

It went a lot faster engaging the half nut just once on "1". I threaded using the jog button. Stopped at the end of the thread, backed off the cross feed, then reversed the lathe back to the starting point. Advanced the cross feed back to 0.000" and turned the compound in another 0.003". Since the half nut was never disengaged, it was always on track so didn't have to wait for the number on the thread dial to come around.


Faced the end
20190907_200001.jpg

Then added a radius using a radius end mill
20190907_200627.jpg

Cut a relief at the base of the threaded end
20190907_201033.jpg

Scratch pass verified at 13 threads per inch
20190907_202527.jpg

Last pass
20190907_203448.jpg

Verified the 0.450" pitch diameter with a screw pitch mic
20190907_203554.jpg


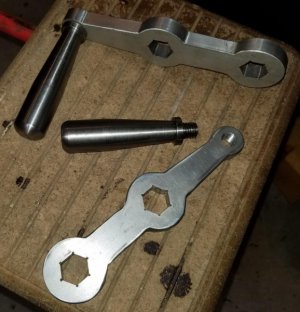
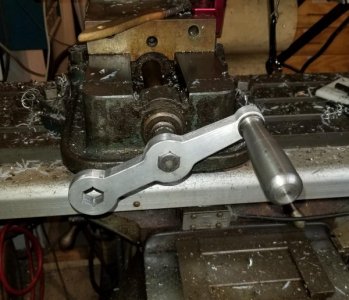
These speedy handles are pretty nice. Gives a 3” short throw position for rapid cranking on the vise and a 6” throw position if extra clamp pressure is needed though I rarely use that position.


An assembled handle and the latest one
20190907_204046.jpg

These speedy handles are much nicer than the breaker bar style handles
20190907_204224.jpg


Thanks for looking, Bruce
 
Last edited:
Bruce, I just completed a speed crank for my 8" Palmgren vise also, slightly different approach and do I love it. should have done this years ago, I left a little on the end for hitting. blind tapped a 1/4-20 and trimmed for .006 clearance when the Allen bolt in the handle bottomed out. Did a crude square for the acme rod handle by drilling the 4 corners, should last a long time.
 

Attachments

  • palmgren vice handle 001.jpg
    palmgren vice handle 001.jpg
    56.8 KB · Views: 36
  • palmgren vice handle 002.jpg
    palmgren vice handle 002.jpg
    58.3 KB · Views: 36
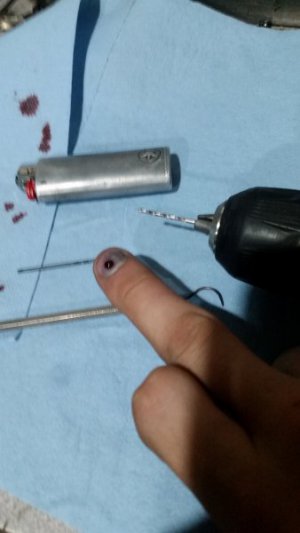
I smashed my finger in a doorway and I just released the pressure today, my body didnt like the pressure loss I felt like puking then I started getting tunnel vision and sweating from every part of my body and after that I was so cold I couldn't stop shivering all in the span of about 3 minutes lol

I found a few .062 drills and started spinning the bit by hand to get the hole started then I used a cordless drill to get right to the edge of nail and the poked a hole with a red hot dental pick.... Doesn't hurt nearly as much as it did now.....

20190907_210515.jpg
 
Last edited:
Back
Top