YALB (Yet Another Lathe Bench)...

Ray C

Registered
Registered
Joined
Nov 16, 2012
Messages
5,596
All the recent posts with folks building lathe benches inspired me to finally do something serious about the lathe bench. I tried a few band-aids but, I think once the lathe's vibrations are tamed as much as possible, it take brute mass and reinforcement to get rid of the remaining vibration ghosts...

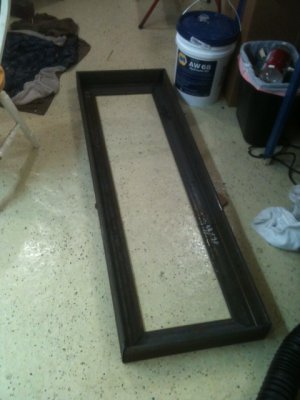
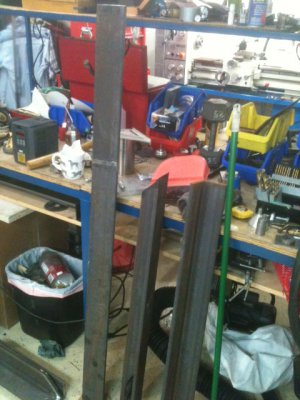
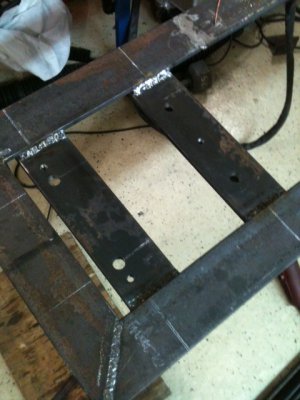
Anyhow, had a day off today so, I picked-up some heavy angle iron. 1/2" x 3.5 x 4" and cut the frame top. I'm planning on a bench that's the same dimensions as the drip pan which is a much broader base than the current bench. It will have 4 legs with leveling bolts and pads that will account for floor unevenness. To actually level the lathe, the lathe's two base pads will each sit on a plate that can be adjusted with a 3-point bolt system. Once level is obtained, the plates can be bolted down and locked into position. I'll show pics along the way... Anyhow, the base will end-up around 350lbs and have plenty of storage space for additional mass. The lathe is around 1100-1200lbs so I think the weight ratio of lathe vs bench weight is favorable.

Here's a couple snaps...

View attachment 45658View attachment 45659
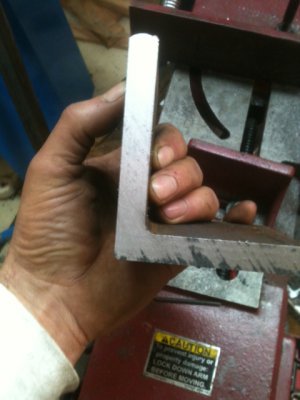
Thick Stuff.jpg Top Fram Layout.jpg
 
The welding will be fun but the grinding will be messy and setup will be a little tedious since I'll be working on the floor. These will be 3 pass welds probably in the 120 to 140 Amp range. Normally I don't like to grossly over-build but, this steel was clean drops that I got for 40c/pound so I jumped on it and got a bunch more than needed. I was initially thinking 5/16 or 3/8 but they didn't have any of that. They had some 1" too but that's off-the-charts heavy!

The little HF bandsaw loved this job!


That already looks like it has twice the mass of my bench, I think I have bench envy? My welder wouldn't even warm up steel that thick though.

Im looking forward to seeing this one come together.

Shawn
 
OK, here's some eye candy that probably belongs in the welding section but since it's about this bench, I'll put it here.

Got 2 hours of work on it today but used my last 2 grinding wheels while beveling the edges. All the drops I got were about 4' long so the long spans need to be joined and got one done tonight. Here's a few words along the way and some pics for your viewing pleasure.

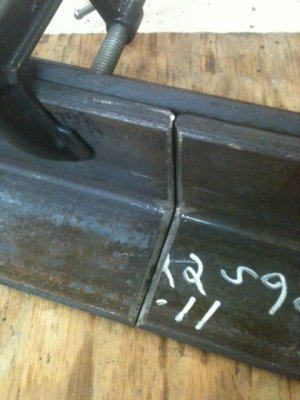
I'm not a pro welder by any stretch but nothing I've made has ever come apart so take all this with a grain of salt... On heavier stuff like this, I prefer to leave a gap between the pieces. I think some folks bevel more deeply and leave the pieces touching. -Not sure which is better.


Positioned.jpg

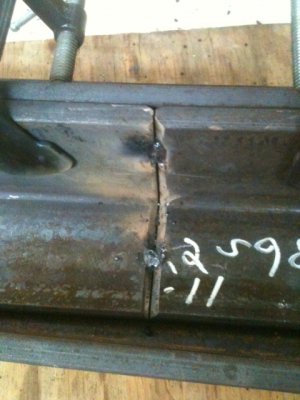
For this heavy stuff, I used 6011 at 130 Amps for the tacks. To keep it straight, I clamp heavily and put 2 tacks in the center of each leg then flip it, re-clamp and put 4 tack on each leg with each set of tacks on the outside of the two on the other side of the piece. Since there are 4 tacks on that side, it will pull any warp back straight:

2 Tacks.jpg4 Tacks.jpg


Since the side with 4 tacks is stronger, I do a root pass on the side that has 2 tacks. Actually, I only do only 1 leg, then flip it and do another root pass opposite it. After that, I repeat that flipping process and do roots on the remaining legs. Since 6011 penetrates deeply and runs hot, the root passes were done at 125 Amps. Since there was a decent gap, I could see from the open side that the root pass was well fused.

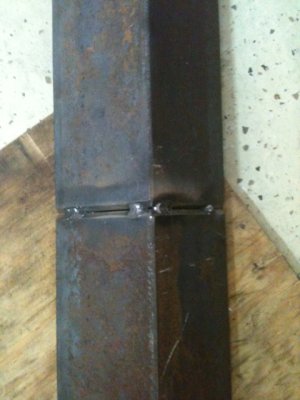
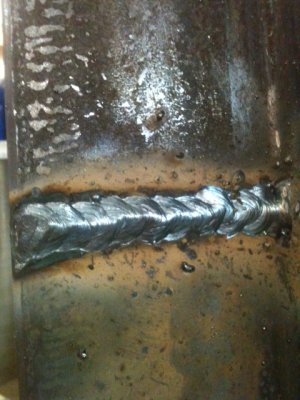
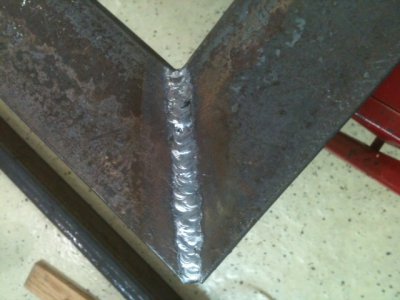
After wire-wheeling all the slag, I cover-up all the ugly 6011 with 7018. I have a boatload of 5/32 7018 and went with 130 Amps. Since I haven't stick welded in over a month, it's like learning to walk again but, it came-out OK. I don't think this will come apart this century -or the next. It's a lot of hassle with all that flipping and "real welders" who know what they're doing probably don't go through all that but, this always works for me and it came out perfectly straight...

Cover Pass.jpgNiceStraight.jpg

OK, no more welding pictures and next pics will be when it's done and painted and I start working on the leveling plates.

Ray

Positioned.jpg 2 Tacks.jpg 4 Tacks.jpg Cover Pass.jpg NiceStraight.jpg
 
Looking good so far! I'm excited to see how it comes out & can't wait!
 
Looking good so far! I'm excited to see how it comes out & can't wait!

Well then, here's a sneak preview...

I've been TIG'ing the corners and sinking deep 180 A. Had some 1/8 Ceriated and it couldn't take it so switched to Thoriated. Ahhhh! Better living through chemistry. BTW: Nothing pretty here since it will all get ground flat and since I'm using ER80s on the TIG, not adding any cap because it's too hard to grind off.

Tig Corner.jpg

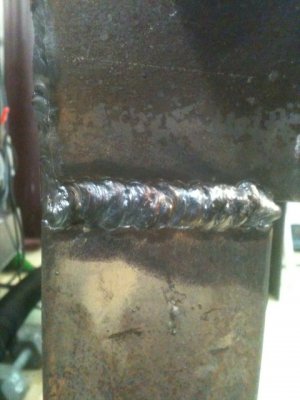
Here was straight up 90degrees (sitting down) 5/32", 7018 at 130 Amps. The bench was laying on it's side for the weld but the picture is taken in the upright (normal table) position. There was a root pass of 1/8" 6011 (I call e'm sparklers) at 120 Amps. All pieces had a good bevel with a 1/16" gap. All the underside is welded too and did it all in-place -about half sitting (straight-up vertical welds) and laying on my back. That was all done done with 7018 because it's a good overhead stick. -And no, this is not my first time doing a little bit of welding and I don't recommend that anyone tries overhead w/o a full cape and some proper instruction first.

Up Vertical.jpg

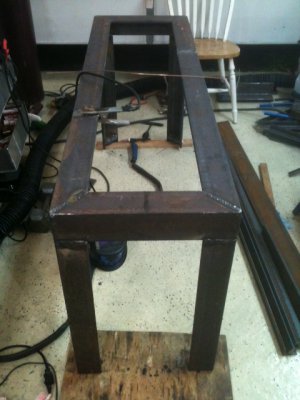
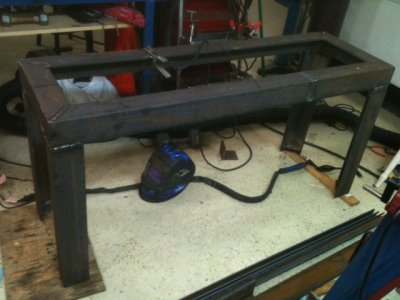
And finally, here's an end and front view. Really happy with the dimensions. It is balls-on square and I managed to keep all the dimensions within 1/16". Actually difficult to do when you're working alone. Been taking my time on it -mainly because I like welding and the earthy smell of boiling iron. It's too heavy to lift now and is about 320lbs. You probably can't see them but there are corner triangles with 5/8" holes for leveling bolts. I've decided those will only be for temporary setup. Once it's positioned and leveled with the bolts to fit the uneven floor, I'll make custom shims and take the weight off the bolts. I want the broad surfaces of the legs to do all the work. Under the shims will be the typical plate and piece of neoprene.

End.jpgFront.jpg

I've got some 5/16 x 1-1/2 angle iron to build some shelf rails down below and will do that later. Tomorrow I'll make the 3-point fine leveling fixtures for the lathe bed pedestals. Hopefully paint it on Monday and sometime this week, bring-out the gantry to swap the benches.

-That's it for now...

Ray

Tig Corner.jpg Up Vertical.jpg End.jpg Front.jpg
 
Ok, so here's a few more pictures and explanation of the fine-tune leveling setup...

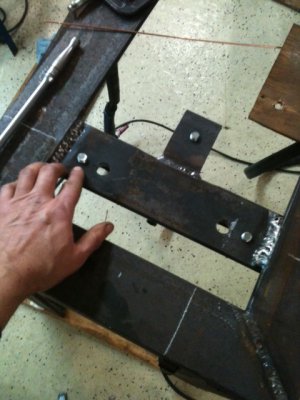
Here's the tailstock end with the main cross support in place. The two big holes are thru-holes that correspond to the two main bolts in the TS footing. Three additional holes were drilled/tapped for 1/2" bolts screwed in from the underside. My index finger is pointing to one of three bolts. A triangle is a perfect way to establish a level.

Leveling Points.jpg

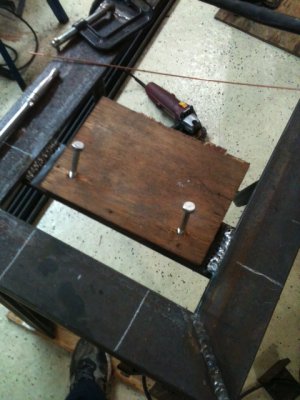
I'm demonstrating with a piece of wood because I haven't drilled the thru-holes in the plate yet but, a 1/2" plate of suitable square dimension will just sit on top of the three leveling points, the TS bed will sit on top of the plate and the thru-bolts will fasten things down. The same deal happens at the head-end which I've included a picture showing it's 4 thru-holes and 3 threaded leveling holes for the adjustment bolts.

Leveling Plate.jpgHead End.jpg

Keep in mind, the idea is not to attempt to twist the bed -that's not a good thing. This just provides a convenient way to fine-tune the overall "levelness" of the machine. Here's a rough idea of how things will go...

Set the table in position and use plates/shims and vibration absorbing neoprene to level the table as close as possible. Since the table is theoretically "infinitely rigid", it cannot be made perfectly level because it's geometry is firmly welded in place. Using shims, you can primarily account for the unevenness of the floor underneath it.

Set the lathe (and of course drip pan) on top of the steel plates and just place the 6 thru-bolts into the holes but don't tighten the nuts yet.

Check for level in the Y direction and use just the front/back leveling bolts to get it very close in the ballpark.
Check for level in the X direction and use just the two "tip of the triangle bolts" to adjust side-to-side height.
It takes a little chasing around but it will eventually level-out and all 6 leveling bolts will be evenly in-contact with the underside of the plate.
Tighten down the thru-bolts and re-check. It takes a little chasing but that's the nature of things.

So, today was an interesting day and I learned that TIG does not like high-sulfur cutting fumes. I drilled-tapped the leveling holes and used dark cutting fluid. I wiped it off and used the wire wheel to get the scale off the angle iron. Once the piece got warm the cutting-oil migrated over and cooked off and the welds formed bubbles like I've never seen before. Thought I was going nuts and couldn't figure-out what was happening. I just switched argon bottles and though I had a bad recharge. Tested on different metal and it was fine. Tried again -same thing. Saw smoke cooking off and bulb went on... Had to use rubbing alcohol to degrease the parts, grind-out the crappy welds and do it over. There's one for the knowledge book...

OK, still on track to do the paint tomorrow. Need to visit the hardware store to get more bolts and I'm all out of primer -and of course, I'll probably find something else to fill the shop with since I have a Christmas gift card from my Sons.

... We're getting closer...

Ray

Leveling Points.jpg Leveling Plate.jpg Head End.jpg
 
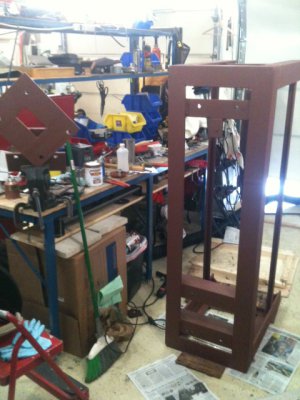
BTW Folks, the bench progress is on hold due to a real drop in temperatures. Too cold to crack the doors and I can't take paint fumes in closed quarters. Will stoke this back up ASAP but will soon switch gears in a few days to the heat treating oven from a few weeks ago.
 
OK, some minor progress on the bench. The footer bars are welded in and it's primed -and as predicted, gave myself a whopper headache caged-up with the fumes despite having the door cracked a good bit. And yes, the shop is pretty messy these days -tends to get that way around mid-winter before spring clean-up.


Primed.jpg

Primed.jpg
 
That is clean compared to my shop. I have barely been able to walk through mine for a good year or more. I am real tired of that and ready to clear some stuff out of there. The bench is looking great too.
 
I like to build things heavy duty, nobody likes to borrow heavy stuff. Are you going with a concrete top? Looks good so far.
 
Back
Top