What Size Belt For A Diy Belt Sander

you could scratch or etch common angles on the platen, for quick reference.
or if you were so inclined,
perhaps a piece of angle iron strategically drilled, placed and fastened to the platen, could be calibrated to any angle desired.
you could tap the platen, clearance drill the angle iron and fasten it to the plate with screw or bolt or stud.
 
all good ideas Mike. I'm thinking about a parallel slot like someone mentioned (mikey, pineyfolks?) up the thread with an adjustable bar on it. Then I can set that to any angle with a protractor and simply run the tool along the face. Something I'm also thinking about is a marked plate for degrees off vertical, so I can loosen the tool rest lower it to the angle I want (say 5 or 7 deg), then I'll be easily able to do 2 angles at once. I can sort of do that on my bench grinder, but I have to use an angle finder (one of those old plastic needle ones) to set it, which is a bit of a hassle.

Lots of thinking :) This and a DIY power hacksaw should keep me in daydreaming material for a while, whenever work gets too stressful!
 
Not sure how Plastidip would hold up to the heat - does anyone know the melting point of that stuff?

Good luck with this, Matt. I'm anxious to see what you come up with so please share when you can.
 
no idea, just a thought that came to me as a way to get a coated roller on the cheap.

I'll share all, it just won't be for a while. There are 3 projects ahead of this in the queue: treadmill motor conversion for the DP, mount a couple of iGaging scales to the lathe and then make a bunch more QCTP holders as I'm tired of swapping tools out of the 2 holders I have! Hobby stuff will slow to a crawl from now on as semester starts tomorrow. I'd hoped to get out to the garage today (last day of holidays) to finish off my arbor to turn down the treadmill flywheel - you should see it, it's 7in diameter on an Atlas 618, only just clears the ways - but I've been working since 10am this morning and have only just finished. 8am lecture tomorrow, bletch. Still, these ruminations and plans keep me going until the next break!
 
In my experience Plastidip doesn't hold up well to friction for long. What about spray in bed liner?
 
I wouldn't try coating an aluminum wheel to be a contact wheel. Surely any coating will come loose the instant you put any pressure on it. Proper contact wheels are solid rubber and they do wear.
From the sanders I have used over the years, I think "hogging" with a 1/3hp motor is quite optimistic. In my experience 1" wide sanders are best suited to more fine work such as gently breaking a sharp edge and getting into tight spots.

This is an example of a 1/3 hp 1" wide belt sander http://www.harborfreight.com/1-in-x-30-in-belt-sander-61728.html I have this sander but it says Delta on the side instead.

I also have this one http://www.harborfreight.com/4-inch-x-36-inch-belt-6-inch-disc-sander-97181.html that also says Delta on the side. There is no hogging with this one either (except with wood).

I fear you will be spending a lot of time and money in an effort to use some free material and will ultimately be disappointed with the results (been there, done that). Now if you were to put a variable speed treadmill motor on it, that would be a worthwhile project. Check out some of the "knife making" 2x72" belt sander plans and videos for some interesting ideas.

Sorry if this sounds negative, I try really hard not to be. I have spent a fair amount of time running thought experiments on building a sander, and if you had no other projects to do, it might be a fun build. However, I think any free time you have will yield more satisfying results checking off any of the other items on your to do list.

It would be a much simpler project to make a disc only sander. Probably could go direct drive (depending on motor rpm). At least it could be a usable prototype for a future build?
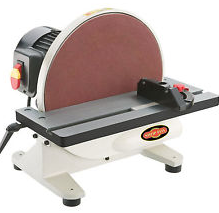
upload_2016-1-19_7-0-33.png
 
Hey no worries at all Jon (and thanks Planeflyer), thoughts like that are why I'm asking :) To be honest, the belt part will be the icing on the cake, rather than the main reason for the build, which is to make a disk sander/ carbide sharpener with those various plates I have (some diamond coated). I figured that if I were going to the effort of building a disk sander, then adding a belt wouldn't be that much more work - famous last words! I started with the same idea as that picture you posted, a direct mount disk sander. Then I thought I could add a belt sander on the other end, like some of the manufactured ones I've seen. Then I realised that using a jack shaft would get be variable speed and allow me to easily swap the motor out when i find a nice free or cheap treadmill motor. Most likely the idea will continue to evolve :D
 
Most likely the idea will continue to evolve
As any shop project should IMO.:)

As for belts, FWIW I went down to my local welding and industrial supply and checked what was in stock that I could buy one at a time. I have never been happy with the results of the ubiquitous red belts found at DIY stores. The zirconia or zirconium (usually blue or green bonding material) last a lot longer for me (mostly work with steel). The industrial belts last a long time and can handle more heat buildup without losing abrasive. I modified my 4x36 sander to be a 4x48 because that was a readily available size. I just used mild steel as the backing behind the belt in the contact area. Hasn't worn appreciably with weekly use in a couple of years.
 
Matt, I assume this is still a future project for you, as you are just wrapping up (or did wrap up?? I've lost track) your WT drive project?

I don't know how much space you have, but separate machines might be best. Diamond coated wheels would be best for honing carbide bits. It seems to me that the 1/3 HP motor would be great for that. Are those coated only at the edge? If you have fully coated discs (seems unlikely?) then you don't need to have a variable speed disc grinder. You can vary the sfpm by the distance from the center of the disc. In that case a simple direct drive build makes the most sense to me.

I would skip building the 1" belt sander if I were you. If you want that size just grab the HF unit and modify it as you see fit. Personally I'm making a 2"x72" because that is the best bang-for-the-buck with belts because they're used by roughly 95% of knife makers. Talk to the fine folks at preferredabrasives.com if you have any doubt. They stock 2x48 in a good range of belt stock, but they have EVERY option in 2x72. There are other distributors with wider selections, but these guys are a small outfit trying REALLY hard to play in the big leagues and I'm very impressed with them. They're developing a strong social media presence as their primary marketing, so it's easy to find people talking about them who have used them extensively. I emailed them some specific questions about belt selection for shaping and sharpening HSS lathe bits and I got a detailed, non-scripted response in like 20 minutes.

The key differences between using 2x48 and 2x72 are the economics (like custom cables, the length makes far less difference to the price than the actual assembly, so the extra length costs very little more), and you have more abrasive in use providing longer life from each belt. Additionally by having a longer belt there is more time for it to cool between passes, keeping your workpiece cooler and again increasing the life of the belt.
 
I imagine you've looked into this extensively, but as I've been planning my build (in the back of my mind for about 2 years, and as actively as my family life allows for the last 2 weeks) I have found YouTube to be the most helpful resource. Terms to search for inspiration:

KMG and KMG Clones
Knife grinder
DIY belt grinder
2x72 grinder build
Wilmont Grinders
Oregon Knife Maker
Alaska Bearhawk grinder
Treadmill grinder
Grinder contact wheel
Grinder small wheel attachment
Belt grinder platen

And so many more you'll find through related videos there. My own design ended up being a combination of features from others I've seen and a small twist of my own: multiple accessory arm size options (2"x2" like everyone else, plus 2"X1" and 1"X1") so I can use whatever makes the most sense for my current application and scrap on hand.
 
Back
Top