- Joined
- Feb 9, 2017
- Messages
- 5,253
It says “free to try”, which says it quits in 3mo, right?The actual name is Sketchup Make 2017. Here is a link to download it. https://download.cnet.com/SketchUp-Make-2017/3000-6677_4-10257337.html

It says “free to try”, which says it quits in 3mo, right?The actual name is Sketchup Make 2017. Here is a link to download it. https://download.cnet.com/SketchUp-Make-2017/3000-6677_4-10257337.html
The headers blow my mind. I don’t claim to know anything except to repeat what I’ve heard. Are the tubng runs on all those the same length? Do you like get virtual tubes the same length and just bend them like in a vector program?Based on a quick search this is what I think is happening. Aidan Chopra's last book is from 2017 which would correspond with the last downloadable free version of Sketchup. I think the Fane, et al. book is related to the web based version of Sketchup. I do not have either of these books so I can't compare them.
I am very leery of using web based software that starts out being free to use. Adobe went to web based versions of their photoshop program. Then in order to access the program you had to pay a monthly fee or an annual fee at a slight discount. This is why I have not switched over to the web based version of Sketchup. I don't want to get sucked into having to pay for it.
Either book is probably fine to use. I would buy Chopra's 2017 book if you are using the 2017 version of Sketchup. Fane's book if you are using the web based version of Sketchup.
The latest thing that I have been working on in Sketchup is headers for my 66 MG Midget project.
View attachment 339090 View attachment 339091View attachment 339092


Hey, any way you can re engineer to fix stupid OEM errors more power too you. That was the worst part of twisting wrenches was the bad engineering, or the lack there of.With Sketchup Make 2017 for the first month you get to use the full featured Pro version. If you don't buy the Pro version the free version still works at no cost. The Pro features are mostly related to creating a set of plans that you could take to a building dept to get permits and lets you customize the toolbars.
The primary design criteria for the headers was to be able to r&r the starter without having to remove the header. The next criteria in order of importance was ease of construction with as few bends as possible. After that I tried to optimize the diameter and length of the tubes for low end performance. Diameter was easy to optimize. Virtually impossible to get equal length tubes. Space is really tight. I made some mock ups with PVC. Here is the only mock up I took a picture of.
View attachment 339211 View attachment 339212
The exhaust tubes have to snake around the steering shaft and then exit through a 3"x6" space between a frame rail and the inner fender well. And height is limited by the hood. A friend on the MG forum tried to get equal length tubes and had to run two tubes over the top of the steering shaft and two tubes went under the steering shaft. He was after top end performance from an engine putting out close to 200 hp. From what I have heard the car is so fast with such quick handling that it is downright scary to drive. When he was all done with everything welded up he discovered that he couldn't get the starter out without removing the header. And to remove the header he has to take the steering shaft out. I originally wanted a 4-2-1 header but there wasn't room to get two tubes out through the space. Long story short I gave up on trying to have equal length tubes and will go with what fits in the limited space. This is the design that I will try first.
View attachment 339213
The hardest part in drawing the header was creating a line for the shape of the tube. Once that was done I used the follow me command to draw the tube. The collector was not hard to draw. It is an oval on the top and a circle on the bottom. A circle is not really a circle. It is a 24 sided polygon. The oval is a half circle on each end connected by two lines. To complete the collector I drew a line from each endpoint on the half circles to the corresponding endpoint on the circle. "Endpoint" is a term of art in Sketchup where a line ends. You can see the connecting lines in the drawing. Sometimes Sketchup smooths out the lines so you don' see them. The tubes are an example of this.
Sorry to hijack your thread David with another Sketchup tutorial.
No worries!Sorry to hijack your thread David with another Sketchup tutorial.


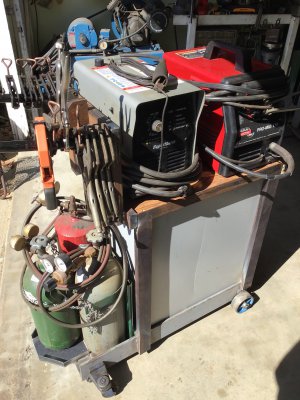
Looks wonderful. Stainless is so clean looking. And having all the material to work with is as good as it gets. Meanwhile I’m coming from the opposite directionMinor progress tonight.
Dismantled more of the cart. This takes a surprisingly long time when trying to preserve as much material as possible.
Took some of the sheet metal and repurposed it for the tank base.
Cut down some of the wire grate for the back of the shelves.
Looks very much like a metal chair from this angle.
Sent from my iPhone using Tapatalk
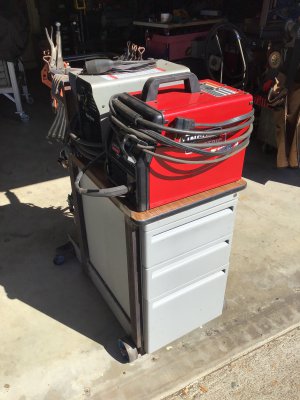
") Is the wire grate for hanging stuff on?
Is the wire grate for hanging stuff on?Thanks!Looks wonderful. Stainless is so clean looking. And having all the material to work with is as good as it gets. Meanwhile I’m coming from the opposite direction
I also made progress on mine yesterday with the side braces and now need to cut a new top and attach it and the braces together. As usual I’m dealing with freebie induced design challenges as the file cabinet was dropped when they tossed it out in the parking lot tweaking front of the frame. I’m getting to the challenge of hanging the tons of clamps in some way that is tidy and out of the way. I originally thought something like the wire grid on yours but on the sides of mine might be the way but I need for this thing to fit back in the cubbyhole the old HF hand cart used to fit in. So I can’t have stuff hanging out to far or it will snag on stuff. Gotta search the junk pile and see if any solutions present themselves.