[Newbie] Trying to understand how to fix this issue.

This is a rabbit hole with no bottom. In order to allow movement of the table, knee, quill etc., there must be a certain amount of clearance (slop). This clearance allows a small amount of shifting under cutting loads. The vertical mill gets its versatility at the expense of rigidity. If you expect to achieve "perfection" with a vertical mill, you will drive yourself mad. Get a jig borer and a surface grinder, then you can chase perfection in tenths (or less). A very large part of being a good machinist is recognizing the limitations of your equipment and the requirements of the job. How close is close enough? A good friend once told me "There is no clean, only cleaner." The same applies to perfection.
 
I have a new Grizzly G0619. I have been having fun with it and now that the fun is turning into an obsession, I am trying to figure out what I am doing wrong. So here's the story. I bought an Accusize 2" Facing tool with 3 cutters. When putting a block of aluminum in the vise, tapping it down on top of the parallels to make sure its sitting tight, I then run the facing tool down the X-Axis of the table. Doing essentially a half overlap I notice distinct lines running along the surface of the block. They have a discernable ridge about .0055 to .001. Also, after facing both sides of the block, I then measure it and it's out up to .002 longitudinally and about .0015 on the Y-Axis.
A little history on my obsession with this issue, I have put a dial indicator in the chuck and checked the table on both x and y axis. X is out less than .0005 across the length of the table. Y is almost perfect, less than .0005. The vise is out about .001 on the X- Axis and less than that on the y-axis. Its a big ole 6 inch vise that weighs about 40 lbs I would guess.
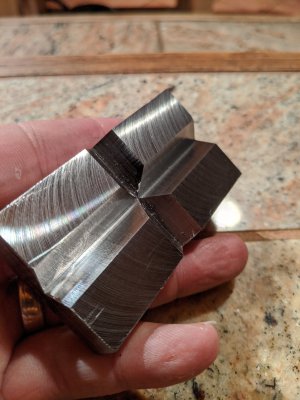
So, the photo is using a 3/4 HSS TIN end mill, NOT the facing tool. I faced the other side to get it as flat as possible on the Y-axis to see if the ridges went away and they did. The side you are looking at is the orientation that is was in in the mill. I forgot to lock the Z-Axis down until I got just past the .6150 mark. You can see the swirls where is changed the depth a little.

I am wondering how I can rectify these weird differences in the facing. Any help is much appreciated.View attachment 327878
Turning wheels,
Have you seen this video?
Mikey knows what he is talking about, as always.
 
I read that the writer had indicated the table both ways, but noting was said about TRAMMING the table. Also, when trying to hold parts like that in a vise, I use VISE HOLD DOWNS to keep the part snug against the vise or parallels; Starrett and others make them.
 
Turning wheels,
Have you seen this video?
Mikey knows what he is talking about, as always.

Tony makes the most entertaining videos. He has a wonderful, if quirky, sense of humor. And he is a good teacher.
Thanks. I had not seen this video before.
 
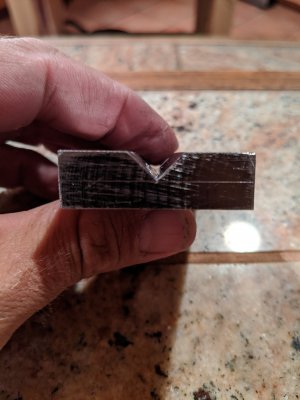
Well, you guys are right, I was trying to get perfection out of a roughing tool. I had to step back and think about what I was trying to achieve. Which is easily rectified right now with a sheet of 1000 grit sandpaper and light oil. I did learn how to square a block and qualify it to within a .001. Thanks to @mikey, i'm a pro now. I also learned how to lay out cutting a notch for a basic v block for holding round stock and centering it. All in all, I am super appreciative of all of your help and willingness to get me out of the rabbit hole and enjoy learning new things again. IMG_20200621_210329.jpgIMG_20200621_210347.jpg
 
We all begin this way, one step at a time. In just a short while you'll be up and running, designing and making things that you cannot imagine today. Good for you!
 
Nice one! Some great tips here on finishing:

 
Back
Top