TOT Arbor Press welding question

graham-xrf

H-M Supporter - Gold Member
H-M Supporter Gold Member
Joined
May 27, 2016
Messages
3,469
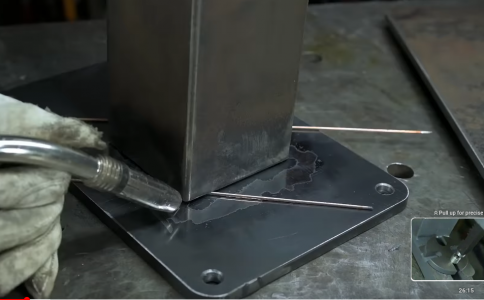
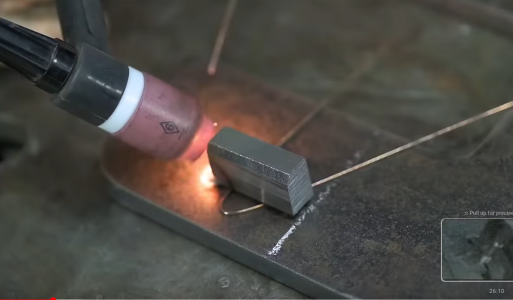
This Old Tony posted a new video on YT about things he did for his arbor press. At one stage, he sets up a deliberate gap, using welding rod.
What is is primary motivation for adopting this technique. What are the advantages?
TOT-Weld2.png - TOT-Weld3.png

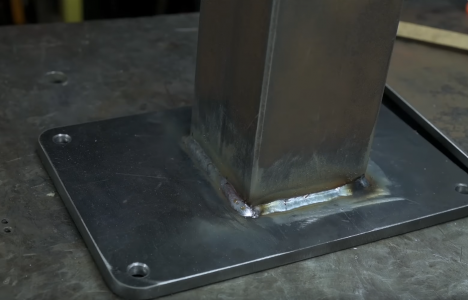
After the usual tack welds, he then completes all the way around.
TOT-Weld4.png

The actual video is here ->
 
I'm no welder. Never held a torch in my life but I do like watching ToT vids, even the welding ones!

So, IIRC, he said in another video that leaving the gap is for when the weld cools and shrinks and pulls the parts together he has space to get the parts back square to each other.
 
When I weld two pieces, I square them up first and make two or more quick tacks on opposite sides so the weld shrinkage is balanced. out. This usually maintains the alignment. Then I proceed to alternately weld on opposing sides until the weld is complete.

My experience with welding tubing is that it easy to blow a hole in the tubing wall and that is best minimized by having as small a gap as possible at the joint.
 
The guy from Fireball Tool has made content to persuade us to buy his fixture table product - BUT - the little test frame he put out to fabricators generated a bit of a row, so he went all in to explain all the kinds of weld distortion, and how to use welds to "keep it square". There are some real good tricks to know from the video.

This is a bit academic for me. I do have welding kit, and I do use it occasionally, but my needs would not extend to an expensive welding table. Regardless, finding out how to counter the effects of weld metal shrinkage is all here.
Haven't watched this yet, but know from hard experience how much weld distortion can occur, even in 3/8" plate. It's crazy amazing to watch that plate that you wanted flat to lift 3/8" or so. And there's nothing you can do about it, beside cut it off again and weld it the right way. This was on a welding bench that I wanted to weld on an extension plate so I could mount a vise. Didn't work out as I had planned. Have to plan out your welds, or learn the hard way what happens.
 
Great video! Unfortunately many designers and welders don't understand or don't take account for heat distortion. Prints should have specs for it and welders should know and mention it when reviewing a job. Many weldments will spec normalizing and machining surfaces afterwards on high tolerance parts. Fixture tables are for fit-up and maintaining geometry. As in machining, welding order of operations does play a large part in controlling distortion in a predictable manner so it can be corrected for or minimized. Prints with GD&T specs will account for all geometry issues of distortion, but sadly many welders are not knowledgeable on it when presented in drawings.
 
Back
Top