- Joined
- Apr 21, 2015
- Messages
- 582
I've been away at another of Richard King's scraping classes so I haven't made much progress nor posted any updates recently to my thread about scraping in my lathe.
I didn't get as much done on my lathe during the class as I might have hoped as I was having too much fun running around and "helping out" (AKA "shooting the breeze" and "hanging on Rich's every word").
After three goes at the class, Rich's words are finally sinking in. I thought I'd put down some of my takeaways regarding basic scraping to make things flat.
Scraping something flat is actually pretty easy, but I've seen enough people go through the class now that it seems EVERYONE makes the same mistakes when starting out (its not just me!).
In no particular order:
Hand vs. Power scraping
It doesn't matter if you use a hand scraper or a Biax power scraper. You can do equally fine work with either. A Biax will go a lot faster, of course, and you will likely get more consistent scrapes with one, but (like learning to drive with a stick shifter) it's good to learn with a hand scraper at first. I still hand scrape very small areas like dovetails where it would be hard to control a power scraper. Things can go bad just as quickly with a power scraper as easily as they can go well, though. Scratches are a particular concern. Once you touch a power scraper, though, you'll almost certainly want one.
In either case, for cast iron parts you'll want carbide blades ground to about a 2.5" (60mm) radius, honed with about a 5 degree negative rake. You'll need a diamond wheel (ideally a slow speed one like on a Glendo Accu-Finish grinder) to shape (~240 grit wheel) and hone (~600 to ~1200 grit wheels) carbide blades. A cheap demagnetizer is almost mandatory to keep chips from sticking to the tip and scratching lines into the surface of your scrapes.
Mark up vs. Indicating
Ink blue-ups can lie to you, but used properly, indicators never lie. You must consistently use a variety of techniques (like "hingeing" and indicating) to find (and erase!) false markups.
Say you're scraping in a straightedge that is ever so slightly curved ("bellied") in the middle, such that the middle is slightly proud by, say, 0.0002" to 0.0005". When you mark it up on the plate there is no way to avoid slightly tipping the straightedge over the belly, causing the ends/sides to mark up as well as the proud center. If you don't realize that only the middle has true bearing, you're likely to scrape all the blue marks you see and potentially make the problem even worse. Hingeing the part can reveal that the center is high.
If hingeing or an indicator shows one thing, and the blue shows something else, don't believe the blue!
Use the stiffest, most rigid indicator setup you can and measure parts from a surface plate whenever possible. Minimize stick-out of the indicator from the base. 0.0001"/division indicators are almost impossible to use except on a surface plate with a good "transfer" stand. A 0.0005"/division indicator is far and away the best to use for almost all scraping tests. It's easy to read to a half division (0.00025") which is more than accurate enough for most tasks, yet not as bouncy and finicky as a tenths indicator.
Indicate your parts to know how much you need to take off (should you still be roughing, or just going for points?). Beginners rarely take the time to measure how much they need to take off, but they should.
If you suspect false readings during a blue-up, use your thumb to erase those marks so you aren't even tempted to scrape there. It's critical to only scrape the high spots, else you'll just make holes and tipped sides lower. Just because there is blue somewhere doesn't mean it's a high spot!
Roughing to finishing
Roughing uses longer strokes with the edges of each scrape touching or almost touching. Finishing uses much shorter strokes, with each stroke clearly separated from each other. The strokes get shorter and shorter as you progress until eventually you start "pin point" finishing where you are only scraping tiny individual spots of blue.
Rich calls out a variety of techniques for roughing: "circles," "zees," or "heavy crosses" depending on how aggressive you want to be. It's still important to alternate the direction of your strokes to avoid a washboarding effect even when roughing. Typically you'll use a wider blade and blade radius when roughing — the goal is to hog off a lot of metal (typically 0.001" to 0.005") in as few passes as possible.
Mid- and finishing passes use rows of individual scrape marks, with each scrape spaced evenly left to right, and each row separated fore and aft. The separation gap should be about the same width as a scrape marks. The length of the scrapes is gradually decreased between passes as you get closer to finishing.
You use the same force and strive for the same depth of cut whether roughing or finishing! Consistency of your scrapes is more important than almost anything (you'll never get great results unless almost all your scrapes are consistent width, depth, and spacing).
Once your indicator tells you that no point on the surface is lower than about 0.001" of the highest point you should stop heavy roughing and start what I think of as "area" scraping to get to about 5 points per inch (PPI). Note that if you're starting with something that was reasonably flat already, you may not need to do any heavy roughing whatsoever, but it's far more common for beginners to start finishing passes too early when they should still be roughing than vice versa.
One rule you'll not want to break is: Don't scrape low spots even lower! No matter the stage, roughing or finishing, you only scrape "around" where there is true blue (not false blue from tipping parts that aren't hingeing correctly). When roughing or "area" scraping, treat multiple clustered groups of blue as a single area to be scraped. The closer you are to roughing, the more liberal you can be with scraping outside the edges of those blue areas, but avoid any scraping in low areas with no blue at all!
Only after you've finally gotten to about 5 PPI over the ENTIRE surface should you begin scraping individual points rather than scraping rows of scrapes in "areas" of clustered blue spots. This is far and away the most common beginner mistake and can cost you hours of time and innumerable marking/scraping cycles. Five points per inch means there is no area on the surface larger than about a US quarter coin without at least a few blue spots.
Once you get to that point (and only when you get to that point) you begin finishing. Shorten your stroke even more, possibly use a slightly tighter radius on your blade (or simply raise the back of the scraper higher to create a steeper angle of attack) and begin scraping individual blue spots, never scraping more than once on any spot nor allowing your scrapes to touch one another.
Conclusion
Anyway, these are just a few of the basic points. There are many, many more things you need to get right to get good results. Like:
Still, I hope this is useful for anyone that is still struggling.
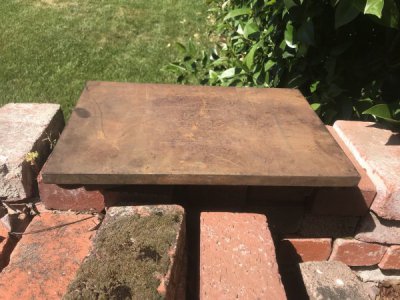
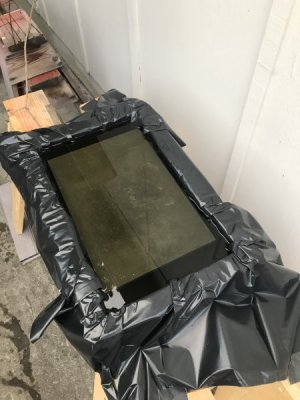
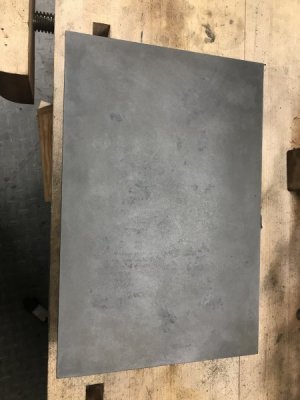
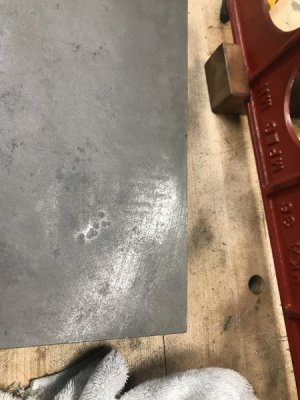
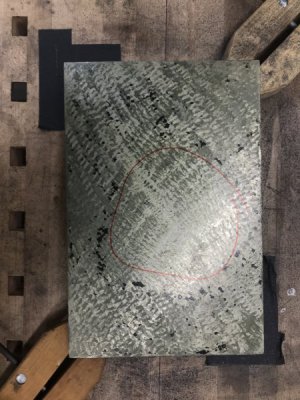
I just purchased an old cast iron surface plate. If there is any interest, I could thoroughly document the process of scraping it in on this forum (with lots of pictures and video showing the exact process of "reading the blue"). I think I know enough now that it'll be a reasonably quick process to get it to gauge quality.
I didn't get as much done on my lathe during the class as I might have hoped as I was having too much fun running around and "helping out" (AKA "shooting the breeze" and "hanging on Rich's every word").
After three goes at the class, Rich's words are finally sinking in. I thought I'd put down some of my takeaways regarding basic scraping to make things flat.
Scraping something flat is actually pretty easy, but I've seen enough people go through the class now that it seems EVERYONE makes the same mistakes when starting out (its not just me!).
In no particular order:
Hand vs. Power scraping
It doesn't matter if you use a hand scraper or a Biax power scraper. You can do equally fine work with either. A Biax will go a lot faster, of course, and you will likely get more consistent scrapes with one, but (like learning to drive with a stick shifter) it's good to learn with a hand scraper at first. I still hand scrape very small areas like dovetails where it would be hard to control a power scraper. Things can go bad just as quickly with a power scraper as easily as they can go well, though. Scratches are a particular concern. Once you touch a power scraper, though, you'll almost certainly want one.
In either case, for cast iron parts you'll want carbide blades ground to about a 2.5" (60mm) radius, honed with about a 5 degree negative rake. You'll need a diamond wheel (ideally a slow speed one like on a Glendo Accu-Finish grinder) to shape (~240 grit wheel) and hone (~600 to ~1200 grit wheels) carbide blades. A cheap demagnetizer is almost mandatory to keep chips from sticking to the tip and scratching lines into the surface of your scrapes.
Mark up vs. Indicating
Ink blue-ups can lie to you, but used properly, indicators never lie. You must consistently use a variety of techniques (like "hingeing" and indicating) to find (and erase!) false markups.
Say you're scraping in a straightedge that is ever so slightly curved ("bellied") in the middle, such that the middle is slightly proud by, say, 0.0002" to 0.0005". When you mark it up on the plate there is no way to avoid slightly tipping the straightedge over the belly, causing the ends/sides to mark up as well as the proud center. If you don't realize that only the middle has true bearing, you're likely to scrape all the blue marks you see and potentially make the problem even worse. Hingeing the part can reveal that the center is high.
If hingeing or an indicator shows one thing, and the blue shows something else, don't believe the blue!
Use the stiffest, most rigid indicator setup you can and measure parts from a surface plate whenever possible. Minimize stick-out of the indicator from the base. 0.0001"/division indicators are almost impossible to use except on a surface plate with a good "transfer" stand. A 0.0005"/division indicator is far and away the best to use for almost all scraping tests. It's easy to read to a half division (0.00025") which is more than accurate enough for most tasks, yet not as bouncy and finicky as a tenths indicator.
Indicate your parts to know how much you need to take off (should you still be roughing, or just going for points?). Beginners rarely take the time to measure how much they need to take off, but they should.
If you suspect false readings during a blue-up, use your thumb to erase those marks so you aren't even tempted to scrape there. It's critical to only scrape the high spots, else you'll just make holes and tipped sides lower. Just because there is blue somewhere doesn't mean it's a high spot!
Roughing to finishing
Roughing uses longer strokes with the edges of each scrape touching or almost touching. Finishing uses much shorter strokes, with each stroke clearly separated from each other. The strokes get shorter and shorter as you progress until eventually you start "pin point" finishing where you are only scraping tiny individual spots of blue.
Rich calls out a variety of techniques for roughing: "circles," "zees," or "heavy crosses" depending on how aggressive you want to be. It's still important to alternate the direction of your strokes to avoid a washboarding effect even when roughing. Typically you'll use a wider blade and blade radius when roughing — the goal is to hog off a lot of metal (typically 0.001" to 0.005") in as few passes as possible.
Mid- and finishing passes use rows of individual scrape marks, with each scrape spaced evenly left to right, and each row separated fore and aft. The separation gap should be about the same width as a scrape marks. The length of the scrapes is gradually decreased between passes as you get closer to finishing.
You use the same force and strive for the same depth of cut whether roughing or finishing! Consistency of your scrapes is more important than almost anything (you'll never get great results unless almost all your scrapes are consistent width, depth, and spacing).
Once your indicator tells you that no point on the surface is lower than about 0.001" of the highest point you should stop heavy roughing and start what I think of as "area" scraping to get to about 5 points per inch (PPI). Note that if you're starting with something that was reasonably flat already, you may not need to do any heavy roughing whatsoever, but it's far more common for beginners to start finishing passes too early when they should still be roughing than vice versa.
One rule you'll not want to break is: Don't scrape low spots even lower! No matter the stage, roughing or finishing, you only scrape "around" where there is true blue (not false blue from tipping parts that aren't hingeing correctly). When roughing or "area" scraping, treat multiple clustered groups of blue as a single area to be scraped. The closer you are to roughing, the more liberal you can be with scraping outside the edges of those blue areas, but avoid any scraping in low areas with no blue at all!
Only after you've finally gotten to about 5 PPI over the ENTIRE surface should you begin scraping individual points rather than scraping rows of scrapes in "areas" of clustered blue spots. This is far and away the most common beginner mistake and can cost you hours of time and innumerable marking/scraping cycles. Five points per inch means there is no area on the surface larger than about a US quarter coin without at least a few blue spots.
Once you get to that point (and only when you get to that point) you begin finishing. Shorten your stroke even more, possibly use a slightly tighter radius on your blade (or simply raise the back of the scraper higher to create a steeper angle of attack) and begin scraping individual blue spots, never scraping more than once on any spot nor allowing your scrapes to touch one another.
Conclusion
Anyway, these are just a few of the basic points. There are many, many more things you need to get right to get good results. Like:
- Always and constantly wiping to eliminate grit on the parts or the plate
- Gradually thinning the ink on the plate as you get closer to finishing
- Learning how to stone the part well to eliminate burrs, but not so roughly that you create problems
- Early in the process, using "crosses" (overlapping rows at 90 degrees to each other) per pass, then moving to one-way rows and only changing direction between passes when you get closer to the end
- Learning to both hinge the part on the plate, as well as hingeing a small parallel or gage block on the part to detect bellying and false blue
Still, I hope this is useful for anyone that is still struggling.
I just purchased an old cast iron surface plate. If there is any interest, I could thoroughly document the process of scraping it in on this forum (with lots of pictures and video showing the exact process of "reading the blue"). I think I know enough now that it'll be a reasonably quick process to get it to gauge quality.
Last edited:


