-
Welcome back Guest! Did you know you can mentor other members here at H-M? If not, please check out our Relaunch of Hobby Machinist Mentoring Program!
You are using an out of date browser. It may not display this or other websites correctly.
You should upgrade or use an alternative browser.
You should upgrade or use an alternative browser.
The Giant Binocular
- Thread starter savarin
- Start date
- Joined
- Aug 22, 2012
- Messages
- 4,121
Well, that was a bit of a fiasco.
1, the resin was too hard and didnt conform to the mirror surface after 12 hours.
2, the interface between the resin and the plaster tool started weeping and dribbling down the side.
Making a new ply tool base. I wont seal it with anything as I think (but dont know) that the sealant on the plaster may have still had sufficient volatiles left to soften the resin at the bond.
Ive melted it off the tool and will re-pour with more caster oil in the hope I can get it soft enough to conform.
Fingers crossed.
In the mean time I'm reading up on a Bath Interferometer http://gr5.org/bath/ and may make one, I only need 1 lens as I have all the other items on hand.
More work.
- Joined
- May 16, 2016
- Messages
- 1,700
Hi Charles, the trials and tribulations of your project. I'm not familiar with the process of using resin and castor oil, but I'm guessing that it sets after it has conformed to the profile of the lens. Would you be able to spread a sheet of cling film over the lens and then pour the plaster onto that and it would harden with the correct profile.
- Joined
- Aug 22, 2012
- Messages
- 4,121
Its a mystical art form Bob, the resin or pitch remains a liquid albeit very very stiff.
If left alone it should flow, again, very very slowly like over months.
The plaster was to be the substrate for the resin, this time I'm using plywood.
I didnt have sufficient caster oil to allow the cold resin to flow so I'm adding more with a more vigorous testing regime before I pour it.
The channels and scratches in the face of the resin was supposed to allow it to flow and conform easier but it was too stiff.
I could have warmed it to let it flow easier but then it wouldnt re-conform as it polished.
This stuff sticks to cling film like the proverbial to a blanket.
- Joined
- Sep 10, 2022
- Messages
- 930
I found pouring the laps to be a hit or miss situation. A small window for optimal forming then putting the grooves in and re-setting the lap to the mirror. I have used various sub straights. Plaster, the grinding tool most of the time. Have even used 40 lb modeling board for the 17” mirror. I did that to save weight as I did all work by hand.
Patients is required for this step for sure.
Patients is required for this step for sure.
- Joined
- Aug 22, 2012
- Messages
- 4,121
The rabbit hole is open.
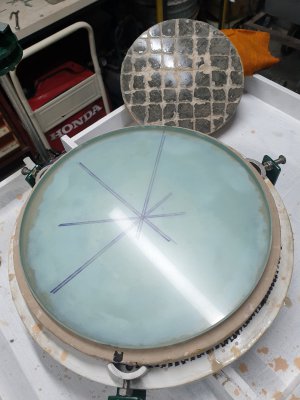
I remade the lap with softer compound and all seems well so far.
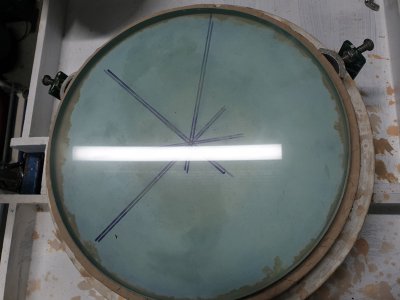
Polishing has started, 2 hours and a reflection is seen.
I'm using a high grade cerium oxide.
I feel it is a little shinier at the edge that the centre but I haven't measured it yet.

the sharpie marks are on the back of the glass
I remade the lap with softer compound and all seems well so far.
Polishing has started, 2 hours and a reflection is seen.
I'm using a high grade cerium oxide.
I feel it is a little shinier at the edge that the centre but I haven't measured it yet.

the sharpie marks are on the back of the glass
- Joined
- Aug 22, 2012
- Messages
- 4,121
Now at 4 hours polishing and the reflection is much sharper

But there are now a few scratches showing up.
I'm really hoping they are left over from the grinding, they are very fine and dont show up in the photo.
If the polishing lap has 1 teenie weanie bit of grinding grit I will have to scrap it.
My fingers are crossed they will polish out and not get worse.

