Started my lathe dro install

oogenshire

Registered
Registered
Joined
Jul 22, 2022
Messages
76
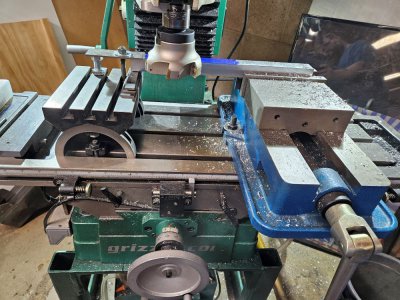
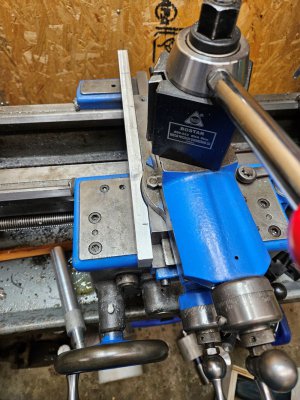
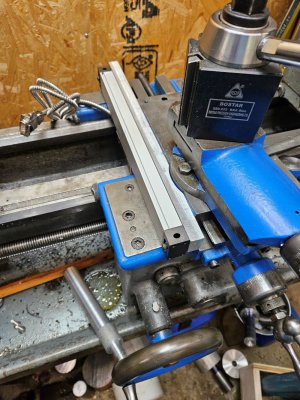
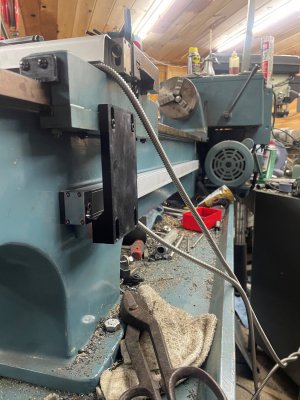
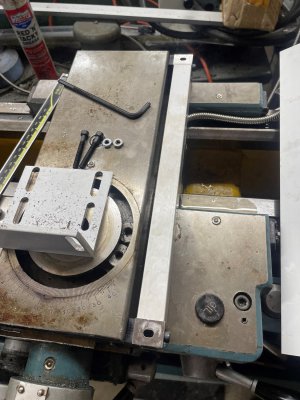
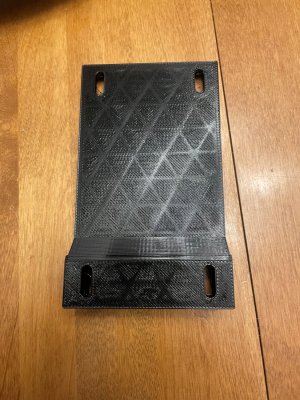
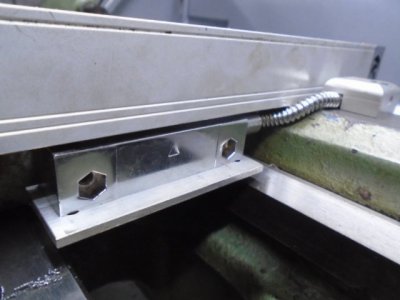
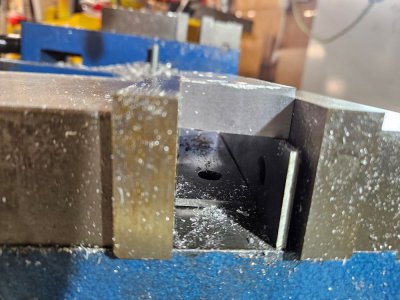
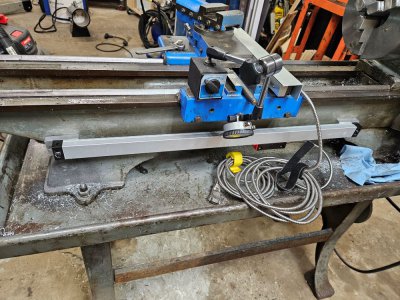
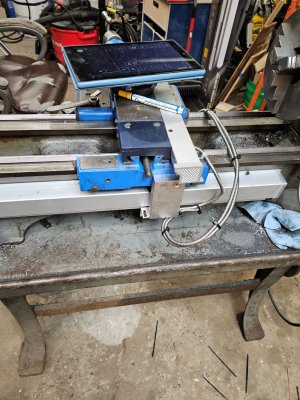
have a atlas clausing 4803 12x36 inch lathe, finally starting to make the adapter parts to mount the scales, todays project was the spacer for the cross slide, had 2 different setups for it this was to notch for the bulge that the compound makes in the cross slide, 4" diameter notch used a 4 inch diameter shell mill. second setup was to cut the 5 degree draft angle onto the aluminum spacer, i apparantly did not get a picture of this setup but basically just turned the angle table sideways and set it at 5 degrees with a ball ended jack holding the far end. later i will drill my 4 1/4-20 pass throughs in it and then drill and tap the cross slide to match, .... wish i was farther along this journey lol
 

Attachments

  • mill setuf for dro.jpg
    mill setuf for dro.jpg
    175.6 KB · Views: 40
Looks good so far! Please post more pictures!
 
got a bit more done today, have the scale mounted to the cross slide and the sensor mounted to the apron... this was interesting to say the least. put it on and back off way too many times lol. next thing is to lift the lathe out away from the wall so that i can see what i need to do to get the long scale mounted. after that i need to make a new block to cover the end of the cross slide lead screw since the factory cover is offset just enough that i cannot use it with the scale in place... i do have a pic of the very modified cover for the scale in place but did not transfer it from my phone.... any tips on routing the cable for the cross slide scale? its something im going to have to play with a bit i think
 

Attachments

  • dro 3.jpg
    dro 3.jpg
    277.7 KB · Views: 27
  • dro install 2.jpg
    dro install 2.jpg
    276.9 KB · Views: 26
Just finished putting the scales on mine after 6 years of owning the lathe. Out of curiosity why the scale on the left side? I figured when I installed mine on the right there was going to be a little give and take and I gave up about an 1" of tailstock usage. I printed some little standoffs that fit nicely into oval on the end of the scales. And I did not like the look of the brackets that came with the scale and 3d printed this bracket. Its made out of PETG so a bit more oil resistant than other plastics and made sure the infill pattern looked like it would not warp or bend when fastened down.
 

Attachments

  • crossslide1.jpg
    crossslide1.jpg
    290.1 KB · Views: 22
  • crossslide2.jpg
    crossslide2.jpg
    305.5 KB · Views: 22
  • crossslide3.jpg
    crossslide3.jpg
    449.2 KB · Views: 21
This ius what I did to route my cross feed cable.

The threaded hole was already there from the PO so I used it for the cable holder.
 

Attachments

  • Reader base.JPG
    Reader base.JPG
    39.9 KB · Views: 16
  • DRO Cable Clamp.JPG
    DRO Cable Clamp.JPG
    36.3 KB · Views: 15
Forgot to mention, I did lose my table lock and my cross slide lock. I'll have to get creative and figure out other ways of locking both of those down. I can always swap the scale to the other side I guess, if they are going to be used.
 
got a bit more done today, have the scale mounted to the cross slide and the sensor mounted to the apron... this was interesting to say the least. put it on and back off way too many times lol. next thing is to lift the lathe out away from the wall so that i can see what i need to do to get the long scale mounted. after that i need to make a new block to cover the end of the cross slide lead screw since the factory cover is offset just enough that i cannot use it with the scale in place... i do have a pic of the very modified cover for the scale in place but did not transfer it from my phone.... any tips on routing the cable for the cross slide scale? its something im going to have to play with a bit i think
i put it on the left side so i wouldnt have to remove the scale to adjust the gib and i also dont lose access to the cross slide lock. i think im going to put some of that accordion material from the head stock to the cross slide to give a little more protection to the scale. but honestly having finally gotten the scale bolted down and in place im really glad i didnt place it over the gib screws
 
This ius what I did to route my cross feed cable.

The threaded hole was already there from the PO so I used it for the cable holder.
i like that cable clamp, i had a threaded hole there but its under the scale now lol... nothing stopping me from drilling and tapping another tho
 
Ahh so your gib is adjusted by screws on the face of the cross slide, mine are adjusted on the ends, using a push pull system. Still need to find a better way to lock. I might just do a brass screw 1/4-20 through the top maybe something that would put pressure on the gib into the dovetail.
 
ok got the spacer blocks machined and mounted. bolted the scale on and checked alignment with dial indicator, and got lazy when it came to the down block attaching the reader to the apron.... then i machined up a delrin cover for the end of the crosslide to replace the original piece because it was off enough that it wouldnt bolt on. delrin might have killed my woodworking band saw... ended up hacking the chunk off the block with a sawsall, slowly... it machined nicely tho....
a little calibration and i think its about ready to roll, next project is a backsplash
 

Attachments

  • spacer blocks.jpg
    spacer blocks.jpg
    137.1 KB · Views: 15
  • scale mounted.jpg
    scale mounted.jpg
    197 KB · Views: 15
  • scale complete.jpg
    scale complete.jpg
    330.2 KB · Views: 16
Back
Top