South Bend Mill spindle bearings

piper184

Registered
Registered
Joined
Dec 16, 2021
Messages
209
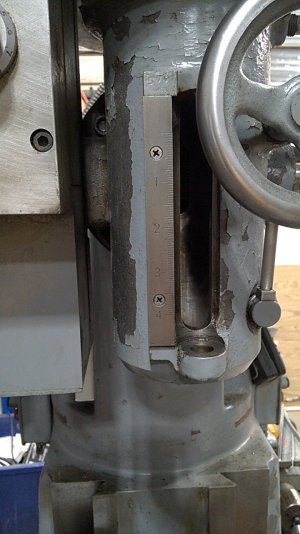
Finally got the mill on caster/feet and moved into place. Got power run to it and have been going through the manual, cleaning and lubing and testing.
Put an optical tachometer on it and found the VFD calculated RPMs to be pretty darned close. Moved the belts up into high range and tested there as well. Still pretty close, runs just a few RPM faster than stated on the belt chart, which is only approximate anyway.

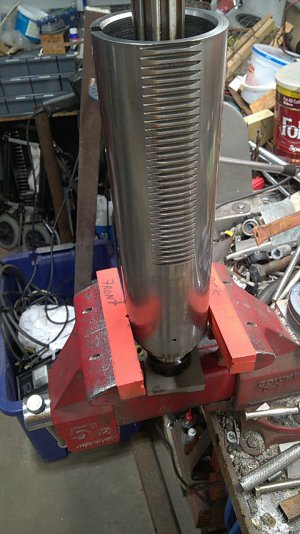
But after running for 10 minutes at full speed the spindle was getting hot. I could hang onto it, but could tell that something was wrong. I had topped off the oil as specified and let the oil drip out of the drain hole. However it looked much darker than the new oil (Velocite #10) going in. The manual states that too much oil can cause over heating. I figured out a way to "flush" by overfilling, spinning up for a minute and then draining the excess. Did this until it started looking mostly like the new oil.

Waited for everything to cool down and drain as per the book, then did another 10 minute test. Same thing, gets hot.

Looking at the captured excess fluid I can see little sparkles in it, and they respond to a magnet. So one or more bearings is making metal. :(

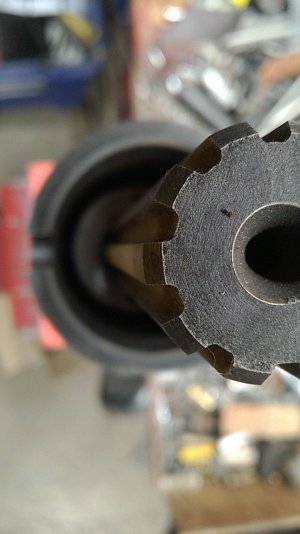
The parts book shows the bearings and the original Timken numbers (YAY!). And a number for the seal so I have info to take to the bearing house.

My big question is how does one go about replacing the bearings? It would appear that you take the quill feed apart and the quill should drop out of the bottom end of the head. Does anyone know if that is correct? BTW, this machine has the power down feed on the head although the rest of it is missing. That does not look too complicated, but I have no experience with this level of maintenance.

Has anyone ever seen a service or repair manual for these machines?

Any help, hints, or suggestions are appreciated. Even old wives tales or bearing fishing stories. :)

Thanks,

Stuart
 
Yup, that's the document I found. An exploded view is better than nothing.

It will probably turn out to be one of those things where you just have to start taking things off until you get to where you are going. Fortunately this machine does not appear to be rusted so I shouldn't have to use excessive force on anything. Lots of pictures will be the order of the day.

The spindle turns easy and smooth by hand and makes no noise under power so this was a little surprising. It looks like the adjusting nut is used to set the pre-load on the tapered bearings and there is a chance it is just too tight. But with the metal flakes in the oil, it is probably too late. It would be nice to know exactly how that pre-load is to be set. Wheel bearings are my only reference in that regard.

Make sure to take loads and loads of pictures. To help you and others at a future date.

Best of luck! Keep us posted please.


Cutting oil is my blood.
 
Good news, bad news kinda thing.

After studying the parts diagrams I still could not tell if the quill pinion gear need to come out to release the quill. If it did it meant the head had to come off the ram. There was just no way to tell if the quill rack teeth are cut all the way to the top of the quill. You couldn't see any of them with the quill extended all the way down.

An experiment was in order. Ran the quill down the full 4" and it stopped against the depth stop as it should. Removed the screw and adjuster nuts and the quill went down a little farther until the quill stop hit the bottom of the slot. Removed the quill stop and put a rubber pad on the table and ran the knee up all the way. Then ran the quill down until it was on the pad and slowly lowered the knee and the quill at the same time. The quill came completely free from the pinion gear and was resting on the table. EASY!

Pulled the whole thing out and got it on the workbench. Quill looks great. Spines on the spindle look great. Turning the spindle by hand you can't feel anything but you can hear the bearings turning. I guess that is to be expected considering they are just coated with a light film of very thin spindle oil. I can't figure how a bearing like this is supposed to operate a whole day with no more than a couple of drops of light oil applied to the top bearing then expect it to run down and lube the lower bearing too.

The adjusting nut is way down inside and I am going to have to make a custom hollow socket with two pins in it to be able to grab that nut. In any case I have no idea how tight it is supposed to be. I can feel zero end play in the spindle and it spins freely so my guess it the adjustment is correct as it sits.

Looking down on the top bearing I can see what appears to be a little surface rust inside the quill and perhaps on the lip of the bearing race. Really hard to tell. I did drain out the rest of the oil out of the drain hole to insure there is no extra oil.

To put it back together it was just pretty much the reverse. The quill is a fairly tight fit to the head so it is a little fiddly to get it in proper alignment as you raise the knee. Then of course you have to get it past the lock dogs and then grab the pinion gear at the right spot. Once that has caught though you don't need the knee and can use the feed handle. Then comes getting the splines back in the drive socket.

I needed 3 hands to rock the spindle, drive pulley and turn handle at the same time. Found the solution to that was to use the spindle lock to hold the pulley and then had two hand to run the quill and the rock the spindle at the same time. Slipped right in!

Ran the spindle up to full speed and after 3 or 4 minutes it was starting to get warm. However it will apparently run a long time at half speed and not overheat. I will add a couple of drops of fresh oil as per the instructions again tomorrow and do some testing to see what speed seems to trigger the heat.

I suspect that the lower bearing it just starting to fail but it may last a really long time with no more use than it is likely to get from me. A little online shopping shows that the lower bearing is easily available at about $75 for the cup and cone but the upper bearing is rather rare and could easily cost as much as $300 to get real Timken. :(
 

Attachments

  • WP_20230724_17_06_53_Pro.jpg
    WP_20230724_17_06_53_Pro.jpg
    184.3 KB · Views: 2
  • WP_20230724_17_07_21_Pro.jpg
    WP_20230724_17_07_21_Pro.jpg
    204.7 KB · Views: 2
  • WP_20230724_17_07_30_Pro.jpg
    WP_20230724_17_07_30_Pro.jpg
    155.1 KB · Views: 2
Back
Top