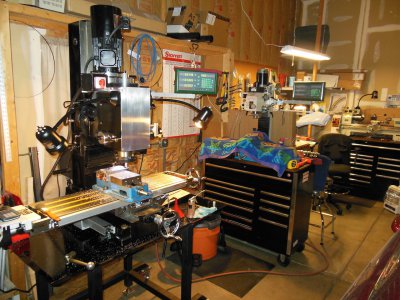
Setup and Continuing Saga of the Charter Oak 12Z

I honestly don't know. After removal of the spindle oil seal and it's housing, you can see the top spindle bearing and preload nut. But I didn't really look at it to see what it would take to go any further. I don't know if you could remove the spindle from the quill without removing it from the head first or not. Once you get all the gears out of the head there really isn't anything else in there except the quill/spindle assy. :)

Oh, and I screwed up the original height number. I was measuring from the bottom of the top plate to the bottom of the motor plate. The original top plate looks to also be about 1" thick, so I would guesstimate that the overall net gain in height is more like 3", not 4". Sorry.
 
Last edited:
Thanks for the quick reply. Also I am happy to know its 3" and not 4" as I have a height constraint and could use every inch. I live about an hour away from CO and could always have them swap the bearings.

I honestly don't know. After removal of the spindle oil seal and it's housing, you can see the top spindle bearing and preload nut. But I didn't really look at it to see what it would take to go any further. I don't know if you could remove the spindle from the quill without removing it from the head first or not. Once you get all the gears out of the head there really isn't anything else in there except the quill/spindle assy. :)

Oh, and I screwed up the original height number. I was measuring from the bottom of the top plate to the bottom of the motor plate. The original top plate looks to also be about 1" thick, so I would guesstimate that the overall net gain in height is more lie 3", not 4". Sorry.
 
They put my upgraded bearings in when they did the 3hp motor install. Probably because it's a 3600 rpm motor and the stock one is 1800.

Keep in mind that unless you are using really tall fixturing or working on really big parts the motor is likely to not go much over the top of the column. I spend most of my time working down on a 5" vise and seldom get the head very high on the column. But you have to put it up there at least once, just to see what all that Z-axis travel looks like. :)

My friend's BP clone didn't have this much travel in Z. Pretty certain I won't be using all of this any time soon, unless I'm decking a small v-8 block or something.
 
looks great, only thing you have to do is engrave the front plate now .
 
looks great, only thing you have to do is engrave the front plate now .

If you want a ultra cool front plate the company to contact is Front Panel Express here in Washington State. You can order a precision CNC machined front panel drilled, machined, engraved in a variety of thicknesses. Materials include and anodized aluminum in a variety of colors, powder coated, Acrylic, plus they will infill the engraving with contrasting colors.

No wait, it gets cooler. They developed their own easy to use CAD software you can download for free to design your panel. The damn quoting for price and ordering is built in, as a software engineer let me tell you this is pretty cool stuff. Its not Mastercam or anything but they really make this easy.

http://www.frontpanelexpress.com/

panel.jpg

panel.jpg
 
Ok, so a friend here is threatening to embarrass me if I don't report on how this new belt drive actually works (probably don't need to mention his name... ;)

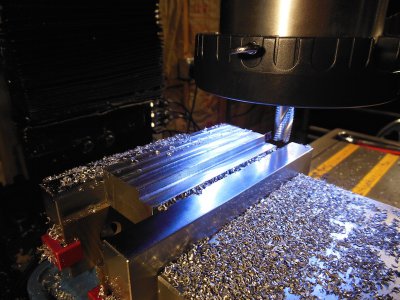
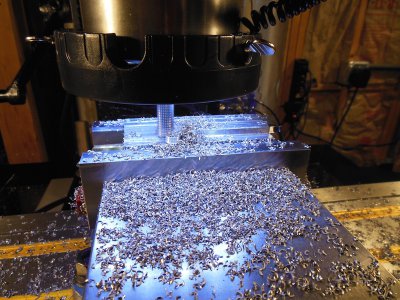
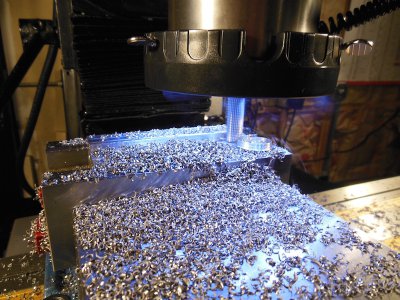
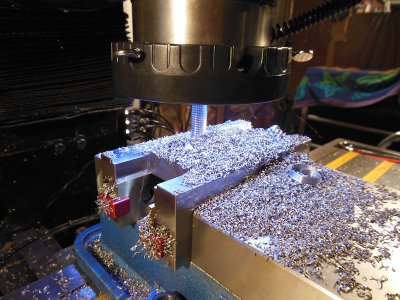
So I clamped a piece of HRS I had laying around and took a 50 thou swipe. Not even sure the mill knew it was cutting anything. My apologies everyone, as I've gotten used to using smaller machines over the last decade and am used to the machine being the limiter of my cuts instead of the material and cutter.

So I took a .25 DOC full-width pass with a 1/2" fine carbide rougher at a fairly moderate pace on the power feed. I think El Hefe knew he was cutting something, but it barely registered. Chips were coming out a little blue so I backed off the spindle speed and the feed rate a bit and the mill just hummed along smooth as butter. No muss, no fuss. And hardly any noise at all. This thing is almost TOO quiet.

I am going to go through a phase here where I am going to toast a few cutters here and there, as I am not used to having a machine that can overpower a cutter in very short order. (prior to the belt change I took a 3/8" carbide rougher and buried it full depth in 1" thick steel like I was profiling a piece of wood on a jigsaw. Dark blue chips, and could have used a bit of coolant to protect the cutter, but the mill wasn't even straining a bit. I'm really liking this mill...)

So anyway, here's a few 'action shots' to appease Charles (oops...) :rofl:

DSCN4303.JPG
DSCN4304.JPG
DSCN4305.JPG
DSCN4306.JPG

Here's a quartering shot of El Hefe wearing his new belt drive. I think he looks pretty good. But then I'm probably biased a bit.

DSCN4302.JPG

I need to come clean on something though: I screwed up the reinstall of the electrical somehow (well...I know what I did, just not sure how). The motor now spins opposite of what it used to. So...I promptly ruined a brand new 1/2" carbide end mill before I realized what had happened. :angry: Lets just say there were plenty of 'bad words' flying around the shop for a bit as I examined three chipped flutes out of four.

But rather than ruin the moment, I just put the fwd/rev switch in reverse and took the cuts and pictures. But after stopping and starting the machine a few times I decided I liked the fact that you turn the switch clockwise to get the motor spinning clockwise and counterclockwise to spin the motor counterclockwise. So I took a sharpie and lined out the words 'Forward' and 'Reverse' on the switch and put a big 'F' and 'R' in the top corners of the switch label. It just makes sense to me this way (OK, I'm left-handed/right-brained but so what...) Those of you who are machine purists can gasp if you want but I'm going to leave it like this. :lmao:

Nobody's perfect. Least of all me.

DSCN4303.JPG DSCN4304.JPG DSCN4305.JPG DSCN4306.JPG DSCN4302.JPG
 
AWESOME FEEDBACK!

Ok, so a friend here is threatening to embarrass me if I don't report on how this new belt drive actually works (probably don't need to mention his name... ;)

So I clamped a piece of HRS I had laying around and took a 50 thou swipe. Not even sure the mill knew it was cutting anything. My apologies everyone, as I've gotten used to using smaller machines over the last decade and am used to the machine being the limiter of my cuts instead of the material and cutter.

So I took a .25 DOC full-width pass with a 1/2" fine carbide rougher at a fairly moderate pace on the power feed. I think El Hefe knew he was cutting something, but it barely registered. Chips were coming out a little blue so I backed off the spindle speed and the feed rate a bit and the mill just hummed along smooth as butter. No muss, no fuss. And hardly any noise at all. This thing is almost TOO quiet.

I am going to go through a phase here where I am going to toast a few cutters here and there, as I am not used to having a machine that can overpower a cutter in very short order. (prior to the belt change I took a 3/8" carbide rougher and buried it full depth in 1" thick steel like I was profiling a piece of wood on a jigsaw. Dark blue chips, and could have used a bit of coolant to protect the cutter, but the mill wasn't even straining a bit. I'm really liking this mill...)

So anyway, here's a few 'action shots' to appease Charles (oops...) :rofl:

View attachment 93859
View attachment 93860
View attachment 93861
View attachment 93863

Here's a quartering shot of El Hefe wearing his new belt drive. I think he looks pretty good. But then I'm probably biased a bit.

View attachment 93864

I need to come clean on something though: I screwed up the reinstall of the electrical somehow (well...I know what I did, just not sure how). The motor now spins opposite of what it used to. So...I promptly ruined a brand new 1/2" carbide end mill before I realized what had happened. :angry: Lets just say there were plenty of 'bad words' flying around the shop for a bit as I examined three chipped flutes out of four.

But rather than ruin the moment, I just put the fwd/rev switch in reverse and took the cuts and pictures. But after stopping and starting the machine a few times I decided I liked the fact that you turn the switch clockwise to get the motor spinning clockwise and counterclockwise to spin the motor counterclockwise. So I took a sharpie and lined out the words 'Forward' and 'Reverse' on the switch and put a big 'F' and 'R' in the top corners of the switch label. It just makes sense to me this way (OK, I'm left-handed/right-brained but so what...) Those of you who are machine purists can gasp if you want but I'm going to leave it like this. :lmao:

Nobody's perfect. Least of all me.
 
Its nice to see it all working so well.

With smaller bits often you can talk just fine while milling.
 
Ok, now I'm not sure I did anything wrong when I re-connected the wiring. Looking at the front of the motor, there's a big red arrow indicating the direction of spin to be counter-clockwise (looking down on the motor). This is the normal direction of rotation when the fwd/off/rev switch is in the 'fwd' position.

But with the belt drive installed, a counter-clockwise spinning motor also has the spindle turning counter-clockwise which is the WRONG direction for a regular end mill. WTF?!?

When I gutted the head, I removed four shafts: one on the motor, two intermediate, and one on the spindle. So if the motor is spinning CCW, the spindle will spin CW given that arrangement.

Maybe I didn't wire the motor backwards... :thinking:

David?
 
Back
Top