- Joined
- Jan 9, 2013
- Messages
- 26
Hello Everyone,
I figured I'd kick-off a thread for setting up my acquired mini lathe which will essentially be the foundation of my hobby machining endeavors. While I intend to chronical the cleanup, light restoration work, and set-up in this thread, I'll have plenty of questions so I'll compile that all here. Who knows, perhaps another hobbyist will come along with the same lathe and can follow along my progress, lessons learned, and such! I briefly touched on my personal limited metalworking experience, but will start with a bit of overview of the lathe and where I'm starting from.
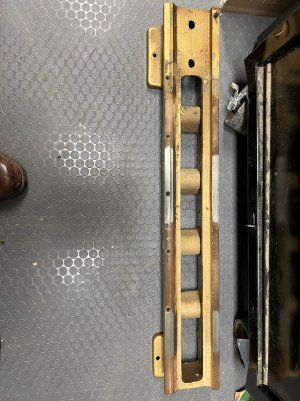
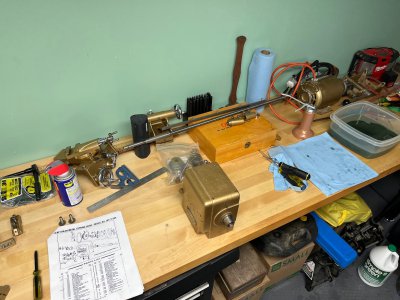
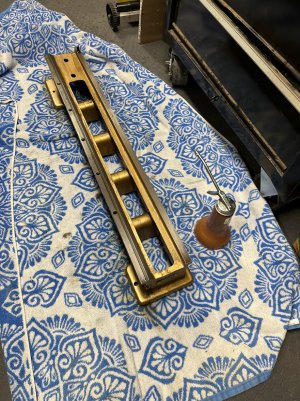
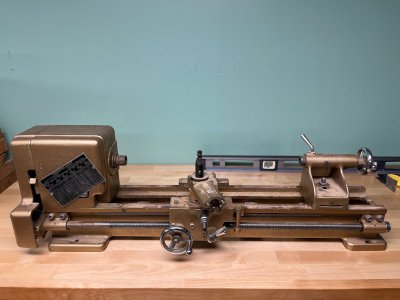
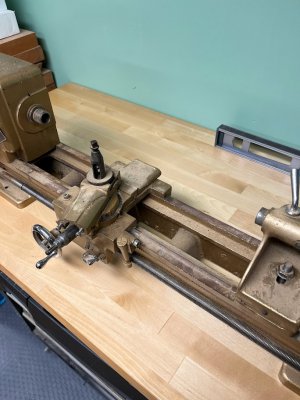
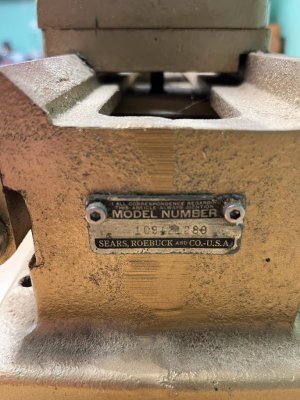
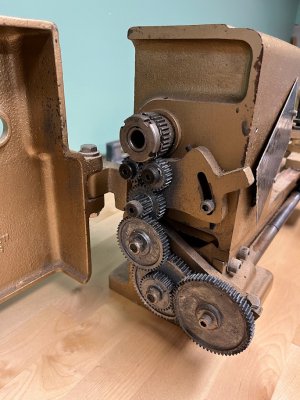
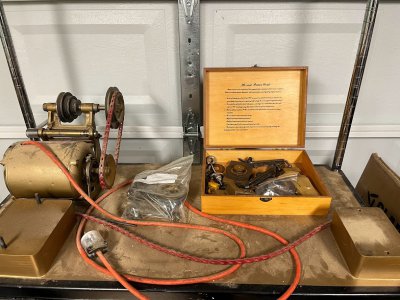
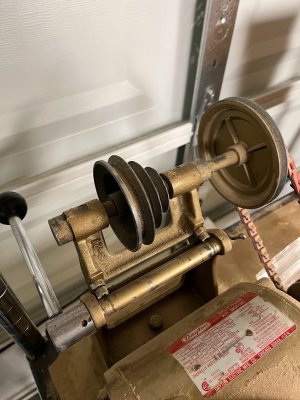
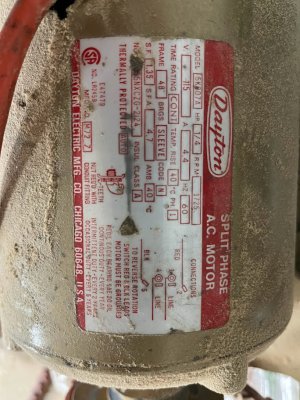
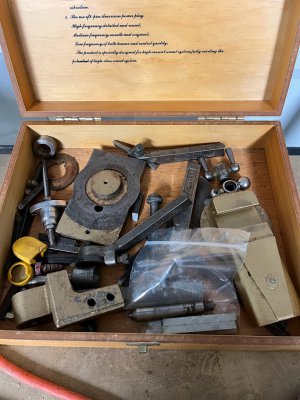
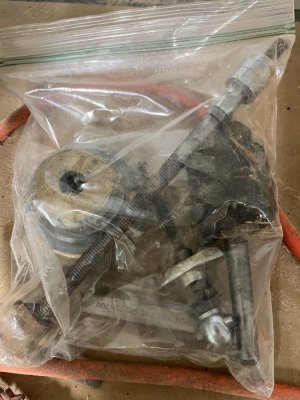
I acquired this lathe a few years ago from an old buddy of mine through a simple trade. He had two craftsman 6" lathes, one of them being an Atlas model, so he offered this one up to me in trade of a new motor for his other lathe. This lathe has been stored for a while, so there's a bit of dusty grime and surface rust on the ways that I'll need to address, but otherwise it seems to be in pretty good shape. I've not been able to find a ton of information about this lathe outside of the UK Lathes History website and a few forum posts. My buddy had built a wooden platform for this lathe and painted it gold to match. He had the lathe on riser blocks, so the drive belt would clear the motor housing mounted underneath. The motor is only 1/4 hp, which I'm sure is underpowered - so first question to the group: do you all think this motor will be fine, or should I just plan to get a new motor? I recall reading that the pulley is mounted directly to the motor, and the backgears allow for two speed settings, making this a six-speed lathe, but this one has a countershaft. I assume the countershaft isn't original to this model, but is a nice feature to aid in slower cutting speeds. The lathe came with a few bits and pieces, certainly not all the tooling, but a start and I'm certainly grateful for what I've received!
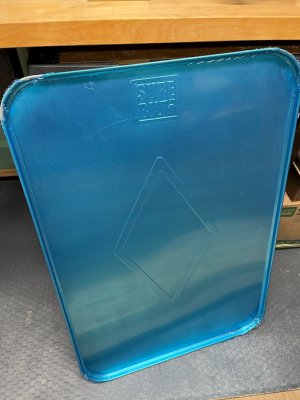
So on to the plans for setup! I have a small space - it's a single car garage, 12x20 and 74" clearance. While I'm still unboxing my tools and organizing my space still, the plan is to have almost half my space set-up for metalworking (including some welding and forging to come), and the other half of my space for woodworking, along with some space for other random stuff like detail work (models, fly-tying, etc.), random house projects, and whatever might come along in my future. I'd like to keep the main area clear and flexible for large projects, so my bench space will be limited to 2' deep along the three walls. I picked up a couple 8' workbenches to start setting up the one side of my shop, and one of these benches will be dedicated to the lathe and general metal work. I'll set-up a small metrology space on the adjacent bench which I'll call my "detail" bench. I'd like to ditch the wooden base that my buddy built, which was intended to fit a wire rack, and mount this lathe directly to the bench. I was looking at fabricating my own chip/drip tray as a little sheetmetal project, and sketched up some ideas and ran them through a sheetmetal worker colleague of mine, but then came across a drip tray the perfect size at the auto parts store! At only $13, this was a fraction of the cost of raw material, so it seemed perfect for me. I'll plan to mount the lathe over this on the end of the bench.
I like the arrangement of the countershaft, so I'll need to figure out a riser block situation, which leads me to the first real inquiry to the group. I thought about casting something in ZA, as I've been looking into making up a replacement crossfeed handle, but the blocks would likely exceed the capacity of the size of furnace/crucible I'll plan on procuring. I also thought about sending off to a foundry for grey iron, but my two concerns there are cost and machining them flat. I've also thought about wood and plastic as options too, assuming I pick a material with some density. I do have some beech for my upcoming woodworking bench build, so I could use that, but my two concerns there would be the wood fibers compressing and/or dimensional instability and sealing the wood from any oils. Arguably, this lathe will never be accurate enough to worry about it, but I'd like to set up the lathe as accurately as possible. So my last option that I've explored is some sort of plastic - either HDPE or ABS, as they seem to be the best options and relatively inexpensive. Perhaps an option I'm not considering is to reconfigure the motor so it's not interfering with the belt, but I like the idea of the motor mounted behind the headstock so it's not getting as much debris on it. What are everyone's thoughts? Am I overthinking this?
I'll attach some pictures to help everyone's imagination out! As I progress, photos will be taken of course.")
I figured I'd kick-off a thread for setting up my acquired mini lathe which will essentially be the foundation of my hobby machining endeavors. While I intend to chronical the cleanup, light restoration work, and set-up in this thread, I'll have plenty of questions so I'll compile that all here. Who knows, perhaps another hobbyist will come along with the same lathe and can follow along my progress, lessons learned, and such! I briefly touched on my personal limited metalworking experience, but will start with a bit of overview of the lathe and where I'm starting from.
I acquired this lathe a few years ago from an old buddy of mine through a simple trade. He had two craftsman 6" lathes, one of them being an Atlas model, so he offered this one up to me in trade of a new motor for his other lathe. This lathe has been stored for a while, so there's a bit of dusty grime and surface rust on the ways that I'll need to address, but otherwise it seems to be in pretty good shape. I've not been able to find a ton of information about this lathe outside of the UK Lathes History website and a few forum posts. My buddy had built a wooden platform for this lathe and painted it gold to match. He had the lathe on riser blocks, so the drive belt would clear the motor housing mounted underneath. The motor is only 1/4 hp, which I'm sure is underpowered - so first question to the group: do you all think this motor will be fine, or should I just plan to get a new motor? I recall reading that the pulley is mounted directly to the motor, and the backgears allow for two speed settings, making this a six-speed lathe, but this one has a countershaft. I assume the countershaft isn't original to this model, but is a nice feature to aid in slower cutting speeds. The lathe came with a few bits and pieces, certainly not all the tooling, but a start and I'm certainly grateful for what I've received!
So on to the plans for setup! I have a small space - it's a single car garage, 12x20 and 74" clearance. While I'm still unboxing my tools and organizing my space still, the plan is to have almost half my space set-up for metalworking (including some welding and forging to come), and the other half of my space for woodworking, along with some space for other random stuff like detail work (models, fly-tying, etc.), random house projects, and whatever might come along in my future. I'd like to keep the main area clear and flexible for large projects, so my bench space will be limited to 2' deep along the three walls. I picked up a couple 8' workbenches to start setting up the one side of my shop, and one of these benches will be dedicated to the lathe and general metal work. I'll set-up a small metrology space on the adjacent bench which I'll call my "detail" bench. I'd like to ditch the wooden base that my buddy built, which was intended to fit a wire rack, and mount this lathe directly to the bench. I was looking at fabricating my own chip/drip tray as a little sheetmetal project, and sketched up some ideas and ran them through a sheetmetal worker colleague of mine, but then came across a drip tray the perfect size at the auto parts store! At only $13, this was a fraction of the cost of raw material, so it seemed perfect for me. I'll plan to mount the lathe over this on the end of the bench.
I like the arrangement of the countershaft, so I'll need to figure out a riser block situation, which leads me to the first real inquiry to the group. I thought about casting something in ZA, as I've been looking into making up a replacement crossfeed handle, but the blocks would likely exceed the capacity of the size of furnace/crucible I'll plan on procuring. I also thought about sending off to a foundry for grey iron, but my two concerns there are cost and machining them flat. I've also thought about wood and plastic as options too, assuming I pick a material with some density. I do have some beech for my upcoming woodworking bench build, so I could use that, but my two concerns there would be the wood fibers compressing and/or dimensional instability and sealing the wood from any oils. Arguably, this lathe will never be accurate enough to worry about it, but I'd like to set up the lathe as accurately as possible. So my last option that I've explored is some sort of plastic - either HDPE or ABS, as they seem to be the best options and relatively inexpensive. Perhaps an option I'm not considering is to reconfigure the motor so it's not interfering with the belt, but I like the idea of the motor mounted behind the headstock so it's not getting as much debris on it. What are everyone's thoughts? Am I overthinking this?
I'll attach some pictures to help everyone's imagination out! As I progress, photos will be taken of course.
Attachments
-
 IMG_0483.jpg201.2 KB · Views: 45
 -
 IMG_0484.jpg156.8 KB · Views: 47
 -
 IMG_0485.jpg172 KB · Views: 38
 -
 IMG_0486.jpg178.2 KB · Views: 39
 -
 IMG_0487.jpg317.7 KB · Views: 36
 -
 IMG_0493.jpg168.4 KB · Views: 36
 -
 IMG_0491.jpg194.4 KB · Views: 35
 -
 IMG_0488.jpg179.3 KB · Views: 33
 -
 IMG_0489.jpg155.8 KB · Views: 29
 -
 IMG_0490.jpg133.5 KB · Views: 43