Restoration Of A Lathe Of Unknown Brand ( Completed)

Electrolysis is an excellent way to remove rust and paint, just be wary of its effects on non-ferrous metals, can eat into them!
For the anode I've had good results using carbon rods (I use arc gouging electrodes with all but an inch of the copper cladding (to solder wires to) removed using acid, they don't crud up like steel and the electrolyte stays a lot cleaner and more pleasant to have around :)
Whatever you do use, DON'T use.stainless, the yellow colour it causes in the tank is hexavalent chromium, carcinogenic, neurotoxic, liver-toxic and (legally) has to be disposed of by a licenced toxic waste handler...
 
Matas,
Nice progress.
The taper in your spindle is most likely factory, you will probably find that its a #1 to match your dead centre and you may have a #2 taper in your tailstock.
Plus 1 for using the electrolysis bath to remove your stubborn paint.
In your stuck handle you may find that it was held on originally by that small discoloured "bush" in the centre of the handle. Usually they are just a small nut with a screw slot to tighten them, but I dont see the slot? In any case it looks to me that someone has pinned that handle from the side. Because its not a through hole it may be a broken off screw. You might need to drill it out.
Any old plain steel works good for electro baths, just some thin strap is all I use. Make sure your electrical connections are out of the solution.

Cheers Phil
 
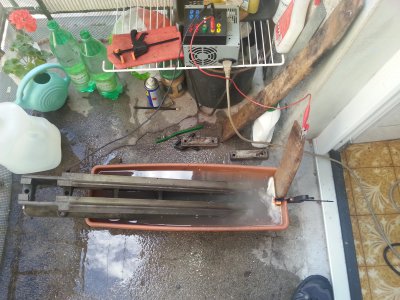
well my experiment with particle board utterly failed... i managed to puncture through both sheets of tough nylon with an edge of iron plate and that made waterproofing a bust...

so, this is current setup, because i didn't buy a bucket :/

20140705_164402.jpg

20140705_164402.jpg
 
well my experiment with particle board utterly failed... i managed to puncture through both sheets of tough nylon with an edge of iron plate and that made waterproofing a bust...

so, this is current setup, because i didn't buy a bucket :/

Take a piece of PVC pipe long and wide enough to keep you pieces, and two caps for it, then cut the top (hacksaw or angle grinder) and you'll have a perfect electrolysis pool… which can be converted into a nice flower pot after the use :biggrin:

If you plant hortensias, they love iron salts, so there is not even the need to clean the pipe :lmao:
 
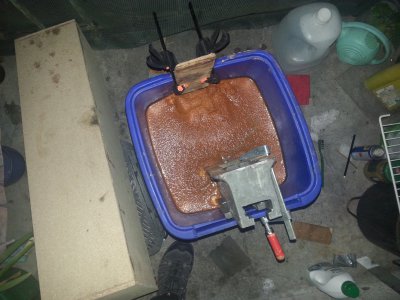
A bit of update.... after 12 hours in the dip

the bucket full of gunk
20140707_210351.jpg

the paint is mega-stubborn
20140708_014145.jpg

i had more success removing the paint after the dip with the cloth than with the scotch-brite type pad (both on the picture)

btw, I have some parts that have brass parts that i cant take out... like cross-slide nut, tailstock lock, etc... should i put those in the dip, or is it no way hose ?

20140707_210351.jpg 20140708_014145.jpg
 
As British Steel mentioned earlier in the thread, I would not put any non-ferrous metal in your electrolysis tank. I don't think brass would fare well mixed with iron or steel in a tank of electrolyte.

GG
 
I'd just try the current tool post as is for a while and see how you get on with it. QCTPs are convenient for sure, but it's not like you'll be making a living off this lathe :)

As for the paint, I've heard that electrolysis is very effective for removing stubborn paint. Might be worth a try, especially if you need to do the bed too.

I much prefer this style of tool post over a 4 way post..

i tend to leave the shimms stored with a tool once ive worked out the centre hight for it, makes it quite quick to pop them back in at the correct height.

Stuart
 
First of all, sorry for not posting my progress sooner, I've been on vacation, and when I came back, all hell broke lose.

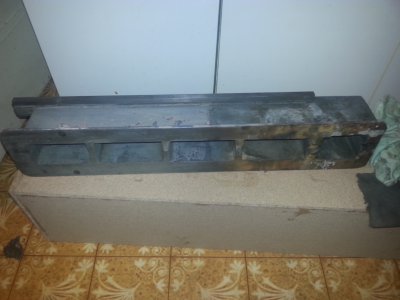
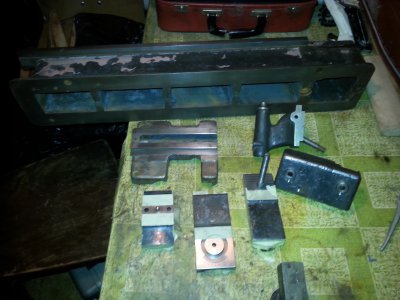
To get to the business, these are the results of electrolysis
20140905_133711.jpg

each part was submerged for 3 days, with once a day cleanup with high pressure hot shower.
as you can see the body is not fully clean of paint, but after six days of electrolysis and high powered car washer treatment, this is the paint that didn't budge. So i decided I'll let it stay.

Brush wheel has not been used at all. I already started masking of the parts for painting, when I realized I should put some status update here.

I'll post an update after I finish painting the parts. Unfortunately, the weather is crap right now, and I have to hand paint all of these, so it might take a while.

20140905_133711.jpg
 
Those threaded split bushes in your post number seven

Those little hexagonal screws down the hole are perhaps not just for lubrication, it could also be meant to spread the bush when it is nipped tight down on the bush So take care to put them back exactly as they came out ..

The tool clamp does indeed look like a Myford one .
I agree that the pin in the control handle is a pin in a blind hole ..if you want it out get someone with a sturdy drill press and quality drill press clamped down vice or a quality milling machine to drill it out for you for unless it is rock solid during the drill out you're like as not to run the hole to one side . ..but why do you really need to take it apart if nothing is worn or wrong with it? drill press

Other than that things are looking good


Are there any data plates on the motor .. pre about 1960 most European ( excluding British ones ) lathes would have had 110 or 220 volt motors & like as not be identified as so many Kwh for the rating rather than amps though the words ampere may occasionally show up on such a data plate

Old UK wiring earlier than about 1970 was red for live , black for neutral and green for earth .
Pictures of the motors capacitor would also give clues .

Re the paint.. Take care it most likely be a hazardous lead based paint , a standard decorators paint stripper should take it off or at least soften it for rubbing off. Don't go using powered wire brushes etc.. to take it off and create dust for you and others to breath in. Always wear impermeable rubber gloves etc. when rubbing or stripping it off . Shower well including hair and clean your finger nails after playing at removing the paint . Dispose of any gunge that comes off with care and not in a house or kitchen sink where food may be prepared.
 
And, I'm back after a high moisture season (aka. the winter).... didn't want to paint the lathe, cause I was worried the paint might bubble and fall off. In the meantime I finished my CNC machine.
This is the first test run, featuring a ball point pen and a Road Runner ;)
--------------------
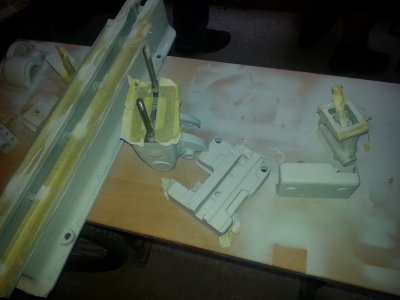
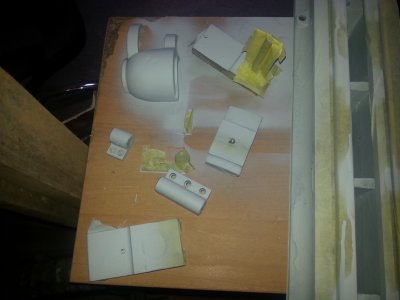
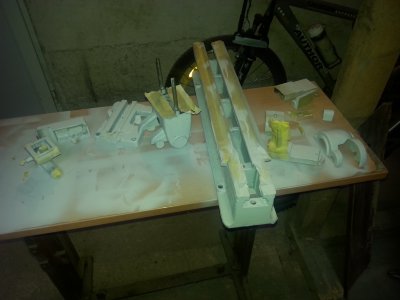
So, back to the lathe. Here I are the parts coated with two coats of gray primer from spray can.
I used masking tape to seal all the holes, and protect any surface that doesn't need painting. To trace the edges I just scraped around the edges using the blunt side of a utility knife.
It worked nicely even for round bends and such, as you can maybe see on the pictures
20150321_181717.jpg 20150321_181709.jpg 20150321_181634.jpg

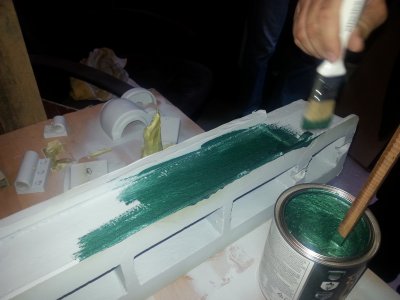
I used Hammerite green hammered effect paint, that I showed in an earlier post. I have to say I'm impressed.
It gives out no foul odors. The primer was acrylic, but it stank up the whole building.
Relatively quick drying, and a consistency of a honey. The guy at the store told me not to dilute it, just to shake it thoroughly and stir regularly.
I used a brush to apply it, and I didn't use much of the paint. It is relatively expensive, but you get a good bang for your buck.
I think, after I apply the second coat, I'll use the rest to paint the stand and the motor, and a friend's large vice
:D

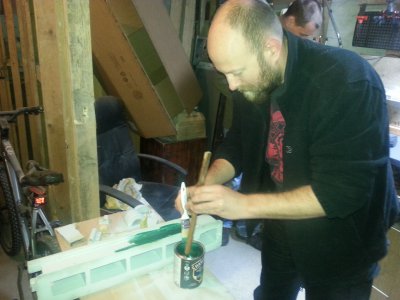
This is me applying the first coat:
20150321_182051.jpg

Check out that nice effect and the swirl in the bucket :)
20150321_182058.jpg
 
Back
Top