Rebuilding a Southbend 9" Model C Lathe - S/N 37193 NCR9 - Part 1.

Nammar

Active User
Registered
Joined
Dec 7, 2011
Messages
61
In 2007 I inherited a Southbend 9" Model C lathe from my uncle in Durban, South Africa. On receiving the machine at my home workshop in Walvis Bay, Namibia, I immediately set about restoring the lathe. I knew that I would be into this project for a while, but never realised that I would tax all of my experience as a marine engineer, to the limits.

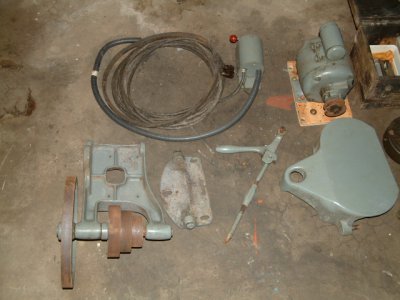
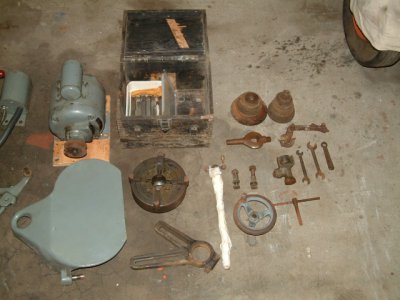
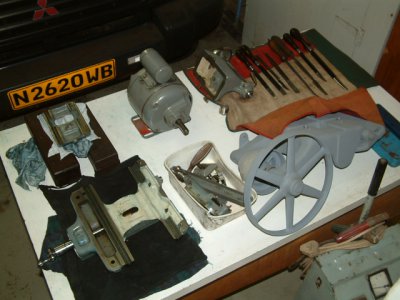
HISTORY: The serial number of this lathe is 37193 NCR9. From Tony Griffiths site I discovered that this SB lathe was manufactured in 1927. This lathe was originally purchased by the Durban technical training centre (now called the Technicon) to teach apprentices how to use a lathe and was bought by my uncle at an auction, after the second world war, in who's care this machine was until it followed me home. Here are some before pictures;
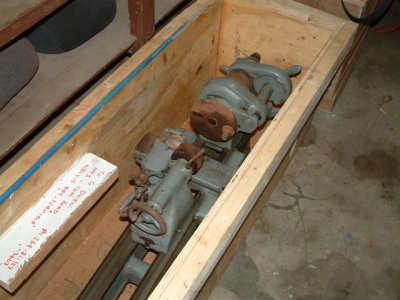
South Bend Lathe Rebuild (08).JPGSouth Bend Lathe Rebuild (09).JPGSouth Bend Lathe Rebuild (10).JPG

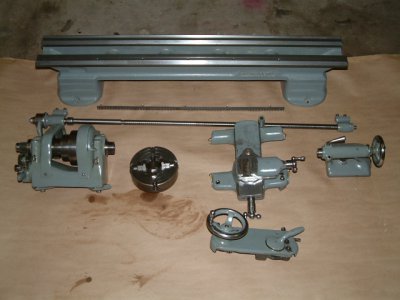
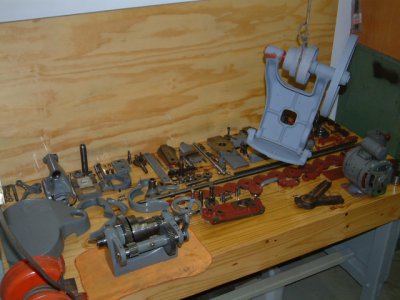
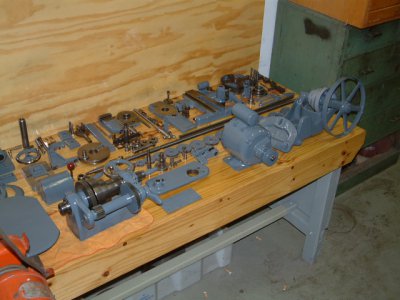
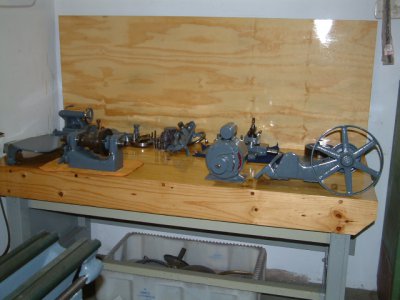
INITIAL REBUILD: I first unpacked the machine and lay all of the parts on my workshop floor. Over the time span of four weekends I progressivly stripped and cleaned all major component parts of the lathe and re-assembled them, leaving the lathe in it's major components, as I realised that some work was required on the lathe bed and mating slides. These photos show some cleaned and overhauled components;
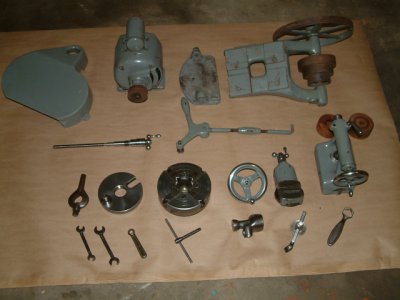
South Bend Lathe Rebuild (12).JPGSouth Bend Lathe Rebuild (27).JPG

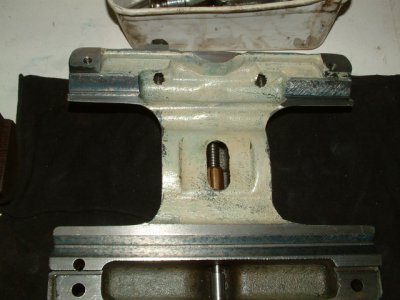
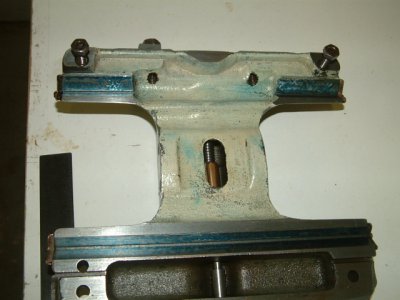
SCRAPING THE WAYS AND SLIDES: This is where the fun started. It took 6 months at two hours per day to re-scrape the bed and the slide ways. Little did I know how long it would take me to do. It was the first time that I had attempted to do this on a lathe. I've scraped in many white metal main, bottom end and cross-head bearings on low speed marine diesel engines, but cast iron, I learn't, was a different story. White metal is much softer than cast iron and your hands really take a beating from holding the hand scrapers over a period of time. Here are the photos of the lathe bed and slides, during the hand scraping process, showing my tools used to hand scrape the ways;
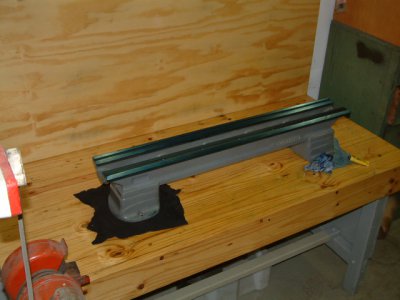
South Bend Lathe Rebuild (30).JPGSouth Bend Lathe Rebuild (32).JPG
Here are some close up photos of the tailstock and saddle slide bearing surfaces during the hand scraping operation;
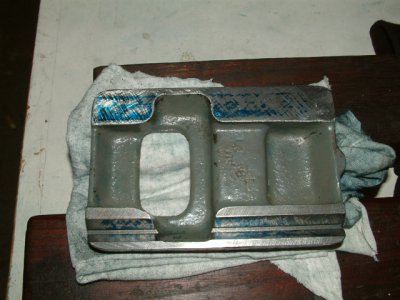
South Bend Lathe Rebuild (34).JPGSouth Bend Lathe Rebuild (35).JPG
Here are some photos of the finished tailstock and saddle slide bearing surfaces after hand scraping;
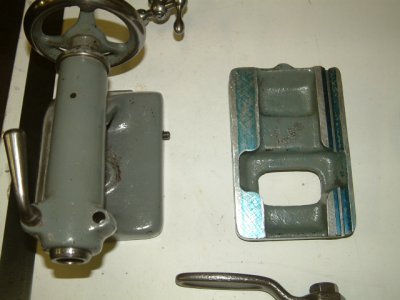
South Bend Lathe Rebuild (41).JPG

This post will be continued.

South Bend Lathe Rebuild (08).JPG South Bend Lathe Rebuild (09).JPG South Bend Lathe Rebuild (10).JPG South Bend Lathe Rebuild (12).JPG South Bend Lathe Rebuild (27).JPG South Bend Lathe Rebuild (30).JPG South Bend Lathe Rebuild (32).JPG South Bend Lathe Rebuild (34).JPG South Bend Lathe Rebuild (35).JPG South Bend Lathe Rebuild (41).JPG South Bend Lathe Rebuild (43).JPG
 
Rebuilding a Southbend 9" Model C Lathe - S/N 37193 NCR9 - Part 2.

This posting is continued on from part 1.

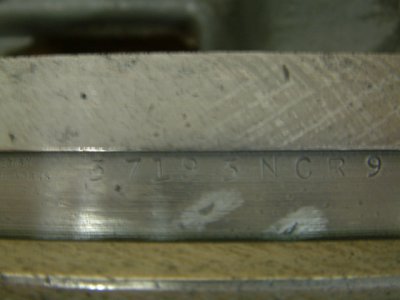
This photo shows the lathe serial number stamped onto the lathe bed;
South Bend Lathe Rebuild (53).JPG
Here are the before and after photos of the paint job, as things progressed over the weeks;
South Bend Lathe Rebuild (56).JPGSouth Bend Lathe Rebuild (57).JPG
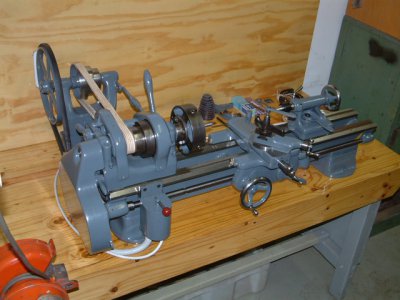
And lastly, the lathe partially and completely assembled, with the first chips flying;
South Bend Lathe Rebuild (65).JPGSouth Bend Lathe Rebuild (69).JPG

I managed to find a new gear banjo, some missing gears and a clapped out 3 jaw chuck from e-bay and have subsequently fitted a new Dixon type tool post, to simplify the changing of tools. The gear guard cover also still requires rebushing, as it flops around a bit and I still need to re-fix the thread cutting and feed gear plate and the lubrication plate onto the gear guard cover. The bench I salvaged by sanding and painting/varnishing and my intention is still to box in the machine to protect it from the harsh desert enviroment. While the machine looks good, I will also still have to do some tests to see how accurate the lathe is after the rebuild.

One thing that I have noticed is that only after about three hours of use, the lathe bed ways are starting to shine again, which indicates that the contact between the mating surfaces is good. I'm also looking for a length of "Chrome Tan" leather for the drive belt. An old timer once told me that the "Chrome Tanning" process was used to make the leather drive belts on early machines. This is hard to come by here in Africa but I'm in no hurry at the moment.

Enjoy, Geoffrey Owen.

South Bend Lathe Rebuild (53).JPG South Bend Lathe Rebuild (56).JPG South Bend Lathe Rebuild (57).JPG South Bend Lathe Rebuild (65).JPG South Bend Lathe Rebuild (69).JPG
 
very nice job, big pat on the back, old iron never dies its transformed:biggrin:
 
Re: Rebuilding a Southbend 9" Model C Lathe - S/N 37193 NCR9 - Part 2.

Nice work, Geoffrey.
 
Re: Rebuilding a Southbend 9" Model C Lathe - S/N 37193 NCR9 - Part 2.

Thanks Tony.

As a moderator, you may be able to combine the two postings into one posting, as the program started to play up during the post, when uploading photos.

Geoffrey.
 
Re: Rebuilding a Southbend 9" Model C Lathe - S/N 37193 NCR9 - Part 2.

As you wish.
 
but.... it`s not a 1927 - the addition of the letters in the serial came quite a bit later and started a whole new nunbering sequence.

not that it matters, it`s still a sweetie!


edit- seems to be a 1947 model

Dear 1200rpm, Thanks for the information. Do you know of a site that I could visit to research the year that my SB was built, other than Lathes.co.uk?

Thanks, Geoffrey Owen.
 
Dear Jonathan,

The original belt that came with the lathe was quite soft. I'v used this belt for a few hours but it broke about 1 inch away from the joining clasp. I've re-spliced, using wire clips and a pin and the belt is holding up with light cuts and taking things easy when parting off. I must admit that this is the first lathe I've used with a flat belt drive and don't have any experience with using leather to drive machines. I've only user rubber V belts to drive machinery.

I recall an old timer telling me that chrome tanning was used to tan flat belt drives, in the old days, but have found nothing on the internet about this. You may very well be right that the vegetable tanning process was used in the old days. I have seen a 1/4 inch thick by 6 inch wide drive belt used to drive machinery in Luderitz, where the oldest machine shop in Namibia is located. This machine shop was set up in 1900 and still has the single cylinder diesel engine, overhead belt drive shafts, four lathes, shaper, milling machine, drill press, plate roller, forging hammer and other machines all driven by flat leather belts and to top it off, the workshop is still in use today. The 3rd generation owner of this machine shop, now in his 70's, is a cool guy who loves to show interested people around his workshop. These leather belts were quite hard, but I presume that they are hard due to age.

I have not yet fallen over someone making leather drive belts here in Namibia. I was thinking of buying a leather belt to hold pants up and adapt this to drive my lathe, but If you will be able to help me locate a 40 inch long by 1 inch wide by +- 1/4 inch thick leather belt to drive my lathe, I'll be very happy. I like taking deep cuts when roughing! Please send me the suppliers address and contact details.

Best regards,

Geoffrey Owen.
 
Dear Mike,

Thanks for the SB serial No. file. From the site I see that my SB 9" was made around July 1955. One year older than his truly. :thinking:

Since I posted the pictures above, I have fitted a Dixon type quick change tool post, which makes life much easier. Last month I cut an 18" test bar and put it between centres. The difference between each machined end diameter was only 0.002". The tailstock is close enough for me. On a 6" test bar protruding from the chuck, the difference in diameters between each end machined was only 0.001". Again, close enough for me. I also ran a clock guage along the top of the 18"test bar length, between centres and found no change in diameter. There is however one thing still to adjust and that is the spindle bearings. The smoothness of the finished machined articles are not what I like. I don't detect any play in the spindle bearings, but something is causing the lathe to produce a thread like finish, without the mirror like shine I get from my 1970's Colechester Bantam. There are no noticible vibrations while taking a cut and all slides are firm and slide smoothly. It may be that I'm loosing my touch to sharpen a HSS tool by hand. :)) A nice lathe to work on.

Regards,

Geoffrey.
 
Back
Top