Hi Bob, I’m Mike. Yes, left hand threads take you by surprise the first time, but it makes sense since the normal rotation direction will keep that cap tight if anything rubs. I didn’t notice the plate in your original pictures, do you know why that was installed? I can certainly see it being helpful for putting an indicator base on, I often struggle getting it to firmly attach to the quill housing.
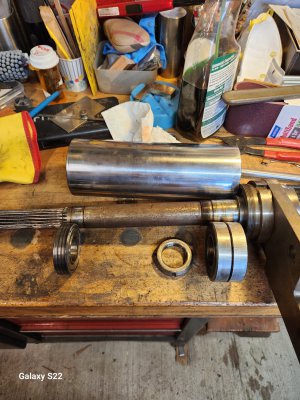
When you get it apart, check the bearing nut and make sure it is not loose, that could cause your chatter problems. You can actually check that without taking the spindle out of the quill through the hole in the backside. I had to replace the upper bearing, it was going bad, but the tapered bearings were fine, so I reused them. I didn’t want to spend $600+ at the time to replace them when they still looked good. The upper bearing was a standard precision bearing when I took it out, I am not sure if that one needs to be a higher precision class or not, I wasn’t able to find an answer to that when I replaced it, so I put a standard precision back in.


 .
.