Power knee feed for FTV-1

akjeff

H-M Supporter - Gold Member
H-M Supporter Gold Member
Joined
Aug 21, 2020
Messages
688
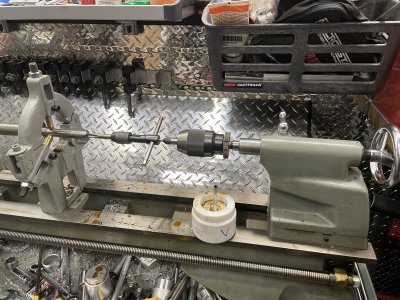
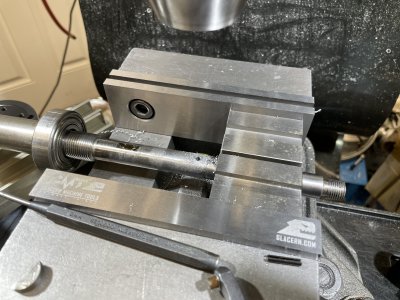
Got started on installing a Dynamo D1000-1580 power feed on the knee of the FTV-1. Not exactly a "bolt on installation". A big thanks to Jon at H&W. Appreciate the help over the phone identifying the Lagun unique parts and order of assembly! Gotta love Asian instructions converted to English! The main thing you need to be prepared to do, is removing the jack shaft, chuck it in the lathe, and drill and tap the end of it to thread in an extension. My headstock is too puny for the jack shaft, so I had to use the steady rest, and had just enough bed length to guide the tap! It's very important that they be as close to concentric as possible. They are then cross drilled and pinned together. At this stage, I would strongly suggest that you test fit the bevel gear while you still have it out, and in the lathe.......ask me how I know. The end of my jack shaft had been bubba'd, so I faced it off so it would butt squarely with the extension. Once they were pinned together, I had to polish out the bubba dings, and blend the two shafts together with abrasive cloth until the bevel gear was a snug slip fit.

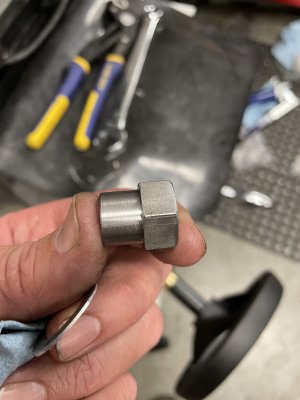
Got to the end of the assembly, only to find that the 1/2-20 nut that holds the handwheel in place was missing. So, now I need to make one. I've got some 1144 stock, and will get to it tomorrow. I ran out of patience at that point, and it was time to put the tools away. Should have it up and running tomorrow some time.
 
Not seeing it work was making me crazy, and went back out in the shop, chucked some 3/4" hex stock and made the nut for the hand crank.Works great, this is going to be an awesome luxury! Tomorrow I'll mount the limit stop switch, clean things up, and dress in the cabling.
IMG_8551.JPG
 
Thanks alot! You were the one who figured it out in the end, I just led ya down the right path.

That install wasn't very nice to you, was it? perhaps it knew you had made a pitcher of margaritas the night before and figured a second one would be better than making chips. :D

Jon
 
:grin: Servo/Dynamo could definitely spend a little money on a technical writer to tidy up the instructions. The assembled drawing that comes with it would be sufficient, if lines were such that you could tell one part from another. Not enough resolution. Still a happy camper, as it runs smooth and quiet, and doesn't sound like it's laboring at all to lift the knee. It's going to be a sweet addition! I like the jog function switch on it. That, along with the hand wheel will make it easy to fine tune the position.
 
Great job Bubba! LOL just kidding
Are we gonna get pictures of this contraption?
-Mark
 
Haha! Yep, I'll post a few after I get the limit switches installed, and tidy up the cables. Hope get to it later today.
 
Here's a thread on installing a Z-axis power feed on a Bridgeport. Mine was from All Industrial Tools and had pretty scant directions also. There's also a reference to a YouTube video that helped me some.

Bruce


Thanks for the link Bruce! Unfortunately, the parts that had me confused, are ones that come with a supplemental kit unique to Lagun's. Just found the limit switches were either wired or assembled backwards, and had to swap them. Not a big deal, but annoying as hell when you pay for name brand products. I also thought the track for the limit switch bumpers were kind of cheap POS's, so I made my own from some aluminum angle. Now that the frustration is over and it's operational, I love it! So damn convenient. After I get some household chores done, I hope to get motivated and take some photos and focus on the oddball Lagun portions of the install, in hopes of helping any fellow Lagun owners who may do this mod in the future.
 
Glad you got it going. My Bridgeport came with a 2-axis DRO. I bought a single axis DRO for the knee and quickly tired of doing around 150 cranks to move it up/down to tram the readout. Bought the Z-axis power feed and couldn't be more pleased.

Bruce
 
Got the knee drive in service, and thought I'd finish up by highlighting a few things unique to folks installing on on a Lagun mill. The drive is a Dynamo model D1000-1580. I'll break it into several posts, as there will be a number of photos.

The first thing you need to do( if like me your mill doubles as your drill press ) is set your table height so that you can cross drill a hole in end of your knees jack shaft.

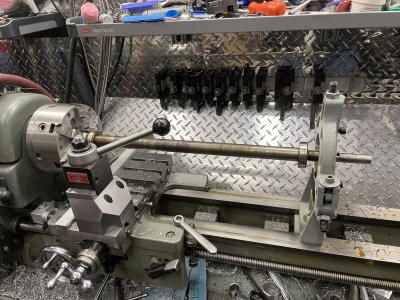
Once you've removed you jack shaft, it's a good time to clean and inspect it, the bevel gear, and the bearings. Then set it up in the lathe to drill and tap the end of the shaft 3/8"-24 to a depth of 13/16"( I had to use a steady rest, as my headstock hole is puny ). Very important to take care and drill it dead center, and give it a light facing cut so that the end is square. Now, thread in the shaft extension stub from the supplemental Lagun parts that come with the -1580 drive. Once you butt it up to the jack shaft, slide some key stock in the slot, slide your factory castle nut on, and use your hand crank to torque it down good and tight. Before I installed the stub, I center drilled the end, so that after I screwed in in the jack shaft I could support it with a live center and polish it up with fine paper.

While the assembly is in the lathe, it's a good time to check the fit of the brass bevel gear that will be going on it later. I had some bubba dings on the end of mine, where some nitwit smacked with something other than a soft mallet! Had to polish it with some paper until I had a nice snug slip fit.

Once you've got your bevel gear fitting properly, cross drill a 1/8" hole through both shafts in the middle of the threaded are, and drive in a roll pin. Smooth out the pinned hole if need be, double check the fit of the bevel gear, and put the jack shaft back in the knee.
IMG_8548.JPG
IMG_8549.JPG
IMG_8550.JPG
 
Back
Top