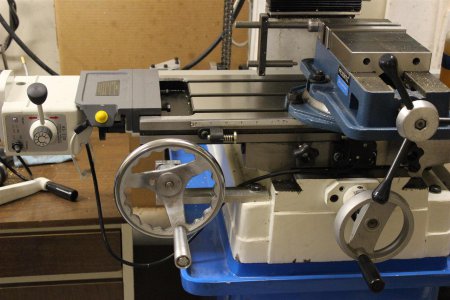
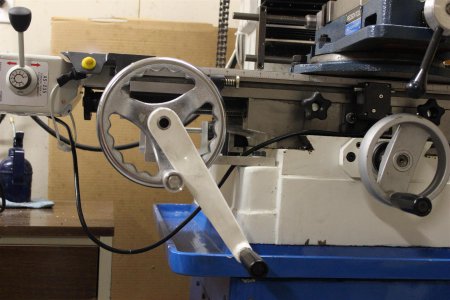
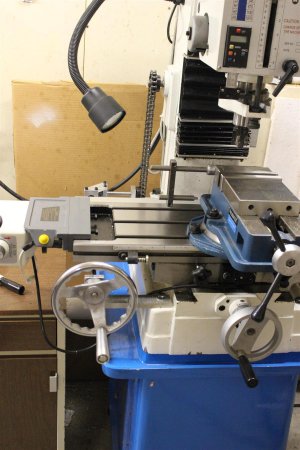
PM45 - Moving the head height crank to the front.

I finally made a handle for that wheel I mentioned in my first post. The wheel removes the limitations of the x-axis getting in the way.
It is just as easy to crank the head down, but I need two hands to crank it up. Hot that big of a deal since it's right in front of
you. It beats reaching across the table the crank at arms length.

In the last picture I put on the old handle to show just how much difference there is. A lot less leverage, but still works great!

Looks pretty cool also.

001 (Custom).JPG 002 (Custom).JPG


003 (Custom).JPG

001 (Custom).JPG 002 (Custom).JPG 003 (Custom).JPG
 
One thing I don't like about small mills is the adjustment for setting the height of the head is on the column on the back of the machine.
Very hard to reach and uncomfortable to crank. Also with my DRO on the opposite side of the machine it made it a stretching act to
read it while cranking.

I decided a long time ago that I was going to fix that. Here is the solution that I can up with. All it takes is some roller chain, two sprockets
and two miter gears for purchased parts.

The only limitation is the table can't be too far from the column or too far to the left. The crank will hit the table if it is. This is not that big a deal
since 90% of things are done with the table near the center of the spindle. If it is necessary to move the table out of the way it's well worth it.

I am working on a couple of improvements to remove this limitation though. I am also looking at using a wheel rather than the crank. I'm just not
sure about the leverage I will get on it.

Right no the crank is fixed with the same set screw that attaches it to the column. I was thing about add a couple of slots in it and a pin through
the shaft to allow you to re-clock it and turn it around like on a knee mill.

We shall see how these work out. If you would like prints and a parts list let me know and I will create them.

One good thing is that it doesn't require any modification at all to the mill and can be put back exactly like it was.

Gary

View attachment 51728 View attachment 51730

View attachment 51729 View attachment 51727


View attachment 51731 View attachment 51732


View attachment 51733

Good morning - Hey great work, plans for this would be great as I have the same mill and the same problem.

Thanks,
Woodrow
 
Here is a video showing the handle being used:

[video=youtube_share;OcfJtyQAsjU]http://youtu.be/OcfJtyQAsjU[/video]

The noises you hear are the following. The clicking is just the handle I made clicking on the mounting bolt,
and the rumble is the chain going around the sprocket. Perfectly normal.

Gary
 
Last edited:
Thanks Matt!


I thought I would guys you guys an update.

Now that I have used the handle for a couple of weeks I have to tell you that I don't dread raising and lowering the head anymore.
I used to try to plan out all my milling and drilling operations to minimize moving the head and now I don't.

With the smaller diameter handle it takes more effort to lift the head but it's right in front of your body and using both hands it a breeze.
It takes me 15 seconds to go from milling to drilling.

Moving the head down is nothing. Not much more than turning the X or Y axis wheel.

All in all I think it's one of the best improvements you can make.

Gary
 
Good morning - Hey do the base plates fit flush to the base of the mill. The reason that I ask is that if I use your measurement for the location of the hole for the base plate the is about a 1/4" gap between the base and the mill. This is my first project and it is turning out great.

Thanks,
Woodrow
 
Back
Top