-
Welcome back Guest! Did you know you can mentor other members here at H-M? If not, please check out our Relaunch of Hobby Machinist Mentoring Program!
You are using an out of date browser. It may not display this or other websites correctly.
You should upgrade or use an alternative browser.
You should upgrade or use an alternative browser.
PM Research #7 It Begins
- Thread starter Janderso
- Start date
- Joined
- Apr 14, 2014
- Messages
- 3,151
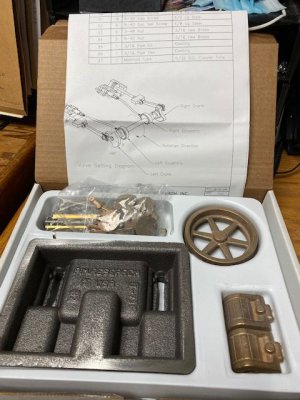
I would agree that they make some high quality kits. I purchased 4 of them (EL-1, MM1, BG1, and another I can't remember) from another member a few weeks ago. They were originally purchased by his father. Unfortunately his father passed away before he could build them. Also included was a 5th kit from Stuart out of great Brittan. This one is a governor assembly for a steam engine. It opened a whole new world of fastener threads. This particular one uses BSP thread pitches. Taps and dies for these size and style threads are a bit unusual in the US, and somewhat difficult to come by.
For now they're all sitting on the desk in the shop. They were intended to be projects for the winter months. However the way things are going I may be working on the outdoor projects until the snow gets deep enough I can't find them.
For now they're all sitting on the desk in the shop. They were intended to be projects for the winter months. However the way things are going I may be working on the outdoor projects until the snow gets deep enough I can't find them.
- Joined
- Aug 3, 2017
- Messages
- 2,437
Awesome! I loved doing my #3. I think the #7 is the same as the #3, except with 2 pistons (mirrored over the flywheel), so you might see my thread if you get stuck on anything.
Have fun, and I can't wait to see how you do!
Have fun, and I can't wait to see how you do!
- Joined
- Mar 26, 2018
- Messages
- 8,407
Thanks Erich,
Those of you that have done these models before know the tricks. I can see set-up/fixturing to hold the base is going to be interesting, but I think I have a method in mind.
I'm not use to working with brass or such small parts.
Looking forward to it.
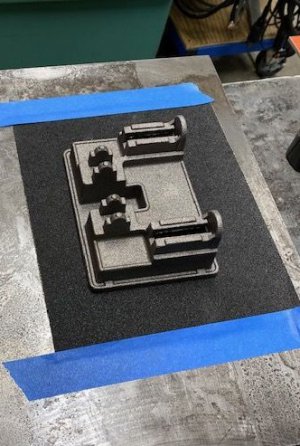
I began by spending a while familiarizing myself with the plans and making sure I have a solid base to work from.
I have an old cast iron surface plate I use that is pretty darn flat.
Those of you that have done these models before know the tricks. I can see set-up/fixturing to hold the base is going to be interesting, but I think I have a method in mind.
I'm not use to working with brass or such small parts.
Looking forward to it.
I began by spending a while familiarizing myself with the plans and making sure I have a solid base to work from.
I have an old cast iron surface plate
 I use that is pretty darn flat.
- Joined
- Aug 3, 2017
- Messages
- 2,437
I started by milling the base, but that works just as well! I would suggest doing as few setups as possible, thats where mistakes get introduced. I opted to not spot face the cylinder face or bearing caps, but side-milled them to make sure they were perpendicular. I ALSO did the slide bearing faces/clearance/etc in the same setup! I think the only other operation I ended up having was drilling the holes through.
Spend as much time as you can studying the plans to figure out how to do as few setups as you can, and I'm quite sure you'll have no problem
Spend as much time as you can studying the plans to figure out how to do as few setups as you can, and I'm quite sure you'll have no problem
- Joined
- Mar 26, 2018
- Messages
- 8,407
Good advice.
I watched Keith Appleton's videos on machining the cylinder vs. Mr. Pete.
I like the pilot mandrel in the tail stock to get the cylinder lined up in the 4 jaw, then boring the cyl. and facing one side. The other side is done on a mandrel not in the 4 jaw to avoid all the set up time. It appears to be a good way to assure concentricity to the bore/faces.
The base has opposed high corners. It's not much, I may just leave it as it is going to be mounted on a piece of oak anyway.
I'm all ears, you give good advice!!
- Joined
- Aug 3, 2017
- Messages
- 2,437
Well, getting the base flat makes setting up on the mill table WAY easier. I'd suggest going until its flat enough to not rock.
I think I used a boring head for the cylinder (never went to the lathe for it) since I wanted to drill the bolt-circle at the same time. For the cylinder, I did:
Face the inboard side, bore the cylinder and drill/ream the valve, drill the bolt circle.
Flip, face the outboard side. Use the coax indicator to center for the head bolt-circle, and drill the bolt circle.
From there, the only ops left were to drill the holes through the valve, and the angled holes, which each had to be done individually.
- Joined
- Mar 26, 2018
- Messages
- 8,407
Setting up the base for drilling and reaming for the crankshaft is tricky. I have the angle plates and yes, you are right, it has to be flat, I was going to mount it and make some checks. I saw Kieth use super glue. It worked for him.
I don't know yet.
I can't bore on my mill, I don't have a decent boring head. Saving for a good one. The Shars head is junk. Mine is anyway.
I don't know yet.
I can't bore on my mill, I don't have a decent boring head. Saving for a good one. The Shars head is junk. Mine is anyway.
- Joined
- Aug 3, 2017
- Messages
- 2,437
For the crankshaft, it was something pretty easy, like 3/8", right? So no need for a boring head. You should be able to drill/ream that reasonably easy, though you might need a long-ish drill bit (I didn't have the other side in the way, since I built the #3).
I'm not sure I understand the super glue idea though.
I'm not sure I understand the super glue idea though.
- Joined
- Mar 26, 2018
- Messages
- 8,407
He super glued a small angle plate to the base. I wouldn't have chosen to do it that way but the guy does good work.I'm not sure I understand the super glue idea though.
I think i'll drill out the crank journals with a 6" center drill, under size, then ream to .250".
I was looking through the diagrams this morning. The more I look, the more I gather a plan and understand what I need to accomplish.
I was watching a David Richards video this morning. Watching a full size steam engine helps me understand.


