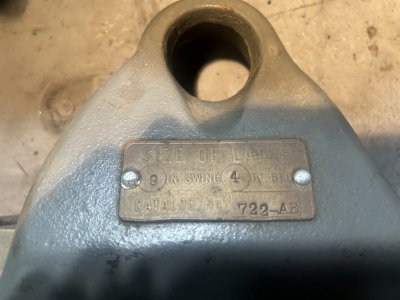
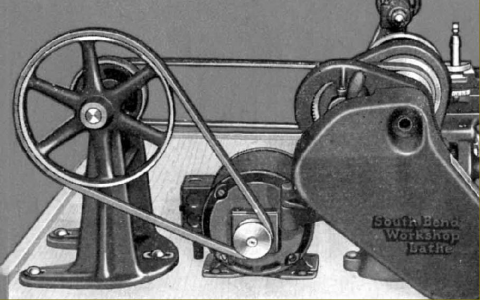
New to me 1927 9” junior

Stayxcalm

Registered
Registered
Joined
Mar 23, 2023
Messages
3
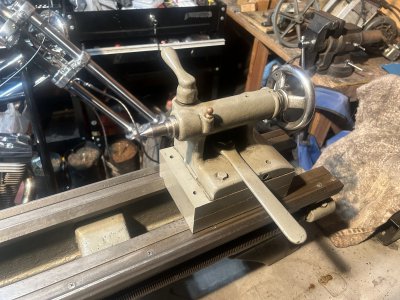
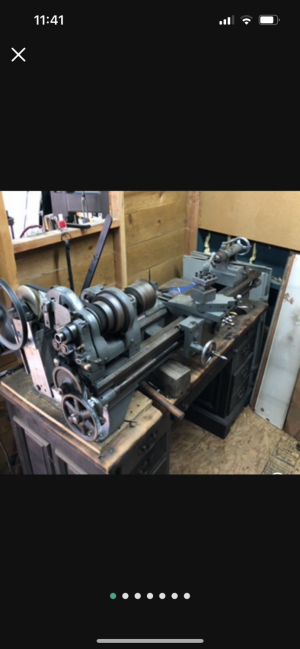
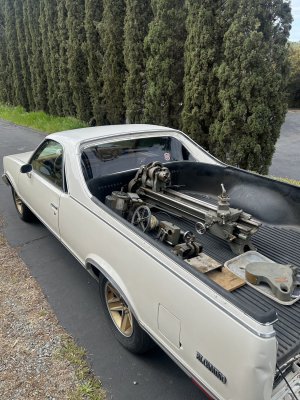
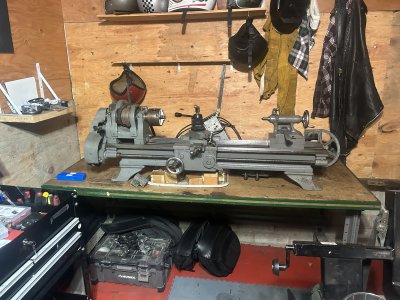
Hey everybody. Just picked up what I though was a southbend 9c… but after getting it home and doing some research it seems to be a 1927 9” junior. I have a handful of questions I can hopefully get answered. This is my first lathe and entry into machining, so go easy on me haha.

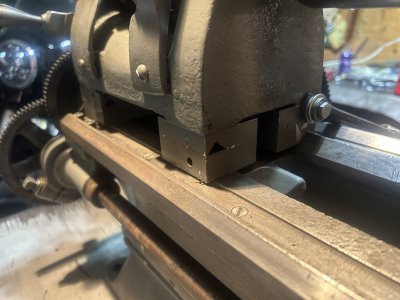
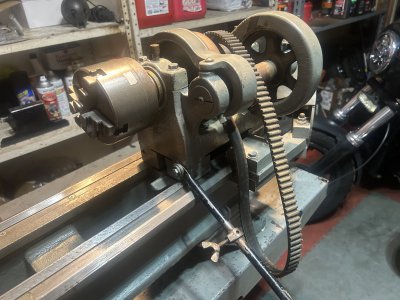
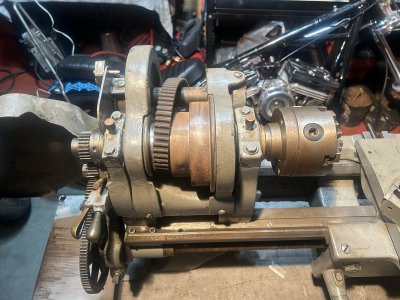
The guy I got it from said the old timer he got it from converted it from 9” to 11”, and it looks like he raised the headstock on 1” blocks. Aside from the travel gained, Is there any real advantage to this? Is it a bad idea to leave it this way? Should I convert it back?

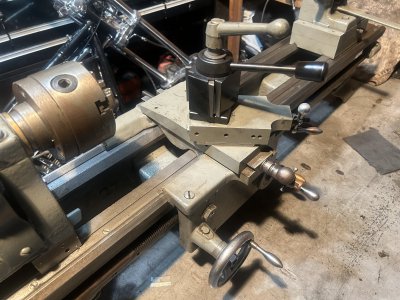
I have looked at many pictures of the 9” junior and it seems like maybe a couple other additions/modifications have been done if anyone can point those out for me? Is the compound correct for a 9 junior?

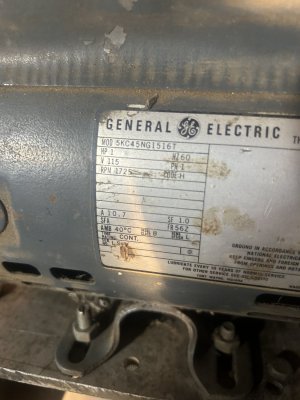
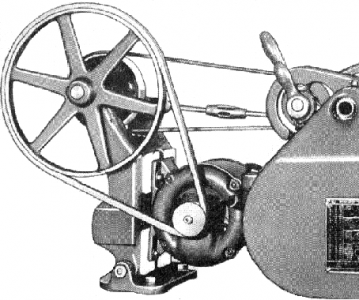
The motor/countershaft mount the previous owner had was super ghetto. I’d like to make and mount them in a cleaner and less sketchy way. question is, it seems like the counter shaft mounting points are not as common as the ones I regularly see in pictures. Are there any common mounting set ups for this style? Or just make something that makes sense?

I need to buy the correct v belt for the motor, but gotta wait to mount it before I take a measurement.

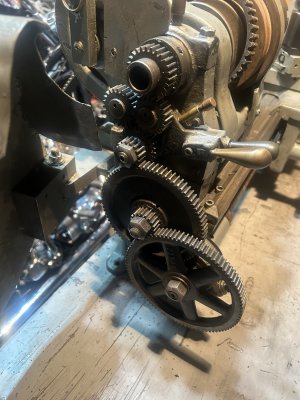
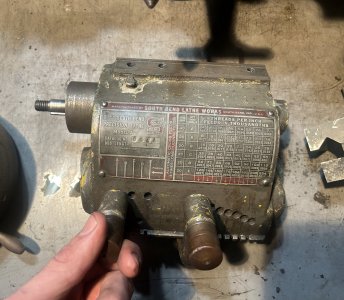
Included was a quick change gear box. It seems as though this box will not fit the 9” junior, as it is for a 9” workshop.

I’ll probably have a million more questions, but I think that’s it for now haha. Any help would be appreciated!
A6CC2F96-E915-424F-82BA-BD026B21A759.jpeg63A5CA80-035C-4DC2-B7C1-03AB70658197.jpeg7E98E5BD-6AA3-4B41-960F-7E0F438884A9.jpeg50CA4BDF-B3BB-4FDB-8013-E28A527F2A62.jpeg
70A62A39-C0B5-4B34-B991-E4FDFE2F39AE.jpegE1C5566C-DA13-4F69-B857-562FD72C7A6A.jpegE008151C-AB18-4868-946A-8133CE6E34FA.jpeg2BFD32BE-A349-460C-AE5E-F59A02E8E691.jpeg97E78A90-1FD9-4FA5-8652-D61B3B4D3EE8.jpeg3E5D4DDD-C13C-48F3-B89C-B3E131D3770E.jpeg9BFD96A5-D07B-4DFB-B260-00418A2E3A76.png
 
Awesome, welcome. This site is easy going, friendly, and informative, you must have been on another site that may not have been too welcoming telling from your introduction :)
 
Welcome. You have indeed joined the friendly machining site. You will enjoy it.

That is a really cool find. Just think about something surviving nearly 100 years and still being useful.
If it were me, I would clean up the rust and get it lubed. Anything is better than nothing. Then make sure the bearings are lubed and the spindle turns freely with no excessive play in the bearings in any direction.

IF all is well in that area, then do the same with the counter shaft.

The lift job is unique but I bet it is not the only one to have something like that. The question is how good of a job was it? IF it is aligned properly, I don't see anything wrong with it and I wouldn't touch the setup until I knew more about the functionality of the lathe as it is.

Next up would be to get the lathe mounted to something solid and rig up the counter shaft and motor. You may have to "redneck" it a little at this point but I would concentrate more on getting it under power than getting it "perfect". Just give yourself options for improving it later if needed. Spin it by hand to make sure the gears are all OK.

Once under power, start it as slow as it will go in direct drive and let it just run for 5 or 10 minutes. Listen for bad sounds and make sure the bearings are not getting warm. STOP if there is any sign of trouble and figure that out first, you don't want to do more damage. If it goes well, you can take it up to high speed for 5 or 10 minutes to make sure all is well.

The gear train may may be noisy but if there are no broken teeth you should be able to run it "empty" without worry.

If that all checks out and the saddle and cross slide move (well lubed of course) I would then get something in the chuck and start making chips. Lots of light passes to get the feel for the machine and learn how to use it.

Watch some videos to see how it is done. My personal favorite is Quinn Dunki of Blondihacks. She has a very good introduction to lathes series that will teach you the fundamentals. There are many others out there but I find hers easy to watch and very instructive.

Then start making small round things out of bigger round things. Have fun.

As for the gearbox. Check the dimensions of the holes against the dimensions of the holes in the bed by the headstock. It looks like it is held on with 3 bolts. The two on the left side might just fit where the left lead screw bearing is mounted. It looks like I can see the third hole in the bed that would be used to mount the gearbox. Keep in mind that you would need to use a different lead screw than the one currently on the lathe. I have no knowledge about this part, just guessing from what I see in the pictures.

Be sure and post updates and pictures as you progress.
 
The compound rest appears to be home made, not original.
 
Welcome to the forum. Is that a raked and extended narrow glide I see there in the back round. Mike
 
Welcome. You have indeed joined the friendly machining site. You will enjoy it.

That is a really cool find. Just think about something surviving nearly 100 years and still being useful.
If it were me, I would clean up the rust and get it lubed. Anything is better than nothing. Then make sure the bearings are lubed and the spindle turns freely with no excessive play in the bearings in any direction.

IF all is well in that area, then do the same with the counter shaft.

The lift job is unique but I bet it is not the only one to have something like that. The question is how good of a job was it? IF it is aligned properly, I don't see anything wrong with it and I wouldn't touch the setup until I knew more about the functionality of the lathe as it is.

Next up would be to get the lathe mounted to something solid and rig up the counter shaft and motor. You may have to "redneck" it a little at this point but I would concentrate more on getting it under power than getting it "perfect". Just give yourself options for improving it later if needed. Spin it by hand to make sure the gears are all OK.

Once under power, start it as slow as it will go in direct drive and let it just run for 5 or 10 minutes. Listen for bad sounds and make sure the bearings are not getting warm. STOP if there is any sign of trouble and figure that out first, you don't want to do more damage. If it goes well, you can take it up to high speed for 5 or 10 minutes to make sure all is well.

The gear train may may be noisy but if there are no broken teeth you should be able to run it "empty" without worry.

If that all checks out and the saddle and cross slide move (well lubed of course) I would then get something in the chuck and start making chips. Lots of light passes to get the feel for the machine and learn how to use it.

Watch some videos to see how it is done. My personal favorite is Quinn Dunki of Blondihacks. She has a very good introduction to lathes series that will teach you the fundamentals. There are many others out there but I find hers easy to watch and very instructive.

Then start making small round things out of bigger round things. Have fun.

As for the gearbox. Check the dimensions of the holes against the dimensions of the holes in the bed by the headstock. It looks like it is held on with 3 bolts. The two on the left side might just fit where the left lead screw bearing is mounted. It looks like I can see the third hole in the bed that would be used to mount the gearbox. Keep in mind that you would need to use a different lead screw than the one currently on the lathe. I have no knowledge about this part, just guessing from what I see in the pictures.

Be sure and post updates and pictures as you progress.


Great advice! Thank you
 
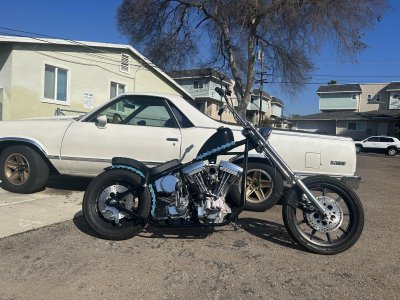
Ah, Frisco style. The kick start is a nice addition. Love the Evo power plants, more reliable than the twin cams imho. That 1hp motor is a bit much for that lathe, but won't hurt anything. Mike
 
Looks like the PO did a good job on the riser blocks- I would leave them in, you might very well need that extra swing if you are
going to make bike parts
-Mark
 
Back
Top