My adventures with my RF-30

In this thread I will document my adventures in getting this mill from the dealer to up and running in my garage. I have another thread here that documents some of the early research and mills I looked at.

I just bought an RF-30 clone. It was originally sold by Rutland Tool, which I remember as a local SoCal company in the 80's. I bought it at a machinery dealer in Pomona, Wheeler Machinery. Nice people, very reasonable to deal with. I was pleasantly surprised. I got the mill and a 5" Kurt vise for $975 out the door. After the sale I asked if I could get a t-shirt, too, and they said yes.

1. LOADING
They loaded it with a forklift into my truck. I have a Chevy 1500 so the 600lb weight was no problem. The put a 2x4 between the quill and the column and picked it up with a forklift. It balanced really well and the 2x4 held the weight just fine.
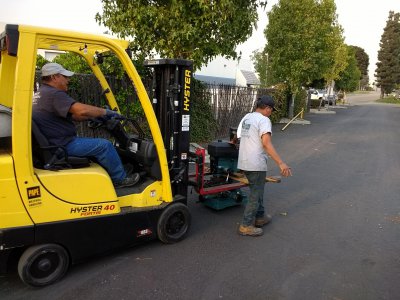
IMG_20201026_165216372.jpg

Once in the truck they pushed it to the back with the forks.
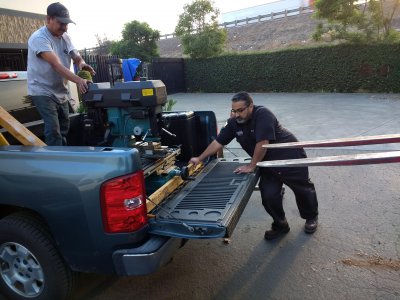
IMG_20201026_165515507.jpg

I tied it down with just two straps wrapped around the column. It didn't move at all.
 
6. PULLEY COVER

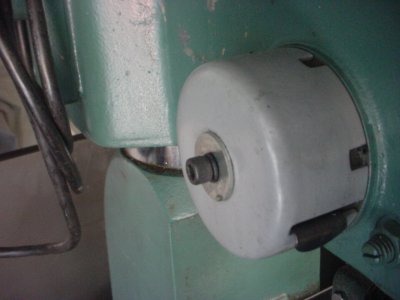
I have a plastic cover. I cleaned this up with a vacuum (the pulley dust was fine, black powder) and Simple Green. The goo from the nameplate came off with acetone. I may make another one, or leave it blank.
I was going to remove it, but I'd have to disconnect the wires from the motor, but they all were in excellent shape so I saw no reason to.
 
7. QUILL & DOWNFEED MECHANISM

The downfeed mechanism needs to be removed to remove the quill, so these were done together. Here's what I did in case anyone needs to do it:
1. Either tighten the quill clamp, or lower the quill so it touches the table. If you don't, it might fall.
2. Remove the 3-arm lever. Take the 3 lever arms off. Don't lose the key.
3. Remove the downfeed assembly: unscrew the two bolts holding it to the head casting.
4. On the other side remove the torsion spring and cover. They are one assembly.
DSC00322.JPG
Unscrew the SHCS. The parts will not go flying off. I put a flat blade screwdriver in the square holes to release the tension help by the little roll pin that engages the gray cover. The spring will unwind. I was concerned that the parts would go flying, but that was not the case. I wore safety glasses anyway.

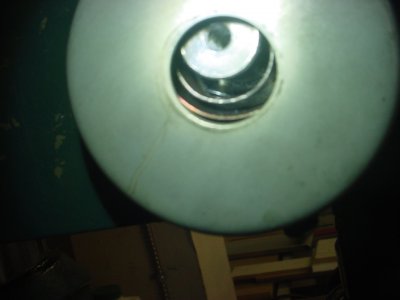
5. The spring is held by a screw that goes in a notch in the spring. You'll have to wiggle and rotate the assembly to disengage it from the screw. I shined a flashlight in there so I could see what I was doing.
DSC00324.JPG
This image shows what you will see when you are trying to do this.

6. Remove the screw, check to make sure the quill is not going to fall, then slide the downfeed assembly out sideways to the right (as you face the mill).

7. Once you have this out, take take the depth stop assembly off. You also need to remove the screw to the lower right of the torsion cover. This screw rides in the slot on the quill to keep it from rotating. It also can keep it from going down/falling out. Then lower the quill and remove it. You might have to raise the head to get enough clearance.

8. Remove the quill clamp at the bottom. I had to gently tap mine off with a hammer after loosening the bolt. I tapped it down. There is a rubber ring on the quill. Mine is a little beat up, but Grizzly only sells it with the quill assembly and Jet was out of stock. I cleaned it up and re-used it.

9. I then cleaned everything with a soft plastic bristle brush, rags and Simple Green. The only marks on the quill were from the quill clamps.

10. I did not replace any bearings. They rolled smooth and had no noticeable play. I'll check them out again when I get the whole machine cleaned up and running, though.

11. I reversed the process to reassemble everything. I rotated the torsion spring almost one whole rotation counter clockwise with the quill up to re-tension it.

12. Notes:
a. The quill was not as easy to move when it got to the top of its travel. This may have to do with the spring tension.
b. The SHCS on the spring tension housing doesn't need to be tight; it seems to work better when it is backed off a 1/4 turn or so.
c. When properly installed, the fine feed engagement knob doesn't need to be turned much at all to engage/disengage; a 1/4 to 1/2 turn does it.

8. LUBRICATION

I used NLGI #2 lithium/moly grease and Mobil Vactra #2 way oil to re-lube everything. The gears and spline got the grease and the sliding parts got the oil. This is per the Grizzly manual. The older Chinese ones don't have any specifics, but the Grizzly manual does.

The NLGI spec refers to the consistency of the grease; #2 is like peanut butter (higher numbers are harder) and is used for highly loaded gearing. I used general purpose grease. Look for the NLGI spec on the container.
 
E. There appears to be no need for a specifically metric belt, since inch sizes are readily available and work. They are even spec'd in the manual, even though these are metric machines.

My version of this machine is hybrid imperial-metric, even to the point of the grub screws being imperial threads, but metric hex key heads. The quill raise & lower spokes are imperial threads where the knobs screw on. The bolts holding the column to the base are metric, as are the feed screw threads.
 
My version of this machine is hybrid imperial-metric, even to the point of the grub screws being imperial threads, but metric hex key heads. The quill raise & lower spokes are imperial threads where the knobs screw on. The bolts holding the column to the base are metric, as are the feed screw threads.

Mine is too, I've discovered. The bolts for the idler pulley plate are 5/16", as are the ones holding the dust cover. A 12mm socket fits them better than the 1/2", though.
 
9. TABLE AND X-AXIS SCREW REMOVAL
This came off fairly easily. I unscrewed it all the way to the right. It's very heavy! Everything looked good. I cleaned it, re-oiled it and set it aside. It took some scrubbing to get off the paint in the ways. There was lots of swarf stuck in the paint, so it had to come off. The casting is very rough, so it was a chore to scrub it, wipe, scrub, wipe, etc...

10. SADDLE AND Y-AXIS SCREW REMOVAL
Once I had the table off, this came off easily as well. I had to take off the handle and the front flange (that's what it's called in the parts list) so I could unscrew the brass cross half nut off.

I cleaned all the grease off the screws and out of the half nuts. Everything looked really good. There was lots of old grease and "varnish"-looking "stains" that came off with acetone, Simple Green and scrubbing with a blue Scotchbrite pad (the non-abrasive one).

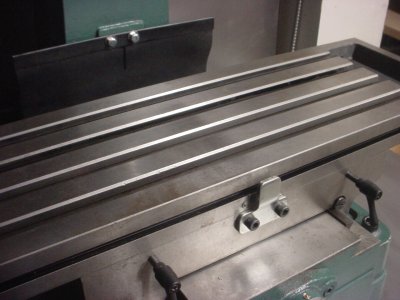
Here's a picture of the table after I cleaned it.
DSC00335.JPG

11. REASSEMBLY OF TABLE, SADDLE AND LEADSCREWS
This was not as easy. Did I mention this is heavy? Both the table and saddle with the leadscrews in place feel like they weight over 150 lbs. The half nuts need to be put back on so they line up properly with the screws, then they need to be tightened down. But, in order to so this you need access to the bolt heads, which are covered by the screws when the parts are assembled. So, I used my engine hoist to hold these up while I tightened the bolts on the X-axis (longitudinal) half nut, which are accessible form beneath. I was able to take out the gibs to give me some play to allow me to maneuver the saddle over the cross half nut so I could get the bolt in. Sorry, I don't have pictures.

12. HANDWHEEL REASSEMBLY The hand wheel collars are held in place by pins. These were easy to get out, but they needed to go back in the same orientation; apparently the holes only line up one way.

13. GIB REINSTALLATION
The gibs can be screwed in. I thought these were just to keep them in place, but it seems they also tighten and loosen how easily the ways move. One way was really tight, but I loosened the bolt and it was much easier to move.

14. LOCK SCREW INSTALLATION
There are little brass cylinders about 1/16" thick that are at the tip of the lock screws. They are easy to miss and they fall out real easy. I'm lucky I found them. I put a dab of grease on them when I reassembled them so they'd stick to the tip of the screw. They can be screwed in with the lock screw.

15. LUBRICATION, Part 2
The ways and leadscrews all got Mobil Vactra #2 way oil. They had some sort of grease on them that I cleaned off. It was a translucent orange-ish brown. The manual calls for oil so that's what I used. The handles had ball bearings that can be lubed via ball oilers. I squirted some oil on the bearings than assembled everything, then squirted some more oil in the ball oilers.
Everything works really smooth and easy now.

16. ALMOST DONE
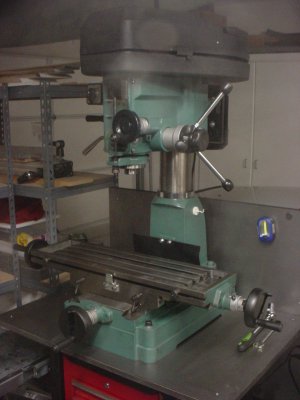
Here is the mill so far. I still need to clean the motor housing and see if I can clean some oil that got behind the clear housing on the switch plate.
DSC00334.JPG

Next:
-Finalize the location of the mill and bolt it to the floor.
-Mount the vise and take a few test cuts. But, first I need to take the vise apart and make sure everything is fine on that. I called Kurt and they said there will be a model number cast on the bottom of the vise. It has a tag, but all that is readable is the stamped serial number. The dimensions match the Kurt D50 vise.
-DRO's. The front cover plate is not on the machine. It's broken and I'm going to make a sheet metal cover for the DRO anyway.
 
My idler plate screws are the same, I keep the plate snug, (but not tight) & do not loosen them when I move the motor to change speeds, which is often.
I will experiment with a DI for lining the head up when moving up or down.
I have always used a vertical line laser with a plumb bob tied with string to a magnet attached to the garage door 25’ away. I can get it very, very close this way. But not exact.
Arc I like your stand. Very tidy.
What height did you settle on for the top of the mill table?
Cheers
 
Arc I like your stand. Very tidy.
What height did you settle on for the top of the mill table?
Cheers

It's 37" from the floor to the top of the table. I built the table around the red tool box under it. It's a HF side box that's just under 34" tall. I left a little clearance for the mounting bolts, then there's the 2" cross member of the stand, then the 3/4" MDF top with the 16 Ga steel sheet. I'm 6'-2" tall so the height is just fine for me. I have to stand on a stool to change the belts, but I figured I'd have to do that anyway. The belt cover also hits the garage door rail and my surfboard. I can move the surfboard, but I still need to adjust the position of the mill so I can open the cover all the way.
 
What's your favorite surf break? My son traveled the world on the pro surf tour for 15 years after winning 3 national amateur titles in high school. He now works in marketing for Reef Sandals. At one time he had over 40 boards in the garage. I don't surf. Sailing was my passion. But I spent a lot of time on the beach at his contests.
 
What's your favorite surf break? My son traveled the world on the pro surf tour for 15 years after winning 3 national amateur titles in high school. He now works in marketing for Reef Sandals. At one time he had over 40 boards in the garage. I don't surf. Sailing was my passion. But I spent a lot of time on the beach at his contests.

Hmmm, that's a tough one. I have fond memories of lots of places. I learned in Santa Cruz (I actually took a class!) and like Steamer's Lane, O'Neil's and Pleasure Point. I then lived in Long Beach for awhile and surfed Huntington and Seal Beach. I even surfed in Hawaii on my honeymoon. I now go to Ventura, County Line and a few other random spots with friends who know way more than I do. I'm about an hour away from the beach now so it's about 3 hours of time to go. I need to teach my kids so they can come. I'm not very good; I have an 8'-6" single-fin "fun board" and prefer 2'-4' waves. I think if I was a stronger swimmer I'd like the bigger stuff. I've been stuck inside on the big stuff (8'-10' faces) and it scared the $h!+ out of me.
That's awesome about your son! What a cool experience. What's your son's name? I got a coworker who was a pro for awhile, maybe they know each other. BTW, I loved my Reef sandals. I had the ones with the bottle opener and actually used it a few times. The front strap broke and I hurt my toes one too many times so I went to wearing Sanduks. Tell Reef to make some closed-toed footwear that's as comfy as the sandals! :)
 
Do a search for Mike Losness. You will get lots of hits. He hasn't surfed competitively now for about 8 years or so. His oldest boy started standing up at Doheny last summer when he was 4 years old. Already knows how to swim. Be interesting to watch how Bennie does. There must be something in the water in San Clemente. It is a never ending hot bed of world class surfing talent.
 
Back
Top