Monarch 60

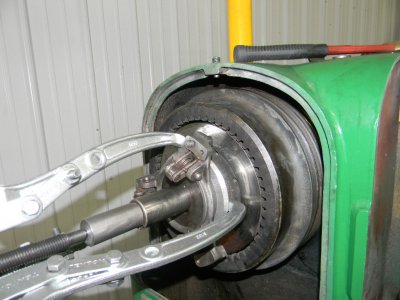
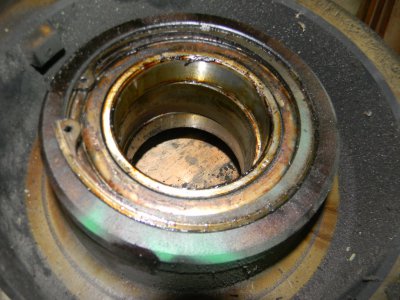
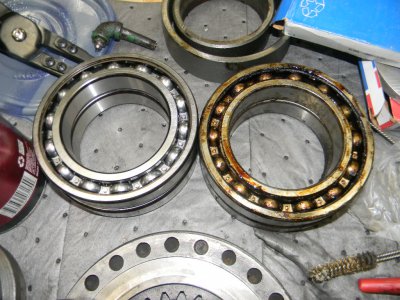
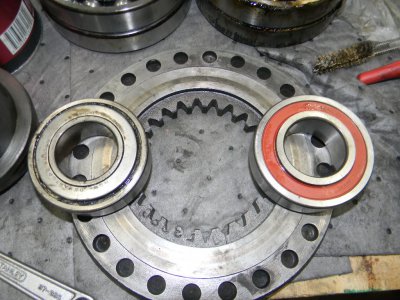
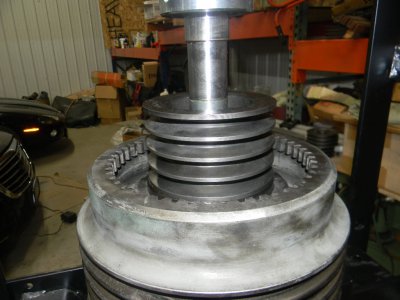
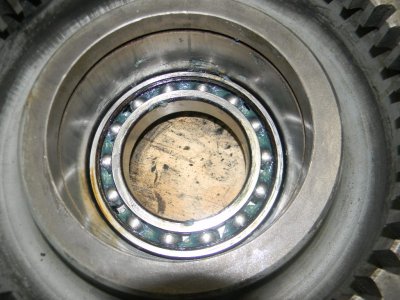
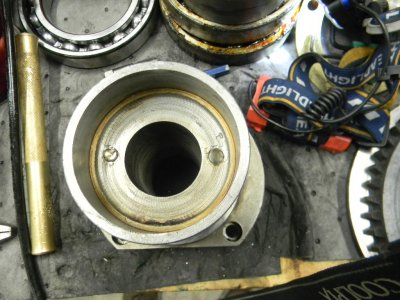
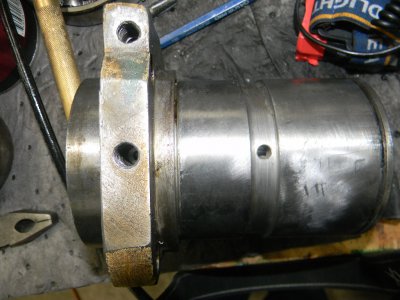
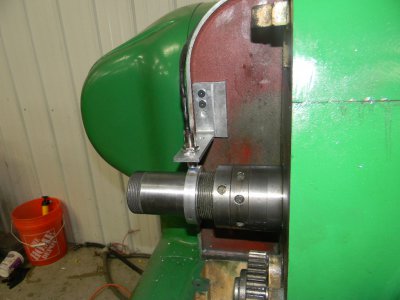
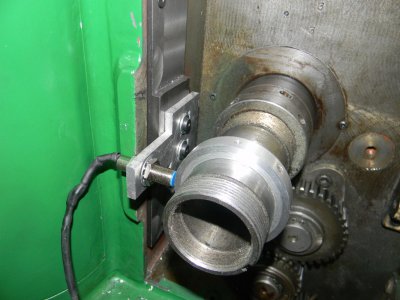
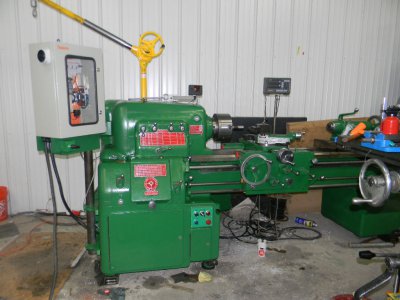
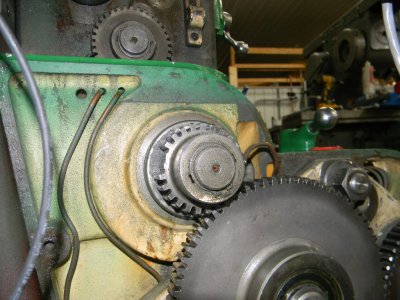
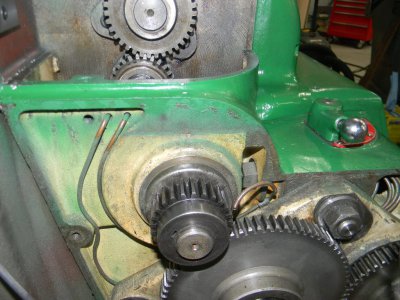
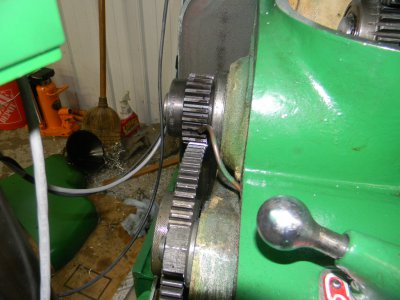
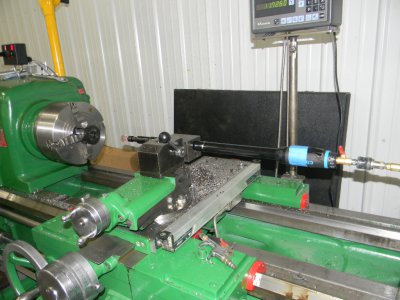
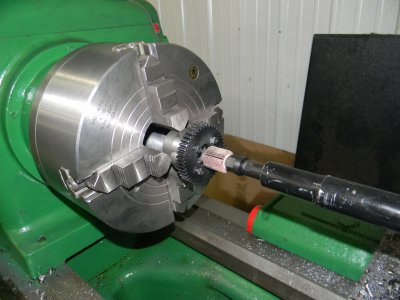
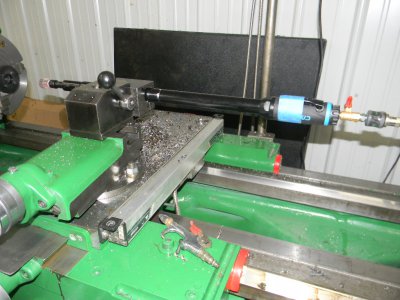
Worked some more on the clutch today. Not without drama as part of it was frozen on the shaft so I had to make a part so I could use a puller. You need a lathe to fix a lathe. I have a question regarding snap rings. The clutch has two bearings, each held with a snap ring and a spacer between them. The front side ring is flat on both sides but the rear ring has a bevel on one side. That bevel was on the outside so the flat is against the bearing. I'd like to verify that is correct. Old bearings were pretty decent. Way too much grease but at least it was still grease and not rock. Dave
 

Attachments

  • DSCN4353.JPG
    DSCN4353.JPG
    232.7 KB · Views: 25
  • DSCN4354.JPG
    DSCN4354.JPG
    237.6 KB · Views: 24
  • DSCN4355.JPG
    DSCN4355.JPG
    240.5 KB · Views: 26
  • DSCN4356.JPG
    DSCN4356.JPG
    237.5 KB · Views: 22
Spent some more time on the clutch. What should have been easy, wasn't. The grease inlet passage was blocked and there was no way to clear it. Finally I drilled out the brass plag where the passage had been bored originally and measured the depth of both passages. I determined which one looked shallow and drilled a little deeper and now grease finally flows to the old Monarch. The lathe is the same age as me and now her joints squeak less. Reinstalled the clutch and hope to put the belts on and adjust in a few days. Dave
 

Attachments

  • DSCN4364.JPG
    DSCN4364.JPG
    239.8 KB · Views: 13
  • DSCN4362.JPG
    DSCN4362.JPG
    239.6 KB · Views: 13
  • DSCN4361.JPG
    DSCN4361.JPG
    239 KB · Views: 12
  • DSCN4357.JPG
    DSCN4357.JPG
    234.4 KB · Views: 12
Mark Jacobs VFD build came in so more work on the Monarch. The original plan was to put the box on the wall behind the machine but I tend to change plans. I had some extra tube brackets so I decided to place the box near the headstock where i can see the display- i like to see hz and amps. I made an extension for the Skyhook to be able to hoist the box but it wasn't necessary. At 70 I can still lift it in place but who knows how long that will last.

Turned some steel to fit into the DOM 2.5" tube, screwed a plate to it and then made a base out of wood to give me room for the cables coming out of the bottom. I can adjust height and angle. I also can still remove the covers to the change gears and spindle.

As you can see, Mark's work is always perfect. Mine is not but good enough for who it is for.

Dave
 

Attachments

  • DSCN4371.JPG
    DSCN4371.JPG
    230.6 KB · Views: 27
  • DSCN4370.JPG
    DSCN4370.JPG
    234.6 KB · Views: 28
  • DSCN4369.JPG
    DSCN4369.JPG
    223.9 KB · Views: 22
  • DSCN4368.JPG
    DSCN4368.JPG
    237.4 KB · Views: 25
  • DSCN4365.JPG
    DSCN4365.JPG
    236.6 KB · Views: 28
A littl more progress. Mounted the mag sensor for the tachulator and pot. Either my math or the original speed chart was off as I get the plate rpm at 35.7 hz rather than the 38.9 I thought I'd have. The range between gears is about double between 36-70 hz so what I was looking for.

Dave
 

Attachments

  • DSCN4375.JPG
    DSCN4375.JPG
    221.7 KB · Views: 20
  • DSCN4378.JPG
    DSCN4378.JPG
    225.4 KB · Views: 19
  • DSCN4380.JPG
    DSCN4380.JPG
    236.9 KB · Views: 21
  • DSCN4376.JPG
    DSCN4376.JPG
    243.5 KB · Views: 18
Hi Dave, the Tachulator's tend to be quite accurate, most of the time I have found that the machine spindle RPM charts are not so accurate. I have seen that with my current and previous lathes that they were off around 5%. The tachometer with the magnet pickups should ready steady at +/-1 to 2 RPM and not vary, in a few cases when it was erratic it was due to electrical noise from the VFD. At the end of the day, I just look at the spindle tach. RPM and pretty much ignore everything else. As long as one sets a reasonable Hz range on the VFD, that is all that matters. On the RPM display you might consider flipping the L bracket and mounting the Tach housing to where the lifting bolt is threaded into the top cover, and or make a small post threaded on each end to elevate it. The install looks very nice.

Spacing between magnets and the sensor should be about 0.1".
 
My other tachulator uses the supplied light sensor and your magnetic one is much more stable and worth the effort. There is no variation ion speed un like the original set up. Thanks for doing it. I will copy if I can fit the sesor in the other lathe. The benefit of the original is its small size. I think long term i will still want the tach and pot near the DRO that moves with the apron. With the size of this machine, more action takes place away from the headstock than near.

Dave
 
As I predicted, my success with the rpm sensor was fleeting. The bracket interfered with the covers so it needed to be redone. I modified the carrier and added a spacer to the end cover for the shaft. Now everything is happy. Dave
 

Attachments

  • DSCN4381.JPG
    DSCN4381.JPG
    241.4 KB · Views: 15
  • DSCN4382.JPG
    DSCN4382.JPG
    226.7 KB · Views: 14
  • DSCN4383.JPG
    DSCN4383.JPG
    219.6 KB · Views: 14
  • DSCN4384.JPG
    DSCN4384.JPG
    238.3 KB · Views: 14
Finished up the final control items. The joystick is for a jog. I told Mark I didn't need a jog but he knows me well enough for changing my mind to wire the option into the vfd. Hit the stop button with the clutch engaged and the vfd and external brake stop the spindle. Hit the joystick and it turns at 2 hz and makes engaging the four gear levers easy. Doing it manually can be hard due to the very large and heavy helical gears. Helical are smoother but a little less efficient so monarch oversized them, as they did everything. Makes turning the spindle by hand very difficult in certain gears. I could have turned the POT down and drifted the clutch but this is handy.

Tachulator is installed. I didn't want to drill holes into the headstock lid and drop cast iron into the gears ( and taking it off is less fun ) but there were two 1/4-20 holes from a previous owner so I used them to mount an extra DRO arm I had.

Next is to get monarch off the skates and level it up. I might invite my friend who is a real machinist and make him help with the leveling as he is anxious to run the old machine. Leveling a lathe by yourself is a job you only want when you have been diagnosed as terminal.

Dave ( Yes the jog box is sideways but it really is straight ).
 

Attachments

  • DSCN4389.JPG
    DSCN4389.JPG
    226.3 KB · Views: 27
  • DSCN4388.JPG
    DSCN4388.JPG
    235.8 KB · Views: 25
  • DSCN4387.JPG
    DSCN4387.JPG
    232.9 KB · Views: 25
  • DSCN4385.JPG
    DSCN4385.JPG
    228.9 KB · Views: 26
Took a step backwards due to being stupid. Hit the leadscrew reverse lever when the lathe was running too fast and broke two teeth off one of the end gears. I was lucky in that the 10dp 25T gear is the easiest to modify and replace so I did that. While waiting for parts i made a shelf unit to fit in the former electrical compartment to hold the KDK tooling that came with the machine. I'm not sure I'm a fan of KDK but I have too much to not try out.

Dave
 

Attachments

  • DSCN4394.JPG
    DSCN4394.JPG
    238.2 KB · Views: 20
  • DSCN4398.JPG
    DSCN4398.JPG
    241 KB · Views: 20
  • DSCN4399.JPG
    DSCN4399.JPG
    235.4 KB · Views: 20
  • DSCN4400.JPG
    DSCN4400.JPG
    231.6 KB · Views: 20
Been working on change gears for Monarch. If I compound a 127T to the existing 75T gear, I only need three gears to replace the 25T drive gear to make the only Metric threads I will ever need ( famous last words ). My plan is to bolt gears to the hub of the broken gear. I've always wanted a good way to polish bores so I made a split bushing and put a die grinder in a boring bar holder. I overengineered the die grinder but I have some 9" bores I want to polish up. I don't plan on grinding on the lathe but the set up is very sturdy. The grinder is a heavy duty one and seems to work. Time well tell as I'm familiar with failure. Dave
 

Attachments

  • DSCN4404.JPG
    DSCN4404.JPG
    235.8 KB · Views: 18
  • DSCN4405.JPG
    DSCN4405.JPG
    230.7 KB · Views: 18
  • DSCN4406.JPG
    DSCN4406.JPG
    234.7 KB · Views: 18
Back
Top