Milling and drilling attachment for the MJ-189A (unimat 4 clone)
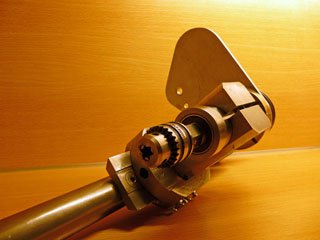
While searching for accessories for the MJ-189 on the internet I saw a picture of the cutter/drill attachment for Unimat3.
That seemed like a very useful tool, but they are quite expensive.
There were at that time no other projects, so I built it myself ,here's a short description.
I started with a piece of round 35 of 450mm length.
I have clamped the axle directly to the milling table and then milled two flat sides with exactly the same depth.
Then I flattened a piece of metal 60x12x230mm on one side,
flipped it and exactly in the center over the entire length cut away a piece of 20mm and 1mm deep and drilled 5x 8mm holes for attachment to the piece round 35.
With 2 pieces of flat key in the two flat sides I clamped the shaft on the milling table, aligned it and then milled a flat side with a length of 232mm.
In the same fixture I drilled and tapped 5x m8 holes in the same sense as in the metal strip and then I assembled the 2 pieces together.
Now I can mill the whole guide in one clamping edit (surfaces and dovetail).
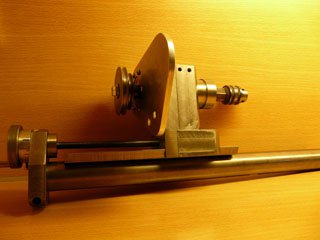
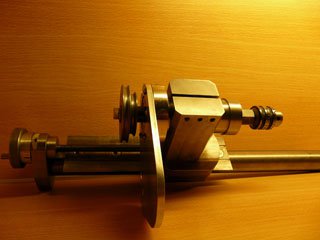
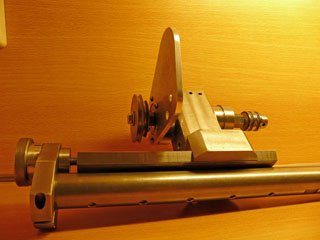
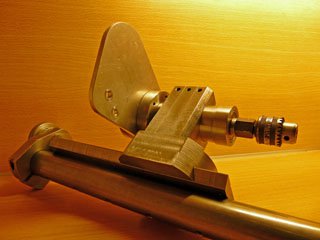
The other guide I've made from a piece of round 100x 18mm with a groove milled on the front of 60mm wide and 2mm deep for receiving the holder of the main shaft.
M10 in this conduction is tapped for transferring of the milling head.
The main shaft of the spindle is +/- 30mm slidable in the holder.
The screw connection of the spindle is M14 x 1 so that I can use all of the MJ-189 (chuck, collet holder ect).
The motor plate is made of aluminum and is clamped on the main shaft.
I've mounted a 24v DC motor,a vew pullies and a device for motor speed controlling.
The rest of the parts speaks for itself.
Everything works as I had in mind.
regards ticino (Gerlof)


Last edited:

