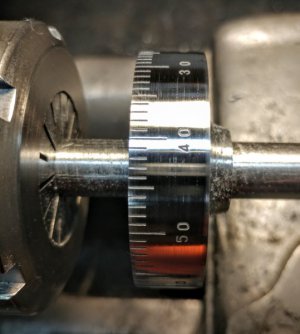
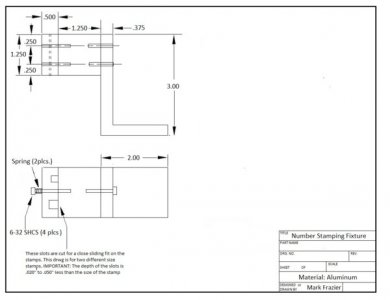
Several people have asked how I make such perfect looking graduated dials with numbers, so I wrote this short article to explain the simple process I use. To start with, I made a simple fixture from some aluminum that will hold the number stamps aligned to stamp the numbers evenly and in line. The next photo is a print to make this fixture.
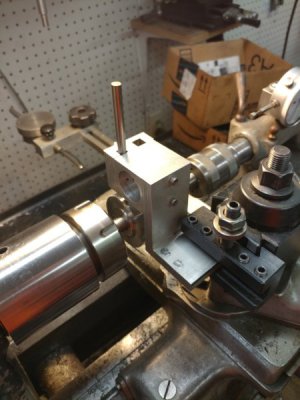
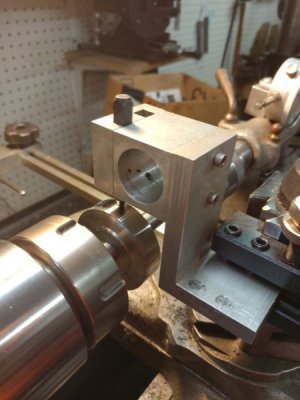
The next several photos show the fixture and how it is mounted in my lathe.
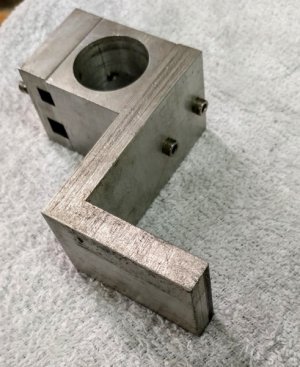
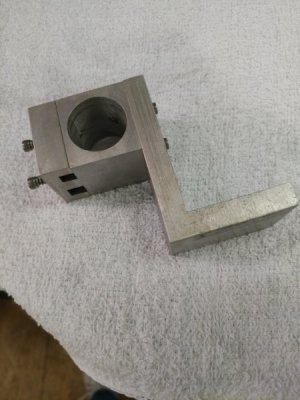
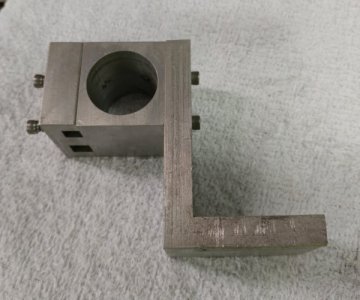
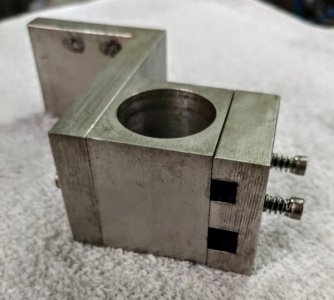
You can see in this photo the two 6-32 SHCS with springs to hold the block tight against the stamp when inserted in the proper slot. (The hole in the main block is not needed. I made my fixture from scrap materials on hand and the hole happened to be in the block). There are two slots that match the two sizes of stamps that I have.
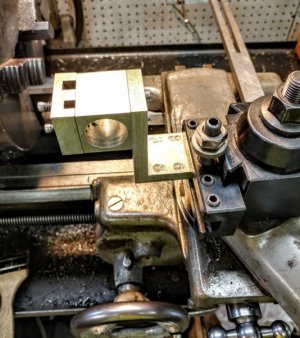
The above photo on the right shows the fixture in a QCTP holder. (You can see the set screw marks where it can be mounted in different orientations to suit the stamping job requirements).
I have made the dial for my lathe cross slide conversion. It is 2" in diameter Most of the time when I make a dial, it will have a lock screw tapped hole for locking in position. I will put a set screw in this hole to lock the dial to the shaft for engraving the lines.
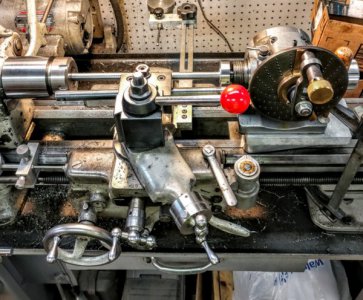
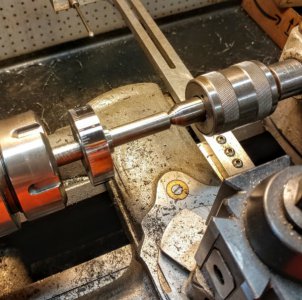
The above photo shows the setup for marking the lines. I set the dividing head on the rear end of the lathe bed and clamped it in place. (I will be making a permanent base to mount the dividing head on that will fit on the lathe base just for this purpose). The dial is mounted on a piece of 1/2" drill rod mounted in a collet at the head stock (the collet is not tight) and a collet in the dividing head (this collet is tightened). A boring bar with a sharp 60 degree tool is set up to engrave the lines.
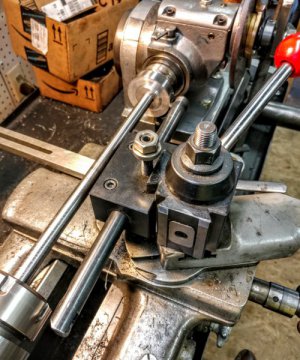
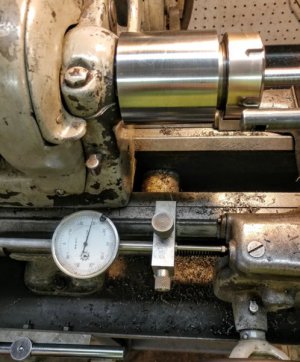
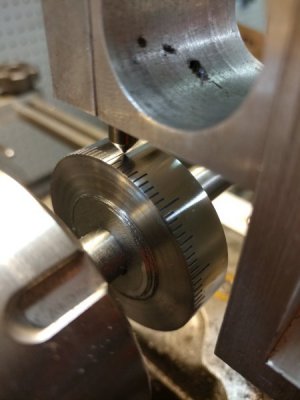
The above photo shows the indicator set up to measure how long each line is made using the lathe carriage. In this instance the thousandth line will be .125" long, the five thousandth line will be .175" long, and the ten thousandth line will be .250" long.
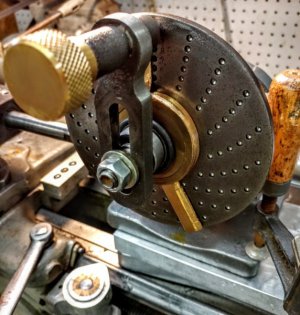
The vector arms on the dividing head are set so that there are 8 holes to every move. Using a 20 hole plate, this will give 100 divisions in one full rotation of the dial to be engraved.
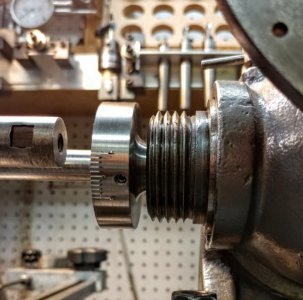
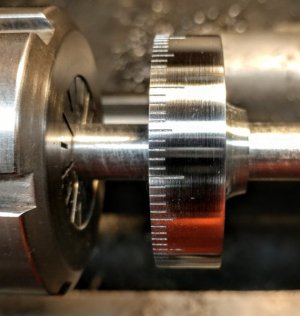
I have started marking the dial. this process takes about 30 minutes. The lines are engraved .006" deep.
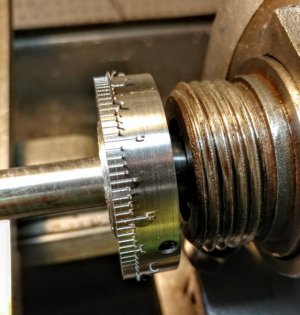
The lines are complete. The next step will be to use a file to clean the burrs off the dial by removing the dividing head and mounting the dial in the lathe spindle on a shaft in a collet. After cleaning the burrs, the next operation will be to stamp the numbers on the dial.
The numbers will be stamped next.......

The next several photos show the fixture and how it is mounted in my lathe.


You can see in this photo the two 6-32 SHCS with springs to hold the block tight against the stamp when inserted in the proper slot. (The hole in the main block is not needed. I made my fixture from scrap materials on hand and the hole happened to be in the block). There are two slots that match the two sizes of stamps that I have.

The above photo on the right shows the fixture in a QCTP holder. (You can see the set screw marks where it can be mounted in different orientations to suit the stamping job requirements).
I have made the dial for my lathe cross slide conversion. It is 2" in diameter Most of the time when I make a dial, it will have a lock screw tapped hole for locking in position. I will put a set screw in this hole to lock the dial to the shaft for engraving the lines.

The above photo shows the setup for marking the lines. I set the dividing head on the rear end of the lathe bed and clamped it in place. (I will be making a permanent base to mount the dividing head on that will fit on the lathe base just for this purpose). The dial is mounted on a piece of 1/2" drill rod mounted in a collet at the head stock (the collet is not tight) and a collet in the dividing head (this collet is tightened). A boring bar with a sharp 60 degree tool is set up to engrave the lines.


The above photo shows the indicator set up to measure how long each line is made using the lathe carriage. In this instance the thousandth line will be .125" long, the five thousandth line will be .175" long, and the ten thousandth line will be .250" long.

The vector arms on the dividing head are set so that there are 8 holes to every move. Using a 20 hole plate, this will give 100 divisions in one full rotation of the dial to be engraved.

I have started marking the dial. this process takes about 30 minutes. The lines are engraved .006" deep.

The lines are complete. The next step will be to use a file to clean the burrs off the dial by removing the dividing head and mounting the dial in the lathe spindle on a shaft in a collet. After cleaning the burrs, the next operation will be to stamp the numbers on the dial.
The numbers will be stamped next.......


