Making a Spider for the lathe

Spent the day making the spider. All was going well until I got to the internal threading to fit the spider onto the end of the spindle. Instead of doing it the way I normally do I tried the cross slide method where you pull the cutter straight in with the cross slide. I must have been doing something wrong because I don't know what I was cutting but it definitely wasn't threads. Wasted most of the afternoon fiddling with it. Luckily I had bored the hole to the small size of the minor diameter. Did a couple of clean up passes and went back to my tried and true internal threading using the compound. Even the parting went smooth with no drama to speak of. All that is left is to drill and tap holes for the screws. I'll have some pictures tomorrow.
 
I use a ball end cutter to cut the round radius and metal epoxy to retain the ball. I picked up the ball bearings (I think they were 1/4") at Ace Hardware, but people usually have them stashed away.
 
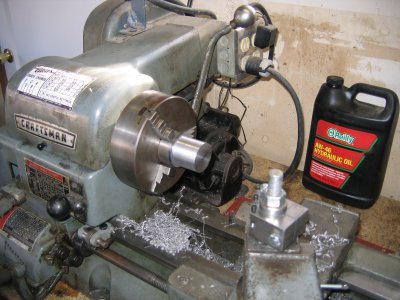
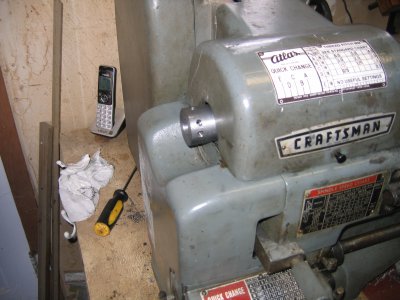
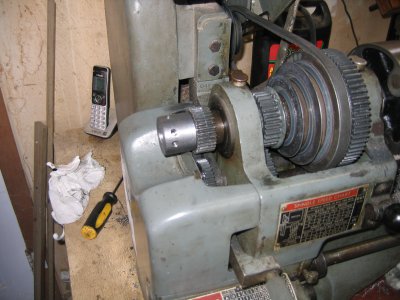
The spider is done. I will pick up the bolts/setscrews this week when I go to town. I know you guys like pictures so I took a bunch as I made the spider. Chucked up the round bar in the 3 jaw and set the carriage stop a 1.500". After parting off the spider would be 1.375" long. In the past when turning to a shoulder I would wiggle a piece of paper between the stop and the carriage. When the paper grabbed I would disengage the half nuts. This time when the carriage got almost to the stop I disengaged the half nuts and did the last bit by hand. I think that the shoulder came out better doing it this way. The OD of the collar is 1.750". I used my two cut method to turn to the target 1.750". Took roughing cuts until I was within .010 and then took two final cuts of .005. Came out spot on 1.750."

IMG_3950.JPG

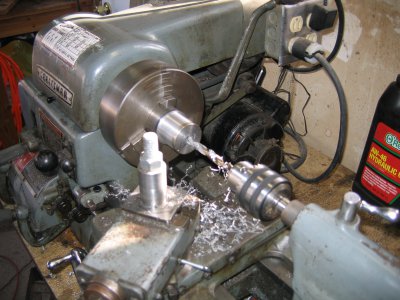
Next was boring the hole. I could have drilled all the way through but decided I needed the practice boring a blind hole. The hole needed to be 1.500" deep to match the outside. I wanted the hole to be just bigger than the hole in the spindle. The spindle hole was .8125. I step drilled the hole to .750 ID using the scale on the tailstock to get 1.500" deep.

IMG_3951.JPG IMG_3952.JPG

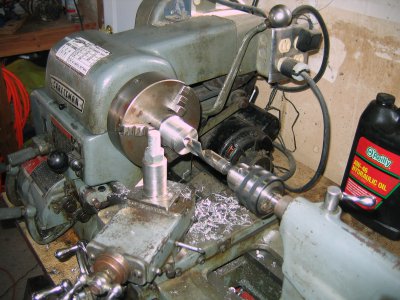
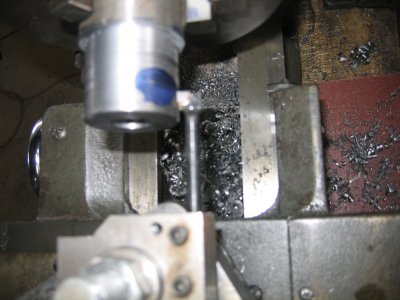
Next came the boring bar. I used the longest carbide tipped one that I had because I could bore a blind hole with it. I prefer HSS boring bars but the ones I have won't let me bore a blind hole. I set the carriage stop by running the bar as far into the hole that it would go. Used the same method that I used turning the OD to bore the ID. Run in close to the stop and do the last little bit by hand. Next came the boring and threading to match the spindle OD. 1.250 x 20 tpi x .500 long. The online threading calculator I use gave a minor diameter range of 1.196 to 1.207. To set the carriage stop I put a mark on the outside .500 from the end and put the end of the boring bar on the mark. I should have used a shorter boring bar but this one was already in the holder. I enlarged the bore to 1.195 ID.

IMG_3954.JPG

Next came threading. Instead of using my usual method for internal threads I decided to try the straight in cross slide method that several forum members say they use for internal threading. I don't know what I did wrong but I definitely wasn't cutting threads. After fiddling with it for far too long I went back to my usual method. It was a good thing that I had bored to the minimum minor diameter. Took a couple of clean up passes and had the threads cut in no time. No pictures of the thread cutting. Parting off went well with no drama to speak of.

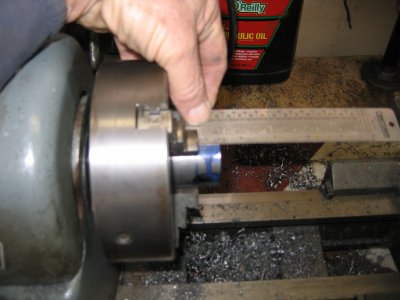
Next I need to drill and tap all of the holes for the screws. Like others that I have seen online I used the jaws on the chuck to mark lines equally spaced around the spider. I did this using a small metal ruler held against the jaws on 3 jaw and 4 jaw chucks. I did both for 4 screws and 3 screws because I thought that it would handy at times to use one or the other. I think that I am good to go.

IMG_3957.JPG

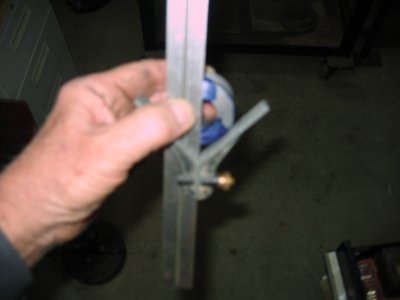
Get over to the drill press and realize I need a line on the face of the spider to make sure my marks weren't off to one side and are exactly on top. Use the center finder on my combo square and discovered that the marks I had scribed don't lined up. Couldn't figure out why at the time and still don't know why they didn't line up.

IMG_3958.JPG Sorry for the lousy picture that doesn't show the lines being off.

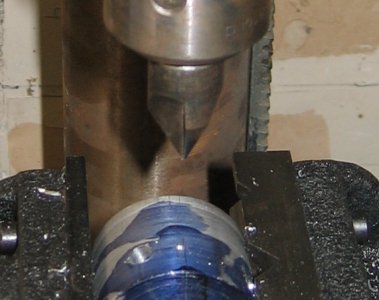
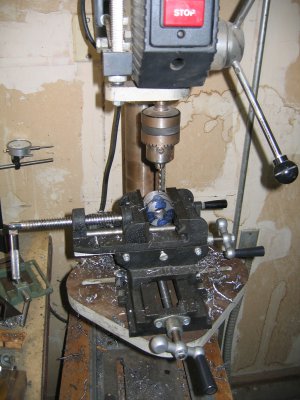
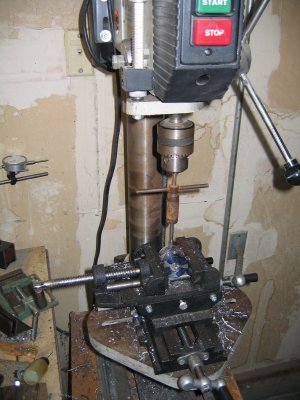
I scribed new lines using the center finder. Moved on to drilling and taping holes. The X Y vice that I got from C Bag came in handy lining things up on the drill press. I am horrible at center punching. So I use a very pointed center drill instead of a center punch. Drilled and tapped the holes.

IMG_3960.JPG IMG_3959.JPG IMG_3961.JPG

It's done.

IMG_3962.JPG IMG_3963.JPG
 
Nice job !!
Did you drill and tap for the set screw at the spindle end ?
 
Yes I did drill and tap for the set screw on the spindle end. That is a 1/4 - 20 set screw and there is a small brass plug that the set screw forces into the threads on the spindle. I will have to check the adjustment on the spindle. The procedure to do that is in the manual for the lathe.

The rest of the holes were tapped for 5/16 - 18 screws. I will probably use set screws because some of my tool holders use 5/16 - 18 set screws and bolts. I keep the allen wrench and a 1/2 open end wrench handy by the lathe.
 
Must be nice having 16 speeds.......
I only have 6.
 
I have only use a couple of the available speeds because so far everything I have machined has been steel. I use 28 rpm for threading and primarily 264 rpm for general turning.
 
The spider is done. I will pick up the bolts/setscrews this week when I go to town. I know you guys like pictures so I took a bunch as I made the spider. Chucked up the round bar in the 3 jaw and set the carriage stop a 1.500". After parting off the spider would be 1.375" long. In the past when turning to a shoulder I would wiggle a piece of paper between the stop and the carriage. When the paper grabbed I would disengage the half nuts. This time when the carriage got almost to the stop I disengaged the half nuts and did the last bit by hand. I think that the shoulder came out better doing it this way. The OD of the collar is 1.750". I used my two cut method to turn to the target 1.750". Took roughing cuts until I was within .010 and then took two final cuts of .005. Came out spot on 1.750."

View attachment 346324

Next was boring the hole. I could have drilled all the way through but decided I needed the practice boring a blind hole. The hole needed to be 1.500" deep to match the outside. I wanted the hole to be just bigger than the hole in the spindle. The spindle hole was .8125. I step drilled the hole to .750 ID using the scale on the tailstock to get 1.500" deep.

View attachment 346328 View attachment 346329

Next came the boring bar. I used the longest carbide tipped one that I had because I could bore a blind hole with it. I prefer HSS boring bars but the ones I have won't let me bore a blind hole. I set the carriage stop by running the bar as far into the hole that it would go. Used the same method that I used turning the OD to bore the ID. Run in close to the stop and do the last little bit by hand. Next came the boring and threading to match the spindle OD. 1.250 x 20 tpi x .500 long. The online threading calculator I use gave a minor diameter range of 1.196 to 1.207. To set the carriage stop I put a mark on the outside .500 from the end and put the end of the boring bar on the mark. I should have used a shorter boring bar but this one was already in the holder. I enlarged the bore to 1.195 ID.

View attachment 346339

Next came threading. Instead of using my usual method for internal threads I decided to try the straight in cross slide method that several forum members say they use for internal threading. I don't know what I did wrong but I definitely wasn't cutting threads. After fiddling with it for far too long I went back to my usual method. It was a good thing that I had bored to the minimum minor diameter. Took a couple of clean up passes and had the threads cut in no time. No pictures of the thread cutting. Parting off went well with no drama to speak of.

Next I need to drill and tap all of the holes for the screws. Like others that I have seen online I used the jaws on the chuck to mark lines equally spaced around the spider. I did this using a small metal ruler held against the jaws on 3 jaw and 4 jaw chucks. I did both for 4 screws and 3 screws because I thought that it would handy at times to use one or the other. I think that I am good to go.

View attachment 346350

Get over to the drill press and realize I need a line on the face of the spider to make sure my marks weren't off to one side and are exactly on top. Use the center finder on my combo square and discovered that the marks I had scribed don't lined up. Couldn't figure out why at the time and still don't know why they didn't line up.

View attachment 346355 Sorry for the lousy picture that doesn't show the lines being off.

I scribed new lines using the center finder. Moved on to drilling and taping holes. The X Y vice that I got from C Bag came in handy lining things up on the drill press. I am horrible at center punching. So I use a very pointed center drill instead of a center punch. Drilled and tapped the holes.

View attachment 346376 View attachment 346378 View attachment 346379

It's done.

View attachment 346380 View attachment 346382
That’s a darn nice spider. It worked out good and didn’t interfere with your gear cover. Really nice job
 
There is an accessory that I want to make for the spider. A dead center. Besides being able to dial something in I would also like to have dead center that fits precisely on the bore of the spider. Machining the dead center I can do. I have some 1018 that I could use or some mystery steel that doesn't seem to machine very well to make it out of.

But what about heat treating the pointy end. Do I need to do this? And how would I do it? If I have to get it red hot the only source of that kind of heat that I have would be to throw it into the coals on my wood stove. The only other thing that I have is a propane torch. Heat treat the whole thing or just the pointy end?

Suggestions
 
Last edited:
There is an accessory that I want to make for the spider. A dead center. Besides being able to dial something in I would also like to have dead center that fits precisely on the bore of the spider. Machining the dead center I can do. I have some 1018 that I could use or some mystery steel that doesn't seem to machine very well to make it out of.

But what about heat treating the pointy end. Do I need to do this? And how would I do it? If I have to get it red hot the only source of that kind of heat that I have would be to throw it into the coals on my wood stove. The only other thing that I have is a propane torch. Heat treat the whole thing or just the pointy end?

Suggestions
I would not worry about the heat treat.
I have 3 dead centers that came with my lathe, only 1 is hardened.
As it will be turning with the spindle, there will not be any friction to speak of.
 
Back
Top