LMS 3960 mini mill on its way to me!

When I trammed the column/head, I used one piece of shim stock to get things pretty close, then went around the column bolts to fine tune. Everything is very snug, some are just more so. :)

I'm not recommending my method, just telling you what I did.

Bill
 
When I trammed the column/head, I used one piece of shim stock to get things pretty close, then went around the column bolts to fine tune. Everything is very snug, some are just more so. :)

I'm not recommending my method, just telling you what I did.

Bill
Yesterday I finally got enough time to wipe down the mill and get things running. I was surprised at how LITTLE crud needed to be wiped down! It's practically ready to run out of the crate. Not really, but pretty close. Anyway, I installed the drawbar and the drilling chuck. The chuck seems to be very nice, but I haven't had a chance to check it for runout with one of my DTI's. I'll do that when I tram the column, since I'll have my DTI out anyway. Hopefully that will happen today.

I also installed the tachometer - it's VERY cool that a dedicated port is provided just for the tach. Also very nice that the tach comes with 3 magnets on its back, and a steel plate is provided right above the control panel to take the tach!
 
Yea, that tach is on my wish list, and I will get it, it was just a lower priority than the DRO was. After that rather large purchase, the Boss asked for a temporary reprieve from my 'toy buying'. :)
 
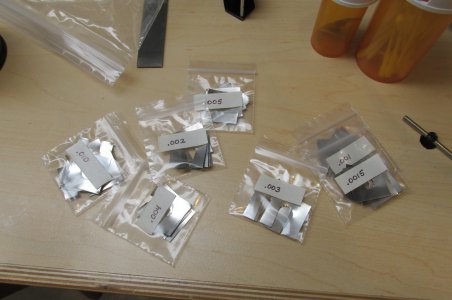
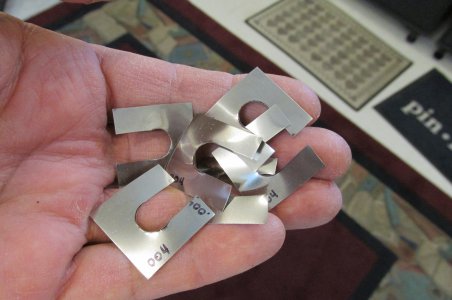
Yesterday I leveled the mill bed and trammed the column. I looked in all the catalogs for slotted shims, but the smallest slot width I could find was 5/8". Since I mounted my mill on 3/8"-16 bolts, I had to make my own slotted shims. So I got an assortment of shim sheets, and made little 1" squares of .001", .0015", .002", .003", .004", .005", and .010". Then I proceeded to cut slots in each piece - all with an old (but sharp) pair of scissors!
IMG_1079.JPGIMG_1081.JPG


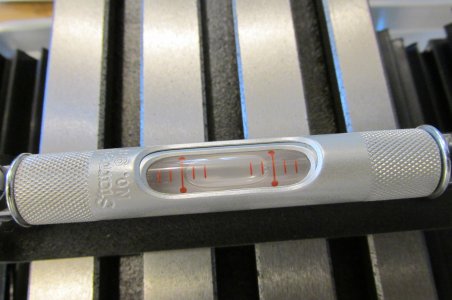
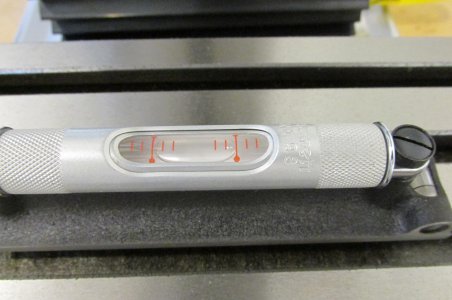
Cutting the thin shim stock was easy but the .010" was really difficult. But, I got the job done. I ended up with six squares of each thickness. So then all I had to do was start determining how much shim was needed under each corner of the mill's base casting. I started by making sure the bench under the mill was as level as possible, using a plain carpenter's level. Once I had the bench as level as I could get, I used a borrowed Starrett 98-6 machinist's level to deal with the mill table. After a lot of trial and error, I ended up with the right combination of shims under the mill base to get a level table. Once I had that done, it was time to tram the dovetail column. I used one of LMS's little gizmos to hold my DTI, and measured all four corners of the table. I used the same homemade shims to build up the corners of the column. I ended up with a total deviation of .001" along the full 18" of the X axis, and zero deviation from the front of the table to the rear of the table. Hooray!
IMG_1088.JPGIMG_1082.JPG

IMG_1079.JPG IMG_1081.JPG IMG_1088.JPG IMG_1082.JPG
 
Nice write up! So is it time to make chips yet? :)
 
Yesterday I leveled the mill bed and trammed the column. I looked in all the catalogs for slotted shims, but the smallest slot width I could find was 5/8". Since I mounted my mill on 3/8"-16 bolts, I had to make my own slotted shims. So I got an assortment of shim sheets, and made little 1" squares of .001", .0015", .002", .003", .004", .005", and .010". Then I proceeded to cut slots in each piece - all with an old (but sharp) pair of scissors!
View attachment 61898View attachment 61899


Cutting the thin shim stock was easy but the .010" was really difficult. But, I got the job done. I ended up with six squares of each thickness. So then all I had to do was start determining how much shim was needed under each corner of the mill's base casting. I started by making sure the bench under the mill was as level as possible, using a plain carpenter's level. Once I had the bench as level as I could get, I used a borrowed Starrett 98-6 machinist's level to deal with the mill table. After a lot of trial and error, I ended up with the right combination of shims under the mill base to get a level table. Once I had that done, it was time to tram the dovetail column. I used one of LMS's little gizmos to hold my DTI, and measured all four corners of the table. I used the same homemade shims to build up the corners of the column. I ended up with a total deviation of .001" along the full 18" of the X axis, and zero deviation from the front of the table to the rear of the table. Hooray!
View attachment 61900View attachment 61901

Are you using those shims under the base or under the column?, how did yours tram?
Thanks in advance
 
Back
Top