[How do I?] Lathe Question - Probably common but for a noobie like me...

clevinski

Active User
Registered
Joined
Apr 26, 2012
Messages
294
Hi...

I have what must be a common machining question, but I can't seem to find an answer here by using "Search". (Although, there is so much information here that I just may have missed it...)

Let's assume that I have an appropriately-sized lathe for what I want to do. I have a piece of 3 inch diameter bar stock. I want to create a section three inches long. I cut the bar stock with, let's say, a bandsaw to a bit longer than the desired three inch length. My next step should be to face both ends.

And here is the issue. The stock is too large in diameter to fit through the chuck. Therefore, I imagine that one would reverse the chuck jaws and set the piece in fully, seating it on the step of all three jaws. BUT neither end of the piece is square; that's why I would want to face it. Therefore, doing what I describe would cause the part to not be aligned with the centerline of the chuck.

1. How do I hold the part to make a reliable, square facing cut on one end when neither end of the part is square? Once I have one square end, the other end should be easy to face with the process I describe above.

2. I have a bunch of other similar questions in my mind. There MUST be a book somewhere that describes possible solutions for such basic, beginner questions as these. Would someone be kind enough to recommend a particular book?

Many thanks!
Charlie
 
One critical factor to the ease of which this can be accomplished is whether or not the 3" OD material is at your finished size. Let's assume that you do intend to at least take a skim cut to clean up the OD of the bar. Ignore the out of square end in the chuck. If this is a typical 3 jaw chucking normal stock, it won't run exactly true, which if you do intend to turn the OD, no matter at this point. Take a dial indicator and place it in contact with the bar as close as practical to the jaws, and note the TIR. Probably a few thousandths, depending on the condition of the chuck and whether the stock is hot rolled or cold finished. It may be possible to tap the stock into a bit truer position using a deadblow mallet or brass bar near the end. That's what you should do with the indicator out near the end of the bar anyway. If the bar is running out of true near the chuck, there is a small advantage to making it run out the same amount and in the same clocking as near the chuck. What this accomplishes is creating the base of a theoretical true cylinder running with the axis of the spindle. Now take the facing cuts, and check as you get close to cleanup that it still running as true near the end as it is near the chuck. After facing, if desired, take the cut on the OD. If it is critical that the faces run parallel, you really should turn the OD as far back as possible, and when you flip it around to face the other end, go through the same procedure described above to face the second end, and turn the rest of the OD to blend.

I would only reverse the jaws if absolutely necessary to open far enough to hold the material. If your chuck is not able to hold the material without reversing the jaws, you will need to take very light cuts, because you have only a light grip.
 
If your chuck is so small you have to put it on a step in the jaws. The rough but easy way is to make sure the uneven face doesn't touch the jaws. Just let the jaws align the OD and thus the face. You'l find that wiggling the piece as you tighten will help center. Check it with an indicator and see if it meets your needs. Rotating CR or HR stock in the jaws you can find a "sweet spot" with less runout. Light cuts on the face as you have about as much hanging out as you'd want.

Better if you can hold the work in the longer/taller part of the jaws

If the stock is at finished size and you need better than that you'd want to dial it in in the 4 jaw. I'd probably go with the 4 jaw if I had to do it on my 9x20 cause the 4 jaw is 6 1/2" and the jaws would give more support because the piece would fit in the middle. Usually 4 jaw chucks are bigger for a given lathe than the 3 jaw.

Steve
 
Charlie,
If you are not concerned about the OD and only facing the ends square then you only need to have the piece of stock parallel in the chuck. Even if it is not concentric, (within reason, you dont want it out of balance), facing the ends will still get it square. Personally, on stock this big I would be setting it up in a 4 jaw anyway. If you have a dial gauge just set it to measure along the length of the stock and run the saddle back and forth, tapping the stock to align it. Check it at several points around the circumference. If you dont have a dial gauge you can use the tool to check. Just feed in until you are fairly close and then wind the saddle. You can then see whether the tool runs parallel to the work or gets closer/further away. This set up is all done with the lathe not running. Just face one end and flip it around to do the other. Ignore the steps on the jaws. You want maximum grip so keep the long side of the jaws on the work piece, dont be relying on the step to hold the work square.

Cheers Phil
 
Last edited:
Okay, I am pretty much a beginner as well but here's how I would handle that. First, (I don't think anyone mentioned this) don't cut the stock just greater than 3" to begin with. Cut it to 4 1/2" - 5" depending on your chuck. Place it in the chuck so that about 4" is beyond the jaws. Using a dial indicator roughly 1/4" from the end, center the piece as best you can. Now face the end.

Now, here is where there are a couple of "it depends" type things. If you want the most rigid setup possible you can use a center drill to spot the end of the piece and then use a live center in the tailstock to firm it up. Being as this piece is already 3" in diameter it is probably rigid enough on it's own but I wanted to throw it out there.

As the piece is faced now is when I would true up the outer diameter. Run your cut down to about a quarter inch before you would hit the chuck. Now comes the fun part (bad pun, it was unintentional, really :eek:). Just measure back three inches from the faced end and use a parting blade to cut into it as far as you can. Pull the whole thing off the lathe and throw it back on the bandsaw to cut off the "extra". Now you can chuck the "trued" piece back up to face off the end you just cut with the bandsaw.

Is that okay guys?

-Ron
 
Is that okay guys?

Yeah Ron good suggestions if you need the diameter turned down and on this sort of length you are getting to the point where you may not want an unsupported end swinging in the breeze, but you are wasting a bit of stock by having that 1-2" left over. But if its just the ends needed square then i think probably unneccessary. You still need to chuck and true it twice to get the 2 ends parallel.
As I think I know why clevinski is doing this:whistle: I am going to stick up a few pics of why and how I did the same.....

Cheers Phil
 
Not to hijack the thread and maybe this could be a new thread but.......
On older, and smaller lathes where wear has become pronounced, or cheaper modern lathes that may have "issues" it can be worthwhile eliminating as many points of introduced errors as possible.
One of the more common is the compound slide. Often worn dovetails, gibs, feedscrews & nuts will allow for unwanted movement in relationship between the tool and the work.
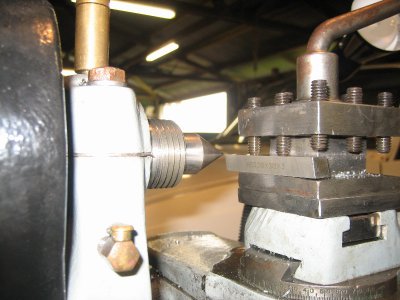
The compound is often not made use of in straight turning. It is limited in travel, so most use the carriage for x axis, and you already have the y axis covered by the cross slide. So unless you are screw cutting or tapering it is unused. But how many go to the effort of tightening the gib screws to lock it in place? If you are lucky enough to have a cross slide with t-slots then you can use these, but if not what then?
Initially, for me, this started out by wanting to make a spacer to replace the indexer (that I never had anyway) and a decent t-nut for mounting my tool post. Tools always needed ridiculous amounts of shimming to get to the correct height, so I thought I would make 1 to suit 3/8" bits.
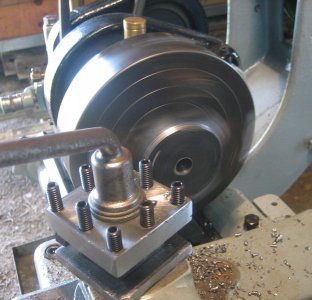
1st up was to turn a suitable boss to suit my tool post.IMG_5194.jpg IMG_5196.jpg
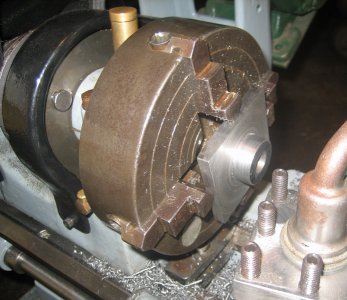
I started with some plate of suitable size and chucked it in the 4 jaw, turned to dia. to be a nice fit and faced the plate to the thickness required to get my tool to a good height.IMG_5198.jpg
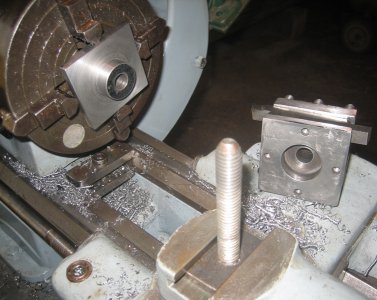
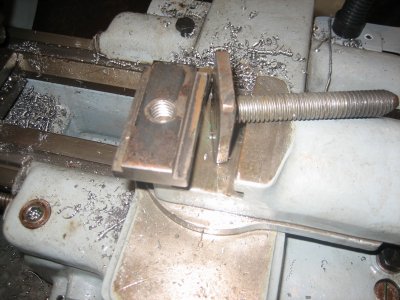
Then, to replace the crappy homemade t-nut I milled and tapped a suitable piece to fit.IMG_5204.jpg

Sorry dinner is ready and its eggs. Gotta go. Be right back.

Cheers Phil

IMG_5194.jpg IMG_5196.jpg IMG_5198.jpg IMG_5204.jpg IMG_5209.jpg
 
I'm baaaack,
So after making a new t-nut IMG_5209.jpg
And a spacer to suit IMG_5210.jpg
I had a tool post that was at a good height IMG_5218.jpg

Cheers Phil

IMG_5209.jpg IMG_5210.jpg IMG_5218.jpg
 
After going to all this trouble to get the tool post to an ideal height, next was to eliminate the compound altogether!:huh:
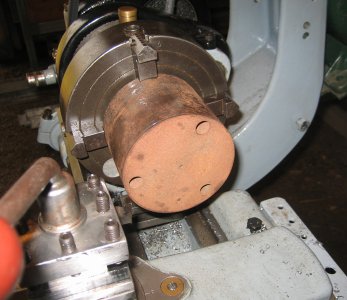
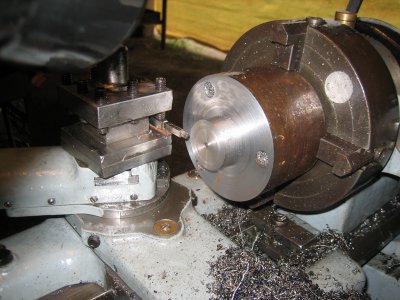
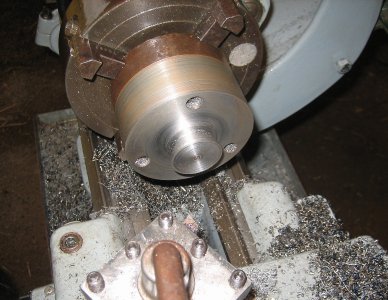
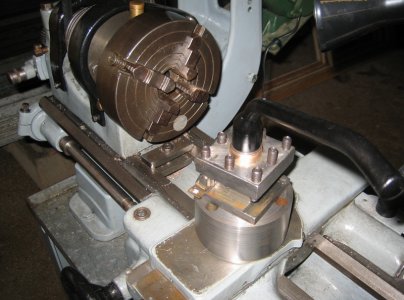
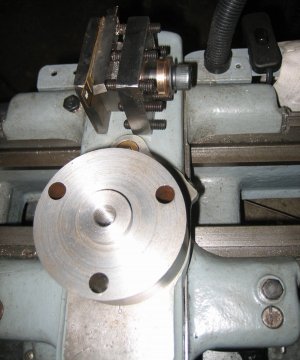
So, having a piece of suitably sized steel laying around I went ahead and made some measurements to calculate what I would need to fill in the gap by removing the compound. IMG_5221.jpg (Ignore the 3 holes, they are left overs from a failed idea :mad: ) I chucked it up and trued it with a dial gauge before turning it to size IMG_5222.jpg and with my compound, cutiing a dovetail to suit. IMG_5224.jpg
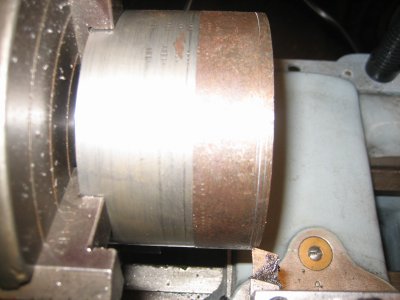
All good on 1 end so remount it in the chuck and turn the other end to suit. IMG_5239.jpg
Again set it up with the dial indicator and turn the rust off to make it look at least half decent.
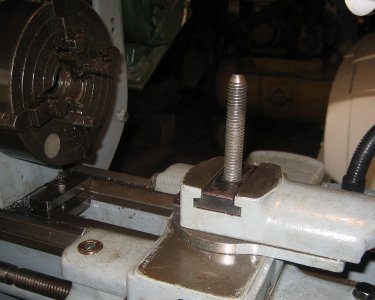
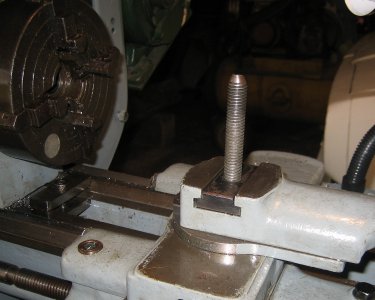
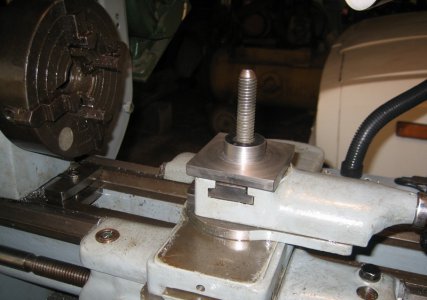
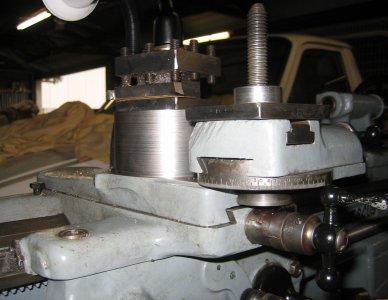
It now clamps directly to the cross slide in place of the compound IMG_5273.jpg
and keeps my 3/8 tools at the same useable height IMG_5281.jpg
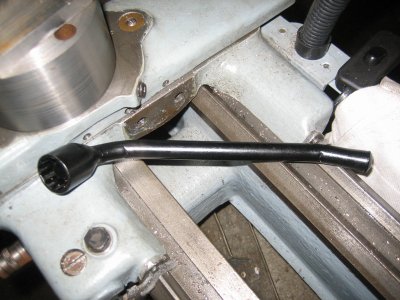
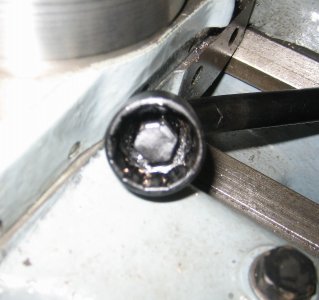
I drilled and tapped it 1/2x13 and made a spanner to suit the cap head bolt. IMG_5275.jpg
i ground the inside out of a cheap socket to neatly fit the OD of the bolt head and welded a pice of allen key in to suit. IMG_5274.jpg
The socket makes it look neater and helps stop the key from "rolling" in the hole and chewing out the hex.
So now, when, (most of the time) my turning takes place without the compound, I can loosen 2 grubscrews and swap the compound in if needed. Takes a matter of seconds and eliminates a large amount of error.
Sure this may not be suitable for everyone but its a simple turning exercise anyhoo.

Cheers Phil

IMG_5221.jpg IMG_5222.jpg IMG_5224.jpg IMG_5239.jpg IMG_5270.jpg IMG_5273.jpg IMG_5281.jpg IMG_5275.jpg IMG_5274.jpg
 
Wow! Thanks to all for the excellent information, and especially to 12bolts for all the detail and photos. Phil, you are right that I am thinking about how I might do something similar to removing the compound.

The one point that hasn't been addressed here; while I'm sure that one needs to be creative on how to solve a great many setup situations, is there a book that I can use as a starting reference point?

Thanks again to all for the great input! :worship:

Charlie
 
Back
Top