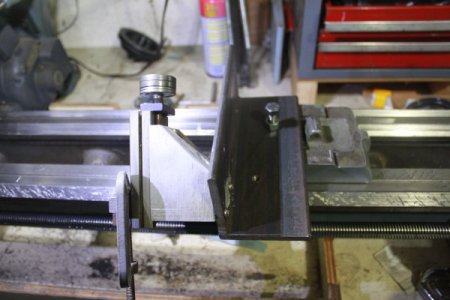
Lathe Bed Restoration

As far as the saddle goes it can be milled, and after that turcite can be applied

If you're only taking 0.008" off the bed I wouldn't think there was any need to build the saddle up again with Trucite (at least there wouldn't be on my lathe). The half nuts should be able to handle the small misalignment with the leadscrew. I understand it can be more sensitive if you have a power feed on the cross-slide.
Or were you just proposing trucite as an alternative to grinding/scrapping?
 
Last edited:
If you have determined that the bed has worn around .008", that usually means the saddle wear can be 2 to 4 times or more, in wear than the bed. That being said, you may have to take off close to .016" to .020" of material off of the saddle for near 100% cleanup. So to make up for that, you will need a material thickness of about .025"-.030" thick, not including glue, to add in to bring it up to standard. Then you still have to scrape in the new material, Turcite or equivalent, to get the proper bearing you need.
 
Actually,it is the REAR vertical surface of the bed that guides the carriage along. And it is that surface which becomes worn the most over time. In fact,there is no reason why the front edge would get worn since the carriage is pushed AWAY from it under cutting pressure. A machinist modified his Myford lathe so that the carriage also used the inside of the FRONT flat way. He finally convinced Myford of the superiority of his plan,and they adopted it. It should not really have taken much convincing,as anyone with common sense would have seen the advantage at once. More likely,the modification added cost to the making of the lathe. But,fortunately,it made use of the existing parts with just an extra bit of machining and an extra gib.

As to the Atlas lathe bed: I'd remove AS LITTLE metal as possible since the bed is already TOO THIN. Scraping ONLY,no machining should be done. Grinding should only remove just enough to do the job. Getting a machine shop to remove only just enough is the neat trick here! If it were mine,I'd not trust them,and would scrape. But,that takes equipment you might not have,of course: a precision straight edge,and the scraping tools.

Lastly,you'd be SURPRISED at how little material taken off the bed will cause the half nuts to rattle along the leadscrew! You'll have to shim it lower on both ends.
 
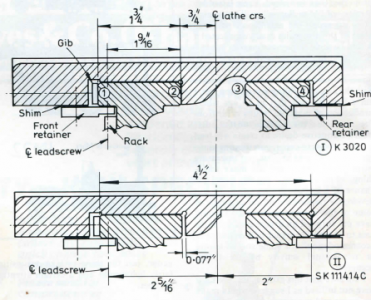
George, it was the other way around at Myford - the earlier ML7s and Super 7s (pre 1972) were narrow guide and only used the two vertical shears of the front way to guide the carriage, they then changed to wide guide using the two outside shears (i.e. the front shear of the front way and the back shear of the back way).

The earlier design is the top section below, and post 1972 they changes to the lower section.
upload_2016-8-5_7-58-51.png

One justification for the change I have seen is as the carriage is 'U' shaped the front and back offer longer bearing surfaces and hence less pressure/wear than using inside of the front shear. If fact on my ML7 (one of the earlier narrow guide style) I found it was the middle 'finger' on the carriage that had suffered the most wear and was causing the cross slide travel to not be perpendicular the lathe axis (hence my facing off was convex - http://www.hobby-machinist.com/threads/cross-slide-facing-adjustment.44572/)

FN1OT0OHKZ9L4KI.MEDIUM.jpg

I have seen articles about people changing both ways - modifying a worn out older lathe to wide guide basically as an alternative to regrinding the worn front way, and modifying a brand new later model (post 1972) lathe back to narrow guide as the owner considered it a superior arrangement.
 
Last edited:
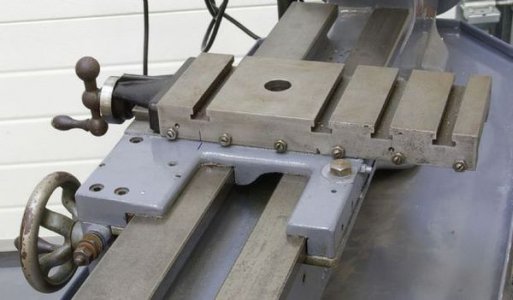
Have you considered planing the bed? I am not familiar with the Atlas bed but possibly you could use the unworn inside vertical sections of the bed as a reference and build a sled to slide on these surfaces.

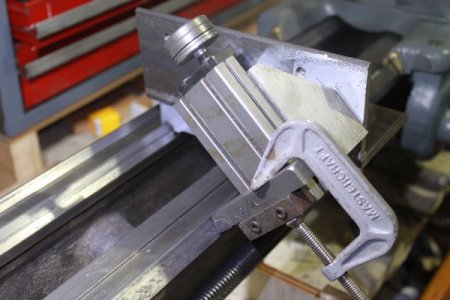
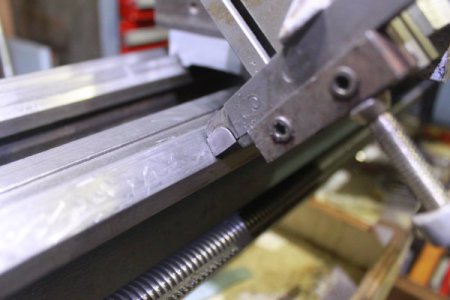
I recently planed my south bend v-way bed using a sled made with the tailstock base, sliding on the relatively unworn tailstock v-way with excellent results. I only did the front v-way since that was where most of the wear was.

The whole operation took maybe 20 mins, after the sled was fabricated. With the flat ways you could get by without the compound on the sled. Stone or lightly file after the planing to debur and scrape in some 1/2 moons to complete.

Here's a video of the process (not mine):
 
Last edited:
Have you considered planing the bed? ..........
This only works if you have non-worn surfaces to work from. I did this on my Lodge & Shipley when I rebuilt it. I had surfaces or datums that had not seen any wear and were not bearing surfaces to re-grind the ways by as well as replan the ways the tailstock rode on, too.
 
How exactly does the plane blade look? Are you cutting the full width of the way with each pass or is it a number of narrower overlapping passes?
 
it has to be like a Rockford planer each pass is the width of the cutting tool
 
I made this as a prototype but ended up using it for the job. The angle of the compound was setup with an indicator to match the v-way angle. I set the depth of cut to the full depth of the wear, approx .005. and made 20 or so passes to cover the width of the ways. If you watch that video, you will see him turning the compound dial a few thou after each pass.

IMG_1369.JPG

IMG_1371.JPG

IMG_1370.JPG
 
Last edited:
Back
Top