I stepped up! Wells-Index 847

Is that some kind of cherrying head or grinding attachment on the spindle/quill?
What are the initials on the side of it?
Nice mill, lots of possibilities.
 
Did you get the X and Y feed handwheels?
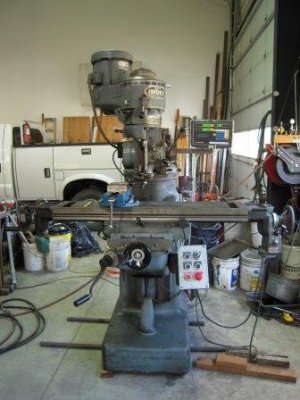
No, I didn’t. The previous owner had it CNCed on the x axis but took the servos off when they quit using this mill. They left a small spur gear on the left end of the lead screw, to which I’ve been attaching a strap wrench to turn it. I’ve been able to use the knee crank on the Y axis, since it still has its crank collar.

I priced replacement parts from W-I and they were about what I expected - high. I purchased the two missing end plates for $73 each.
IMG_2096.jpeg
The hand wheels and associated pieces amounted to over $750 each, which I passed on.

Here’s what I’m doing. I bought these hand wheel castings from MSC:
And these handles:

I’ve somehow lost the photos of machining the hubs on the handwheels, but here’s how I did it. I was able to hold it from the inside with a three jaw chuck. I faced and turned the hub to the proper diameter, and bored the thru hole. I then turned them around and chucked on the hub to face the front side.

Next I made an arbor to hold the wheels for the remaining operations.
IMG_2280.jpeg

Holding this arbor in a super spacer, I drilled the holes for the roll pins on the hubs. Then I flipped them over and drilled and tapped the hole for the handles. IMG_2265.jpeg

After installing the roll pins in the hubs, I put the arbor back in the lathe to turn the radius on the perimeter of the wheels. IMG_2274.jpeg

I used a round cutting tool and approximated the 1/2” radius on the handwheels using the DRO on the lathe. I calculated the points using Microsoft Xcel and made a chart to reference while cutting. Here is the finish after turning.IMG_2276.jpeg

Then using a succession of files, Emory paper, and Scotch Brite, I smoothed out the ridges and polished to a shine.

IMG_2277.jpeg

I then cleaned up the parting lines on the internal surfaces and spokes with a rotary bur prior to painting.
IMG_2279.jpeg
I just got them painted last night, and here is the final product.
IMG_2281.jpeg

I still need to make the collars for the x-axis screw that the handwheels engage. That’s the next order of business.
 
I put an import DRO on mine, and highly recommend doing so.
I couldn’t agree more. It was a total game changer when I put one on my 645. I bought a 4 axis DRO from Aikron back during their Black Friday sale. I’m waiting to install it until I’ve had a chance to remove the table. I want to check things out under there and possibly replace some oil lines.
 
You did well, blind hog!
Nice job on the handwheels
What spindle taper does it have?
 
Nice job on the handwheels!

I went looking on Ebay for handwheels, and did a search for just that term. That resulted in a lot of results, and I recognized one. The Index handwheels are pretty distinctive. The lady had no idea what it fit, but had a decent price on it. After it came, a further search showed she was offering another! I made her an offer on that one, which she took, and my only original handwheel got a full set of mates. I did have to buy the quill fine feed handwheel from Index.

Mine came with a Servo power feed on the X axis. There had been one on the Y axis, but it was no longer there. I discovered that because of this, the bearing on the feed screw was moving back and forth, and I made a spacer to hold it in place. That took out the excess end play. I may try to put a power feed on that axis again, but for now it is fine. I believe that Servo still offers units to fit this machine.

Here is a photo of mine after the DRO installation and one of the original handwheels installed.

Wells Index 847-1.comp.jpg
I've been using it, but it is moving to another building as soon as I get the heating system installed there.
 

Attachments

  • Wells Index 847-1.comp.jpg
    Wells Index 847-1.comp.jpg
    40.3 KB · Views: 10
that is a heck of a score, well done!

Looks like it has a right angle head on it that has been converted to run a small grinding well. Not sure I'd use it that way, but a RA head is handy to have.
 
Is that some kind of cherrying head or grinding attachment on the spindle/quill?

It is a right angle attachment, made by H&R Mfg. It slides over the end of the quill, and has an R8 taper shaft inside that goes into the spindle. Its spindle is also R8, so it can use the same collets and tooling as the mill.
IMG_2282.jpeg


IMG_2284.jpeg
IMG_2283.jpeg

The guard on the front was shop made by the previous owner specifically for these carbide slot cutters. I will need to remove it before I can use it.

When I picked up the machine, the shop foreman told me a little about what they used it for. They were making a specific part out of micarta. This mill, along with 6 other machines, was dedicated to that task. They had a contract to manufacture these parts for many years, but got outbid by another shop.

I bought this mill a little over a year ago. At that time, the shop was auctioning off some superfluous equipment, because they were in financial trouble. The owner had died unexpectedly, and the family member who took it over was in over his head, from what I understand. Sadly, a couple of months ago the bank finally foreclosed on the business. They auctioned everything off. I was able to grab a few small things from that one too, like the super spacer you saw in my previous post.
 
I got the collar and bushings made for one end of the table this past weekend.

IMG_2300.jpeg
IMG_2301.jpeg

I didn’t cut the threads for the dial lock collar because I don’t have the proper change gears for my (new) lathe yet. It’s not a big issue anyway, since I don’t plan on buying dials for now. Next step is to install the DRO…
 
Back
Top