- Joined
- Apr 14, 2014
- Messages
- 3,169
As many of you know I started a project of building new decking for the pier at the family cottage last fall. Things started out slow, but that was to be expected since I had all winter to complete it. I purchased a "new to me" 14" radial arm saw to cut the lumber. It needed a little work to refresh it, so that was where I started. I had to do a few electrical repairs, purchase some new blades, and add some 220-volt circuits in the recently rebuilt garage.
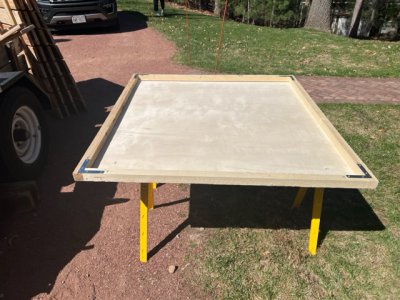
Once that was done it was time to purchase the lumber and get to work. I went to a local "big box" lumber yard and bought enough to make some prototypes. Things started out fine, but by the time I started assembling the deck sections I found a significant number of the boards had warped and cracked. I went back to see if I could find enough quality lumber to complete the job but found 90+% of what they had in stock was not going to work. I was going to reuse a set of jigs and spacers I'd built for a previous set of decking only to find they too had warped over time. They were beyond repair, so I threw the originals away, and made a new set.
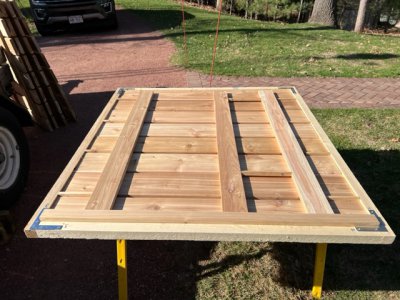
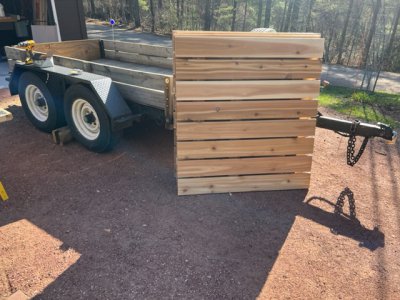
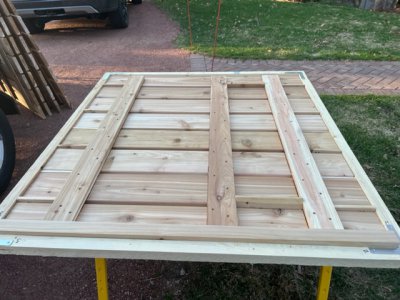
I ended up purchasing all new lumber from a specialty lumber yard at nearly 3 times the price and went back to work. Over the last couple weeks I cut everything to size and today I started placing the components in the jig for assembly. Once again, I hit a roadblock. With all the original spacers in place it was obvious there was a problem. It seems the lumber used for the first set of deck plates was actually only 5 1/4" wide rather than the standard 5 1/2" wide.
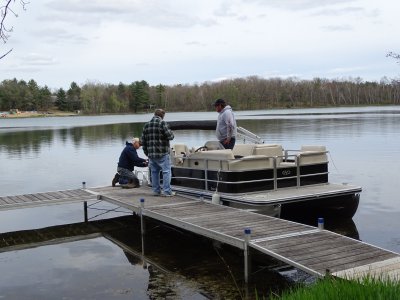
Tomorrow I'll make some new spacers and once again attempt to start the assembly process. What was supposed to be a leisurely project is now pushing the envelope as to when it needs to be completed. The pier needs to be installed within a week so the boat can be docked when it comes out of storage. The pier also supports the water intake for the lawn irrigation system, and the "aqua thruster" that keeps weeds and debris from inundating the dock and swimming area.
Hopefully the next steps will go smoothly and all will be in place before the relatives arrive for a little summer fun.
Once that was done it was time to purchase the lumber and get to work. I went to a local "big box" lumber yard and bought enough to make some prototypes. Things started out fine, but by the time I started assembling the deck sections I found a significant number of the boards had warped and cracked. I went back to see if I could find enough quality lumber to complete the job but found 90+% of what they had in stock was not going to work. I was going to reuse a set of jigs and spacers I'd built for a previous set of decking only to find they too had warped over time. They were beyond repair, so I threw the originals away, and made a new set.
I ended up purchasing all new lumber from a specialty lumber yard at nearly 3 times the price and went back to work. Over the last couple weeks I cut everything to size and today I started placing the components in the jig for assembly. Once again, I hit a roadblock. With all the original spacers in place it was obvious there was a problem. It seems the lumber used for the first set of deck plates was actually only 5 1/4" wide rather than the standard 5 1/2" wide.
Tomorrow I'll make some new spacers and once again attempt to start the assembly process. What was supposed to be a leisurely project is now pushing the envelope as to when it needs to be completed. The pier needs to be installed within a week so the boat can be docked when it comes out of storage. The pier also supports the water intake for the lawn irrigation system, and the "aqua thruster" that keeps weeds and debris from inundating the dock and swimming area.
Hopefully the next steps will go smoothly and all will be in place before the relatives arrive for a little summer fun.
Last edited: