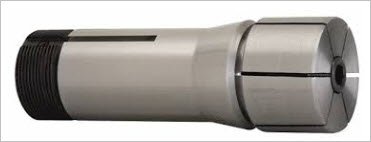
Home made expanding mandrels?

One of my main interests in getting a lathe was for making small scale model truck wheels. Looking around and seeing how rings are made, I'm thinking a small expanding mandrel would be very useful. These seem to have a very limited range for holding, but also seem fairly easy to DIY allowing for the exact size I need for a project. I've found a few tutorials for making these, but none seem to give a recommended size for the expansion slits. I'm probably looking at a couple mandrels to cover 5/8"-1" in diameter.

For the price of a set of expanding mandrels I could get myself a slitting saw arbor and a couple sizes of saw. I know I want a 0.01" for another project, but not sure how large I should get for making a mandrel. Sherline carries the 2" saws for their arbor in thicknesses of 0.01" to 0.057"

Maybe I'm over thinking this, the slots allow the "fingers" to separate so does the slot thickness even matter?

Assume I should do these from an easily worked steel rather than aluminum, any recommendations for material?

Thanks
I did a thread a few weeks ago called home made ID expanding collets it has lots of info about what you are trying to do. I don't know if you have ever tried a slitting saw but I can tell you it is not easy. I have been making expanding collets for over 50 years and unless I am making a bunch of them (20 or more) I buy store bought ones from ebay. I now have a bunch of Rovi brand collets in my collet collection. Also have other brands but I seem to use my own or Rovi brand most of the time. Rovi makes them from very small (around 5/15 dia to 6 in dia in a 5c holder) and they have some videos on you tube showing how to set them up. I also make my own expansion bolts out of shcs. I use leadloy for my homemade ones. And slit them on my band saw. You can turn them smaller and smaller for the size you need.

Pic of some of my Rovi ID collets

https://photos.app.goo.gl/rOj3NP2KIKOMLStA3
 
Last edited:
One of my main interests in getting a lathe was for making small scale model truck wheels. Looking around and seeing how rings are made, I'm thinking a small expanding mandrel would be very useful. These seem to have a very limited range for holding, but also seem fairly easy to DIY allowing for the exact size I need for a project. I've found a few tutorials for making these, but none seem to give a recommended size for the expansion slits. I'm probably looking at a couple mandrels to cover 5/8"-1" in diameter.

For the price of a set of expanding mandrels I could get myself a slitting saw arbor and a couple sizes of saw. I know I want a 0.01" for another project, but not sure how large I should get for making a mandrel. Sherline carries the 2" saws for their arbor in thicknesses of 0.01" to 0.057"

Maybe I'm over thinking this, the slots allow the "fingers" to separate so does the slot thickness even matter?

Assume I should do these from an easily worked steel rather than aluminum, any recommendations for material?

Thanks
I have made mine from Aluminum. I would not buy one, considering they are easy to make. My only mistake on the first I made was to have the mandrel and screw have the same angle and found this too hard to expand w/o a lot of effort. After that I started making the taper on the srew only and left a slight chamfer on the screw hole. Cut the slits with either a hack saw or slitting saw, and go farther than you think. It makes it easier to expand. So if you have a sleeve to mount on the expanding arbor go farther than the sleeve's endpoint. No rule on distance, but farther.
 
From my limited experience the tightening force isn't so much a function of the screw head/countersink angle, you can put substantial pressure on that. I found it has a lot to do with the relief cut that allows the segments to expand & length of slits. The Joe.P video shows that detail, how he removed substantial material which I had to figure out by trial & error. He also has makes 3 slits = 6 segments versos 2x90-deg slits = 4 segments which means there is less material at the root of those segments which means less pressure required to deflect them. BTW I id my slitting by putting the part in one of those hex collet blocks & running along the fence of the band saw.

My expanding ID holder 'works' but I find it works best when the OD/ID is very closely matched. If its too many thou different then grip pressure is a narrower band on the tailstock side of part. So its not quite as good for parts with rougher bores or varying ID.

This type of system to my simple mind is more of a unifom increasing diameter. Its more like an ER & similar collet where the slits alternate from one end to another, whereas the above systems originates from a single end so can only expand on that end. But these expansion mandrels are more spendy, more limited range & a bit more fuss to set up many parts. I guess each tool serves its own purpose.
http://www.arceurotrade.co.uk/Catalogue/Expanding-Mandrels
 
This is the best video I had found.


I like the method used in the Joe Pi video posted above, I had not seen that one. He also offers a few variations I had not seen.

Glad to hear aluminum is acceptable material, I've made a few parts from aluminum, but haven't cut any steel so far.


This seems like a relatively easy project, it justifies buying another tool, allows me to make a tool exactly size to my needs and will provide me some practice turning cutting and threading.

I for one can be extremely fussy about wheels, handles and such that wobble when rotated…extremely fussy! And to make a wheel, handle and such to turn true when mounted on its end result is NOT an easy task! Using an expanding mandrel is one way but maybe not the best in all applications. You want to duplicate the mounting exactly from machine making (ie: lathe) to final use…Dave

The wheels are for static models so they just need to look good, they won't be rolling and often are fixed in place during construction. Rolling wheels on a static display model is kind of like parking your car in neutral and not setting the brake. :)


One thing you might want to consider is the screw . Many life times ago I was told that using a flat head screw was not the best choice . I was instructed to make a screw that had more of a Morse taper on it and I given some matching C'sinks to use . I was working in a shop that was building a 35mm motion camera , we were making lots of egg shell thin round parts . Anyhow I made up a few screws that had different lengths and diameters to work in mandrels of various shapes and diameters .

The video I was basing my ideas around, made a plug that the screw goes through so he could set his own pitch. It makes sense to me that a steeper angle would put more force outward with less effort. I saw another video that went with 60 degrees, just following the bevel made by a center drill which seems easy enough.


I have made mine from Aluminum. I would not buy one, considering they are easy to make. My only mistake on the first I made was to have the mandrel and screw have the same angle and found this too hard to expand w/o a lot of effort. After that I started making the taper on the srew only and left a slight chamfer on the screw hole. Cut the slits with either a hack saw or slitting saw, and go farther than you think. It makes it easier to expand. So if you have a sleeve to mount on the expanding arbor go farther than the sleeve's endpoint. No rule on distance, but farther.

Again this makes sense to me and makes fabrication easier. The video I posted made a point of matching the angle exactly, but as long as both are perfectly round, I don't see that different angles would make a difference. Many expanding screws are just a cone inside a slotted tube and those seem to work well.
 
Hallo Arron.

I did a thread on expansion collets I made and they work very well. I got the idea from the guys of this forum so you can check that out. In my experience,the size of the slit does not matter at all,I would say that the thinner the better 0.7mm or so is fine. Aluminium is good for this application and would machine and cut easily, but 12L14 or EN1A(1112) would work well. I made mine out of EN1A. The main thing is to expand the arbor a bit and machine the outside diameter to the final internal size of your ring or bush so that when you clamp your workpiece it will clamp evenly. Hope this helps.

Michael

He mentioned this in the video as well but didn't show it. Is this to account for the potential of uneven expansion?

I expected that the slots would be the last step, wouldn't turning the part after the slots are cut cause a lot of chatter as the tool crosses between metal and open space?
 
A couple years ago, I made a tapered mandrel that went from slightly over an inch to slightly under an inch using
a taper attachment. Gear blanks with a one inch diameter hole can be press fitted on the taper quite easily. I have made many a gear
using this method and found it quite effective. The taper went from .998 inch to slightly over an inch over 15 inches or so.
When forming gear teeth, I would run the involute cutter toward the wider end to be sure the gear blank would not work loose.
 
I expected that the slots would be the last step, wouldn't turning the part after the slots are cut cause a lot of chatter as the tool crosses between metal and open space?

Probably multiple ways to skin the cat, but in my particular case I left .010" to finish the OD with the slots cut & end screw slightly tightened. That way the diameter is perfectly concentric. If you finish it to size, then slot, then return to chuck & your chuck/part body is out .002", that run-out is reflected on your part. yes Yes the cut was a bit interrupted by the slits but it was just aluminum & didn't seem that bad for the intended purpose. Nothing stopping you from finishing with abrasive stick or light file. The commercial brass body ones work the same way.
 
Probably multiple ways to skin the cat, but in my particular case I left .010" to finish the OD with the slots cut & end screw slightly tightened. That way the diameter is perfectly concentric. If you finish it to size, then slot, then return to chuck & your chuck/part body is out .002", that run-out is reflected on your part. yes Yes the cut was a bit interrupted by the slits but it was just aluminum & didn't seem that bad for the intended purpose. Nothing stopping you from finishing with abrasive stick or light file. The commercial brass body ones work the same way.

It sounds like the final finishing you are talking about is a disposable mandrel to ensure everything is aligned, chuck, the expansion screw didn't move anything etc?

The added accuracy of this final finishing would be lost the first time it was removed / replaced into the chuck / collet correct?

Just trying to understand if there is a benefit to this last step if I'm intending to use the mandrel multiple times.
 
That's true, but it doesn't make it disposable. In either case when you remove & re-install an expanding arbor you might be faced with runout as a function of your tooling. How you deal with that (or don't) depends on the target accuracy at stake. A 4-jaw independent chuck could dial it in for sure. Other options might be collet based. There are ready to size expanding arbors with integral 5C body. Or alternatively if you had a nice accurate shank on your homemade tool & trusted your collet chuck more than typical 3 jaw, that would reduce runout with repeated in/out re-installation. The choice is really yours suited to the application & tooling you have.

SNAG-12-15-2017 0000.jpg
 
Ok, makes sense. If I need to eliminate any run out caused by the insertion into the chuck / collet, I need to turn it each time and remove a small quantity of material to true it up. If the run out is within the acceptable tolerance I can just set it up and go without that step.

Thanks
 
Back
Top