- Joined
- Apr 23, 2011
- Messages
- 2,476
When grinding a lathe tool for turning but especially for threading it is important to get your angles correct and edges sharp.
Get yourself a small magnifying glass or jewellers' loupe. You will be amazed at what defects you can see at 8-10 X. I also have a 20X lens from an old microscope and what that shows up is just ridiculous!
A grinding wheel will not give you a satisfactory finish. You will need to finish off the faces with a small carborundum stone at least and preferably an Arkansas or India stone or similar as well.
In the following pics a 3/8 HSS bit was first ground to the 60* included angle, then honed with a carborundum stone and polished with an Arkansas stone. The final touch was to put a small radius on the front edge to minimize chipping and strengthen the tool tip.
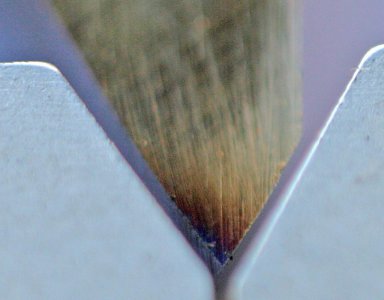
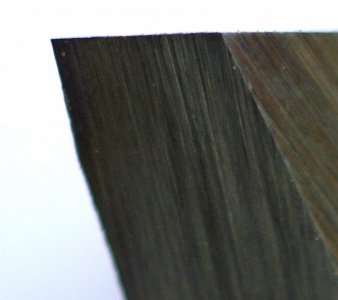
First the 60 degrees included angle is obtained. Then a close up of the ground surface. Looks pretty good? Ready to use?
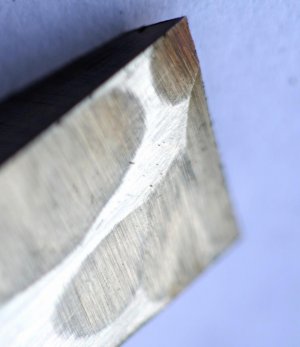
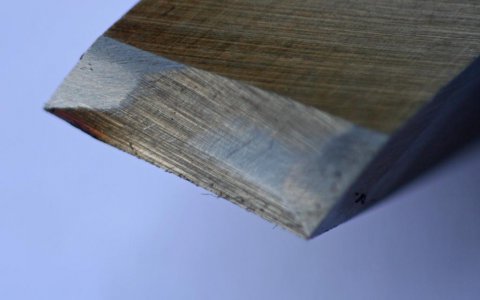
Nope! A quick hone shows the high spots and various facets left by freehand grinding
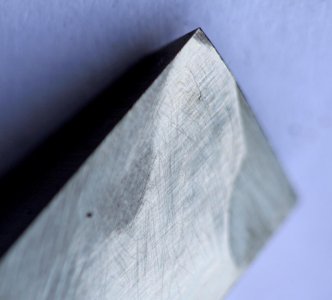
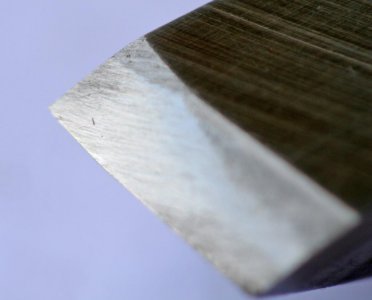
Getting there now. Just concentrate on the 2 front faces. Its not necessary to hone the entire face flat, just bring it back so that the working edges get cleaned up.
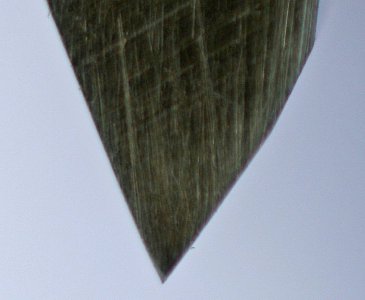
Keep an eye on the angle. Although it looked ok after grinding, but once the edges were sharpened up more I was able to see I was too acute and needed to hone a bit more off the front left face to bring the angle back to 60*
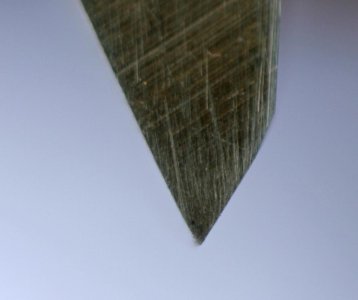
The final touch is to hone a small radius or flat on the front of the tool and polish the top edge.
As a rule I dont put any rake on the top of the tool for screwcutting. Generally speaking you dont go hogging off large amounts of material when single pointing threads. Certainly some materials would require some positive rake, or possibly even a chip breaker but most times a flat top suffices.
Cheers Phil


Get yourself a small magnifying glass or jewellers' loupe. You will be amazed at what defects you can see at 8-10 X. I also have a 20X lens from an old microscope and what that shows up is just ridiculous!
A grinding wheel will not give you a satisfactory finish. You will need to finish off the faces with a small carborundum stone at least and preferably an Arkansas or India stone or similar as well.
In the following pics a 3/8 HSS bit was first ground to the 60* included angle, then honed with a carborundum stone and polished with an Arkansas stone. The final touch was to put a small radius on the front edge to minimize chipping and strengthen the tool tip.


First the 60 degrees included angle is obtained. Then a close up of the ground surface. Looks pretty good? Ready to use?


Nope! A quick hone shows the high spots and various facets left by freehand grinding


Getting there now. Just concentrate on the 2 front faces. Its not necessary to hone the entire face flat, just bring it back so that the working edges get cleaned up.

Keep an eye on the angle. Although it looked ok after grinding, but once the edges were sharpened up more I was able to see I was too acute and needed to hone a bit more off the front left face to bring the angle back to 60*


The final touch is to hone a small radius or flat on the front of the tool and polish the top edge.
As a rule I dont put any rake on the top of the tool for screwcutting. Generally speaking you dont go hogging off large amounts of material when single pointing threads. Certainly some materials would require some positive rake, or possibly even a chip breaker but most times a flat top suffices.
Cheers Phil


