Greg's Logan 820 Restoration

I'm thinking a 5/16xNC18 bolt with a square head. (Machinery's Handbook specifies a 1/2" square head for 5/16" bolts, but that seems rather too large. Maybe a 3/8" square is better?)

Mine is in fact 5/16-18 with a 3/8" square head and a flat washer. The washer is a very close fit to the 5/16" bolt, I don't think a normal 5/16 washer would work well with the small 3/8" head.

A replacement handwheel shaft was my very first project on the lathe. Both the shaft and bronze bearings were worn. When I took the apron apart the second time (to replace the shaft) I wish I had put sealant on my apron halves... drip drip drip Someday I will take it apart again and do that!

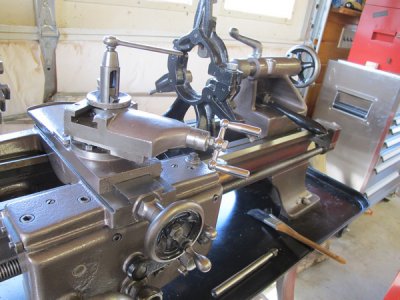
The partially completed new shaft and the carriage lock bolt can bee seen in this picture:

logan820_a11.JPG
 
Greg - I just realized you already started the gray paint. Those parts look real nice (and no baby seals were harmed in the making of the paint...).

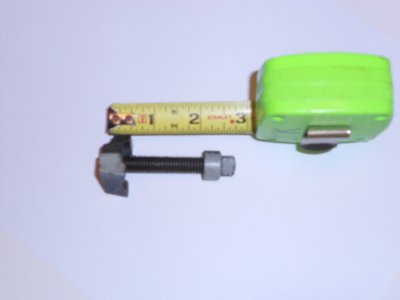
I happen to have my model 200/210 carriage in pieces, so I took a pic for reference. Again - not your model, but definitely the smaller 3/8 square head, about 5/16 total head height, including the crown. This one has a round collar, 5/8 OD, 3/8 inch tall. I can't tell if it's threaded on, or just pressed on tight. Hope this helps.

Carriage Lock 001 small.jpg

Carriage Lock 001 small.jpg
 
Re: Greg's Logan 820 Restoration -Thanks for the carriage lock info

TomKro and CluelessNewB

Thanks for the details on the carriage lock/bolt and all. I may start out with a generic hardware store hex head bolt while I make the lock plate and get the sizes all figured out. Then mill a hex head down to the configuration you guys described. As you say, a little bit of collar will be needed to hold the washer; and I see the parts list calls for a hardened washer. If I don't have one, guess I'll make one. Or maybe just case-harden a plain washer.

Greg
 
Re: Greg's Logan 820 Restoration - Making a carriage lock (aka saddle lock)

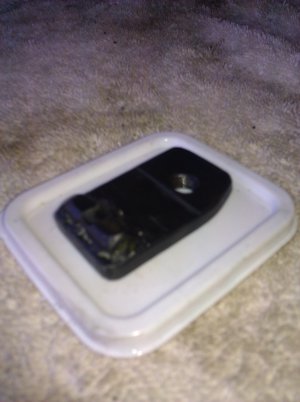
Okay, today I made a carriage lock for my Logan 820. (It was missing when I bought it in February.)
Thanks,TomKro, for his picture posted to this thread yesterday!
I made the lock plate from 1" x 3/16" steel and a 5/16NC18 x 2" generic hardware store bolt for now. Once the lathe is back together, I'll make the Logan style square-head bolt.

To make the clamp contact humps, I welded on another tiny piece of the 1" x 3/16". It didn't actually seem necessary, the plain plate did clamp okay, but I didn't want to contact against the lower front edge of the way.

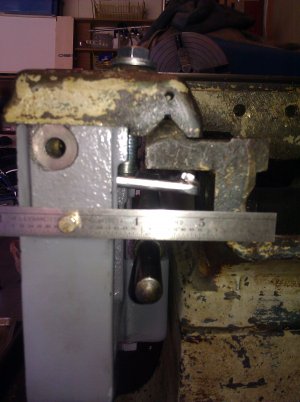
Here was the test fitting, with a 6" ruler stuck on the apron for size reference.
carriage lock test fitting.jpg

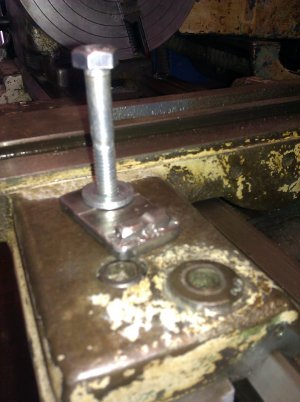
Close-ups of the lock assembly parts
carriage lock closeup.jpg

And finally, I like to treat small parts with gun "blue" ... using "Birchwood Casey Super Blue"
carriage lock blued.jpg

Next step, reassemble the apron.

Bye for now,
Greg

carriage lock test fitting.jpg carriage lock closeup.jpg carriage lock blued.jpg
 
Great job on your project. I LOVE to see these old staples of American Iron being brought back to service. My hat's off to you and all the others that have tackled these projects to bring them back to their former glory.

Thanks for sharing. These restorations are quickly becoming my favorite reason to log on every day!

Please keep up posted as you continue to bring it back to life.
 
Greg in the picture with your home built carriage lock do you think it might bend when locking down the carriage?
 
Richz
I see your point. But in my brief test (when taking that picture), I just snugged down on the lock nut hand-tight with a nutdriver. That certainly seemed to lock the carriage in place adequately.

On the other hand, it probably wouldn't hurt to do the following:

  1. Build up the front edge of the lock plate a little bit (where it would better bear against the apron casting, giving a more parallel action. A little bit of welding bead should do it.
  2. Perhaps case-harden the lock plate.

Thanks,
Greg

Greg in the picture with your home built carriage lock do you think it might bend when locking down the carriage?
 
WOW! Is this a disease that inflicts Logan 820's? Missing the carriage lock. I purchased my 820 in 1981 and it too was missing the carriage lock bar. Bolt and washers were there just no bar. I made a quickie out of some 1/4" x 3/4" flat and never looked back. No humps or bumps. Did not know it needed them. Thought at the time I would come back later and fix it better but it works just fine as is and has since '81. And I use the lathe quite often, my favorite in the shop, maybe cause I have used it the most and longest!
 
Re: Greg's Logan 820 Restoration - Starting reassembly - handwheel shaft issue and questions

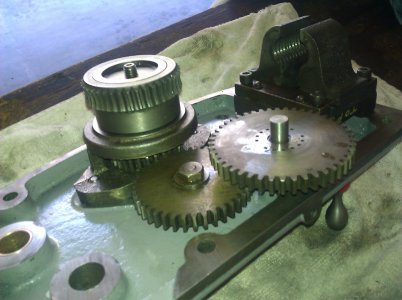
I've started the reassembly of the apron, after replacing the bushings for the handwheel shaft and the longitudinal drive gear shaft (and the drive gear that engages the rack) and repainting.

But even with new bushings, the handwheel shaft is sloppy loose. I hadn't realized how badly worn it is. The wear surfaces measure about 0.594. I assume the correct diameter is about 0.625 (less a little bit for a running fit.) Wow that's worn! Can anyone confirm this?

Now, how to replace this shaft? Logan Actuator doesn't list one, and the ones on eBay are for Logan 200's. Similar but not identical (the shaft and gear seem to be just one piece, and the gear only a 16-tooth (mine is 20 tooth.) So I guess I will put the lathe back together and make a shaft (or two.) I just ordered a #404 Woodruff keyseat cutter for this task.

Now, a question on material. Testing the worn shaft with a file, it appears to be no harder than a piece of 5/8 hot-rolled steel rod, nor a piece of plated 5/8" rod. (Both from hardware stores.) Should/must the shaft be hardened? If so, I need to get a piece of 5/8 drill rod.

Meanwhile, here's the apron in progress
Apron assembly 1.jpg

Greg

Apron assembly 1.jpg
 
Re: Greg's Logan 820 Restoration - Saddle teardown

This week's progress (aka problem) report:
I'd said I needed to make a new handwheel shaft. But of course, that will require putting the lathe back together again temporarily. Before doing that I figured that I'd see what other parts might need some lathe action.

The cross feed screw (LA-153) has several issues:
  • The threads at the "handwheel end" are a bit chewed up. Looking at the Parts Catalog, I now see that sometime during this 820's long career, the handwheel disappeared and was replaced with a crank, likewise on the compound slide. Properly done, a crank would be fine. But instead of a keyway for a woodruff key, the crank has a fixed pin to act as the key. And on the screw shaft, the short woodruff keyseat has been machined into a regular keyseat slot all the way to the end, so that this crank/pin can slide into place. [I wonder if the compound slide is similarly afflicted?]
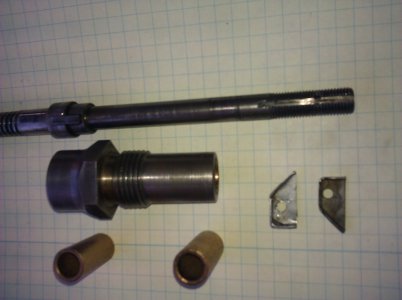
  • The "bushing" LA-689 has some wear in its bronze bushings (612) and the feed screw is worn at those bushings. Sloppy, but not extreme; maybe 0.005 total play. I bought replacement bushings.
    • Design questions: what is supposed to serve as a thrust bearing in this mechanism? It seems that that first step in the screw shaft diameter (to 0.500) bears against the end of the bronze bushing and the side of the cross feed idler gear bears against the steel LA-689 bushing. Maybe a bronze flat washer in between would help. And how to keep these bearing/bushing surfaces lubricated? I don't see how the felt washers on the other side of the gear would help. Or are they supposed to sandwich the gear?
    • By the way, inability to oil those bushings in the apron for the handwheel and the longitudinal drive shaft probably contributed to their excessive wear. They are too high up to benefit from the apron's oil sump, right? I am thinking about drilling a hole or two in the apron casting so that some oil can be manually feed.
  • Acme thread wear: near the ends of the acme thread, I find no measurable end-play. But an inch or two down, there's 0.007" play. That suggests the wear is mainly in the shaft and not the Acme nut.
Assuming I want to remedy these issues, I can buy one or make one. But replacement LA-153 screws are too expensive and the 7/16 Acme 10 TPI thread is non-standard. I didn't find any commercially-available source. For now, I will go with what I've got. maybe later I will try machining a new one. An alternative might be to machine the front part and splice it onto some standard 1/2" 10 TPI Acme "all thread." Of course, a different nut would be needed. I need to see if there's clearance for this "upgrade."

One of the way wipers was missing. Not just the felt, the whole assembly. I fabricated a replacement from scrap.

This photo shows the parts discussed above (cross feed shaft/screw, bushings, way wipers)
Crossfeed lead and wiper.jpg
Okay, for this weekend, I will replace the bushings, reassembly the saddle and apron, and perhaps start making that handwheel shaft (LA-549) now that I have a woodruff keyseat cutter.

Greg

Crossfeed lead and wiper.jpg
 
Back
Top