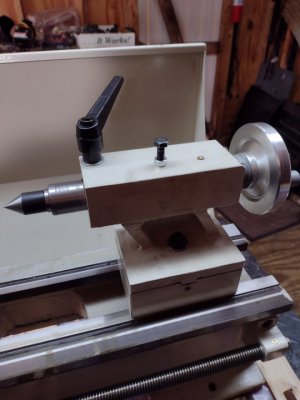
G0752Z spun the quill :(

Sounds your custom set screw is a good solution to the problem.
So far. I have put some really heavy loads on the tailstock with no rotation. This is also important to me as I have my DRO scale attached to the quill and rotation would screw it up. A better way to handle this would be to have a real key to engage the keyway. That way, you would have full surface contact rather than point or line contact. That would involve broaching a slot in the tailstock but that isn't practical for this machine.
 
So far. I have put some really heavy loads on the tailstock with no rotation. This is also important to me as I have my DRO scale attached to the quill and rotation would screw it up. A better way to handle this would be to have a real key to engage the keyway. That way, you would have full surface contact rather than point or line contact. That would involve broaching a slot in the tailstock but that isn't practical for this machine.
Next best thing would be a custom screw installed from the inside (see RJSakowski's post) but with the section that fits the slot in the quill milled flat on both sides to match the width of the slot. That would achieve surface contact without needing to broach a keyway in the bore.
 
Got it apart. Threads on the set screw had some deformation. Drove out the screw with a dead blow against a block of wood. No marks on the quill. Quill bore is mostly ok. There's some sort of scratch starting from the setscrew going towards the ball oiler. It is about 1cm long. Unfortunately I can't feel it, since it is beyond my finger length. I attempted to use a rod to slowly slide it along the bore to try to tell if there was a burr and couldn't really feel one. Might be a casting defect, it didn't look fresh.

I have put it back together again, using a new set screw, for the moment. I will drill it out and put in a dog point set screw. Seems the easiest solution. Of course, I don't have any M10 set screws, but that is easy to fix. So at the moment I am back in business. I'll take it apart again when I get the M10 set screws.

Oh, probably the real problem was I ran off the end, or was very close to the end. I was at 2.5" extension when everything went to the dogs. Lesson learned.
 
Next best thing would be a custom screw installed from the inside (see RJSakowski's post) but with the section that fits the slot in the quill milled flat on both sides to match the width of the slot. That would achieve surface contact without needing to broach a keyway in the bore.
I thought of this but the keyway slot is 7.83 mm wide so a simple flat on the end of the screw would create free play. Since my DRO scale is attached, any undue rotational play can't be tolerated as it would make the scale the restraint. However a screw like shown below would work. The doming on the key surface would allow rotating tight to the quill cylindrical surface. Ideally, the threads would be timed to permit drawing the key close to the socket but at worst case, it would be out by .313 mm. Of course the flat would need to be aligned with the keyway. The slot would enable that. Once the quill was engaged the key couldn't rotate so a lock nut wouldn't be required.

As I recall, I had some difficulty installing my key as the lead screw is inserted from inside the socket and there isn't enough clearance between the lead screw and the key to start it. The lead screw couldn't be inserted after the key was in place because the diameter of the thrust washer was larger than the new clearance. I remedied that by cutting a flat on one edge of the thrust washer. Thinking about it now, I may have been able to slide a rod into the tailstock and thread the washer on the rod. Then I could slide the lead screw in and transfer the washer to the lead screw. and then seat the lead screw.
 
Oh, probably the real problem was I ran off the end, or was very close to the end. I was at 2.5" extension when everything went to the dogs.
That's what I figured ! :grin: Should've told me you needed M-10 set screws an hour ago , they would be on their way also . :)
 
That's what I figured ! :grin: Should've told me you needed M-10 set screws an hour ago , they would be on their way also . :)
Didn't know know it, at the time. Looked at the screws and the slot in the quill, and knew I needed to make a change. I'll just pick up a few M10s. Just add them to my growing hardware collection. Not a big collection, by any means, but it is still growing.

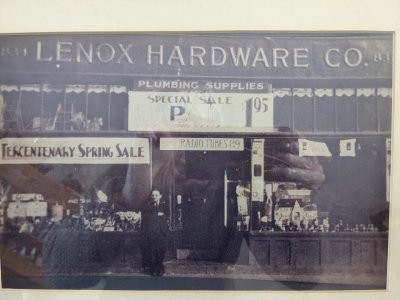
Beginning to feel like I am becoming my Grandfather. He owned a hardware store in the 1930's. Made his own paint, among other things. Here is a picture of him in front of his store in Boston circa 1930. Guessing that from the Tercentenary Sale sign. Boston, Mass was founded in 1630.
PXL_20220218_194427609.jpg
$1.95 for a gallon of paint. Used white lead then. Still have some of his old chemical formulary books.
 
Good to see that there was no real damage. My neighbors are always at my door, asking if I have this or that. They call me the hardware store of the street as I have hard to find bit and bobs!
Pierre
 
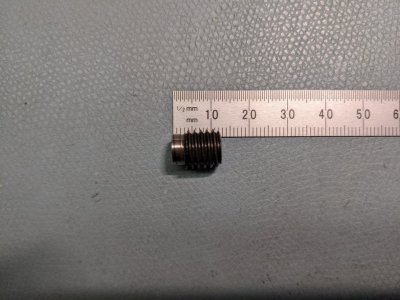
Was kind of dreary this afternoon. Wasn't up for much machining today, but managed to machine an M10 set screw to length in my mini-lathe and add a little dogleg to it. Will have to set up the tailstock on the mill, drill it and tap the existing M8 to M10. The dogleg is 2.5mm long and 7.98mm in diameter. Figure it is close enough to do a fit check. If I'm way off, well, I do have quite a few extra set screws to play with. Held the set screw in a collet, using an extra set screw to get some extra material in the ER32 collet. Worked well. Used some TCMT inserts to reduce the 16mm long set screw to 12mm, and to peel off the threads. No muss, no fuss. Tomorrow I will do the tailstock.
PXL_20220307_220621859.jpg
 
I too was concerned about a whimpy soft set screw acting as a anti-spin component so I custom flat ground an 8mm bolt and seated the bolt as far down into the movable tail stock quill barrel as I could without creating excessive drag. I then also used a jam nut to keep the adjustment. Should add some strength when using a larger drill.

IMG_20220313_131010754.jpg
 
Back
Top