- Joined
- Oct 30, 2019
- Messages
- 197
Earlier this year I towed home a Bridgeport series 1 2J. I specifically had bought it because it had 2-axis DRO and x-axis powerfeed.
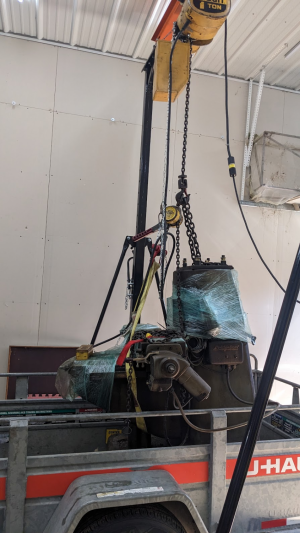
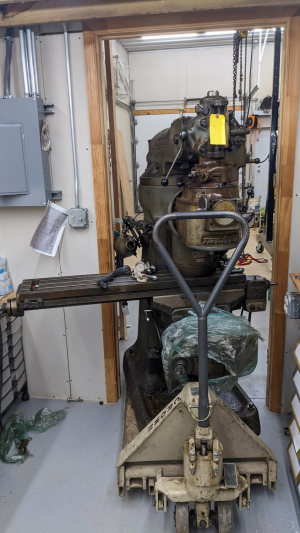
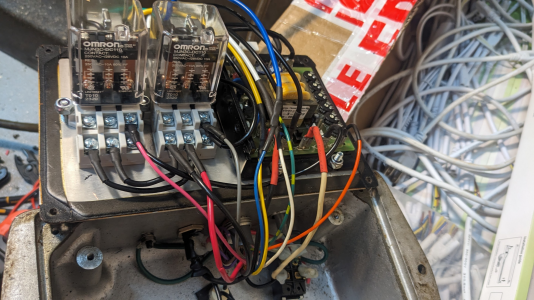
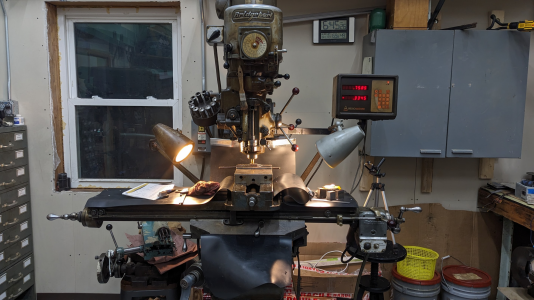
It has sat for a few months while I worked on cleaning up the table (including burrs in the t-slots that prevented t-studs from sliding in for the vise), monitoring local auctions for a vise and eventually getting one; installing a VFD, contactor/master power for it, and a quad box for the lights+DRO+powerfeed... and also figuring out a new control solution for the original 6F powerfeed that I wanted to keep on the machine.
Power is an extension of circuits already established in the metal shop
This was based on https://www.atechfabrication.com/information/Bridgeport_Feed_Controller.htm with only the tiniest changes to the BOM
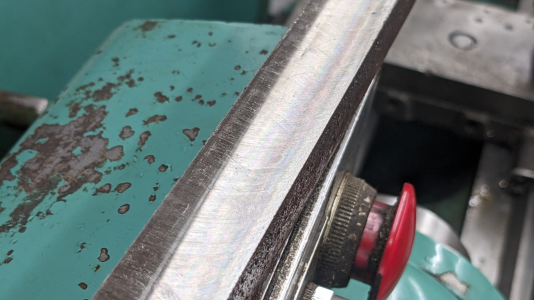
First cleanup pass on some old iron salvaged from a 100 year old bridge twisted up in the woods around here. After a roughing pass to cut under the rust crust, a faster finish pass looked good!
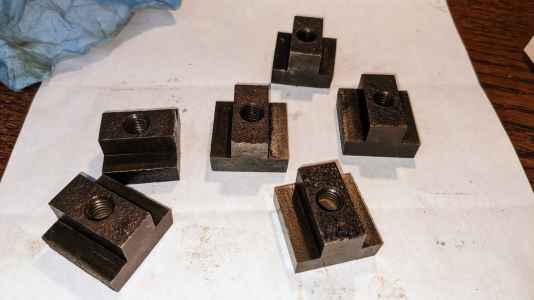
I selected another piece of that iron which was large enough to provide the profile for the slots on the bridgeport 9x49 table, but it was a bit twisted. heated it up with OA and bent it straight enough. I got two reference sides cleaned up, then had to cut it into pieces for the 6 nuts because it was still curved enough that trying to do all the machining together would result in too much wasted material.
Then set up to cut the shoulders in on the nuts in a single pass per side with a roughing end mill - the finish it leaves on the sides is fine for this purpose. On my prior mill (Rockwell 21-100), I wouldn't try to do this in one pass - mainly because I would have to hand feed it and not be consistent enough with the tool pressure/feedrate. On here the 1/2" roughing end mill did my ~3/8x3/8 depth of cut just as well as I was hoping it would.
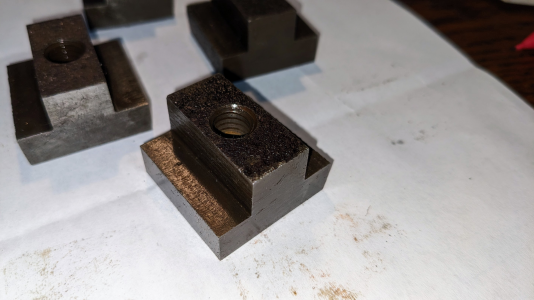
I ended up leaving some of the non-critical surfaces of the nuts with their original iron-in-woods surface finish because why not, I got the dimensions I needed on all critical surfaces.
In the drill press I did a spot drill, 5/16 tap drill for 3/8 UNC (all my fixturing hardware is 3/8 in my shop), chamfer top and bottom, then powertapped. each operation was done on the batch of 6 then came back to the 1st for the next operation. Power tapping was done with a Procunier #3.
I learned something though -- I should have put the nuts in evaporust after cleaning them. When I hit them with cold blue, it had a much more red/brown hue than normal. I think the cold blue solution picked up the red iron oxide that was on the pitted surfaces and it got deposited in the new black oxide finish. Oh well. They look fairly black in the pictures but in person they're more of a dark brown. Normally this scrap iron blues real nicely, I use it for various custom shop hardware.
Remaining little steps:
Thanks for reading


It has sat for a few months while I worked on cleaning up the table (including burrs in the t-slots that prevented t-studs from sliding in for the vise), monitoring local auctions for a vise and eventually getting one; installing a VFD, contactor/master power for it, and a quad box for the lights+DRO+powerfeed... and also figuring out a new control solution for the original 6F powerfeed that I wanted to keep on the machine.
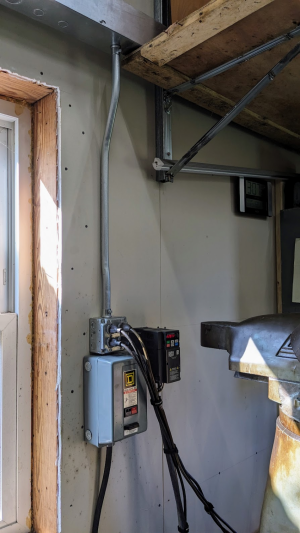
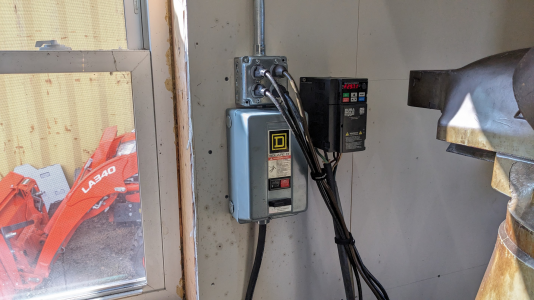
Power is an extension of circuits already established in the metal shop
- 3/4" EMT stubbed down from the 4x4 wireway that runs around the shop
- 2x 20A GFCI circuits extended into a quad box for the two lights, DRO, and powerfeed
- 30A 240v circuit branched down to a SquareD NEMA #0 motor starter (used, from ebay) so I have local disconnect to turn the VFD off cold when not in use or making wiring changes.
- 2HP VFD from AutomationDirect


This was based on https://www.atechfabrication.com/information/Bridgeport_Feed_Controller.htm with only the tiniest changes to the BOM

First cleanup pass on some old iron salvaged from a 100 year old bridge twisted up in the woods around here. After a roughing pass to cut under the rust crust, a faster finish pass looked good!

I selected another piece of that iron which was large enough to provide the profile for the slots on the bridgeport 9x49 table, but it was a bit twisted. heated it up with OA and bent it straight enough. I got two reference sides cleaned up, then had to cut it into pieces for the 6 nuts because it was still curved enough that trying to do all the machining together would result in too much wasted material.
Then set up to cut the shoulders in on the nuts in a single pass per side with a roughing end mill - the finish it leaves on the sides is fine for this purpose. On my prior mill (Rockwell 21-100), I wouldn't try to do this in one pass - mainly because I would have to hand feed it and not be consistent enough with the tool pressure/feedrate. On here the 1/2" roughing end mill did my ~3/8x3/8 depth of cut just as well as I was hoping it would.

I ended up leaving some of the non-critical surfaces of the nuts with their original iron-in-woods surface finish because why not, I got the dimensions I needed on all critical surfaces.
In the drill press I did a spot drill, 5/16 tap drill for 3/8 UNC (all my fixturing hardware is 3/8 in my shop), chamfer top and bottom, then powertapped. each operation was done on the batch of 6 then came back to the 1st for the next operation. Power tapping was done with a Procunier #3.
I learned something though -- I should have put the nuts in evaporust after cleaning them. When I hit them with cold blue, it had a much more red/brown hue than normal. I think the cold blue solution picked up the red iron oxide that was on the pitted surfaces and it got deposited in the new black oxide finish. Oh well. They look fairly black in the pictures but in person they're more of a dark brown. Normally this scrap iron blues real nicely, I use it for various custom shop hardware.


Remaining little steps:
- Need to break down that kurt vise and clean/lube it. It weeps a bit of rust-colored liquid from the screw, I have a feeling it's got a bunch of water-based coolant trapped in it from its previous life. Geometrically, the vise is in good enough shape for my uses at home
- The one-shot oil system installed on the bridgeport... I have no idea whether it's in working condition or about testing/adjusting those -- need to do some research
- The new 6F drive either needs a linear pot instead of audio taper, or I need to increase the drive's max rpm so the speed scale is more reasonable. Right now it is way slower than original, but that's also fine for my uses.
- At some point I will see if these high-quality, mechanically protected scales can be adapted to work with touchDRO so that I only need to add a 3rd scale for Z-axis. If that isn't straightforward, 2-axis DRO is fine for me for a while.
Thanks for reading
Last edited:


 Spotted the Kubota in the background also , been working mine lately here .