I am not dead! Anybody else have an insane job that frequently requires an inhumane amount of time, energy and patience? I'm catching a little break this week (I think), but i have to finish building the power supply for that brushless motor before i can go too much further, as it will dictate how i proceed. BTW, turns out a 48v 30a (1440w!!) PS isnt easy to come by, but pretty cheap and easy to make. Maybe that'll be my next series. I bet we have a few folks here who would like to see the cheap and easy way to make a PCB (Circuit board). Hopefully I can finish putting together the results of the wash. It turned out way better than I expected.
-
Welcome back Guest! Did you know you can mentor other members here at H-M? If not, please check out our Relaunch of Hobby Machinist Mentoring Program!
You are using an out of date browser. It may not display this or other websites correctly.
You should upgrade or use an alternative browser.
You should upgrade or use an alternative browser.
Epoxy Granite (EG) The cheap and easy way... I hope.
- Thread starter Taz
- Start date
- Joined
- Jul 14, 2013
- Messages
- 198
Well, since I haven’t seen anything recent, I thought I’d try my own experiment. 100g 70grit aluminum oxide, 35g West System epoxy: 24% epoxy by weight. At 10% the whole mix was crumbly due to only the fine aggregate I assume. I’ll pop it from the cup tomorrow to see how it looks, and then it should be full hard in a few days. If it seems solid, I’ll shoot for a bigger piece (this is about 3” dia, ¾” thick.) My goal is to cast a base to replace the metal tray of my HF 7x10 with a 1” thick EG base to stiffen the machine and maybe absorb some vibrations as I refuse to bolt it to a rigid bench (I know it should be, but space is a premium right now.)
- Joined
- Jul 14, 2013
- Messages
- 198
This morning I pulled the puck from the mold:
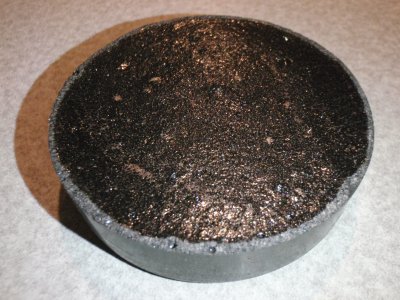
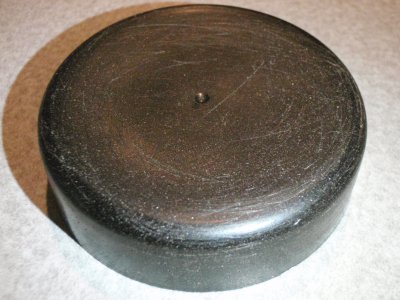
Not too bad, the scratches in the bottom of the cup transferred to the epoxy.
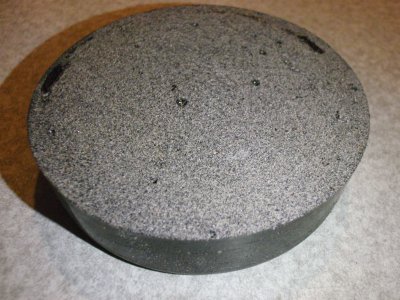
I chucked the puck in the lathe and faced it to see how many air bubbles were inside,
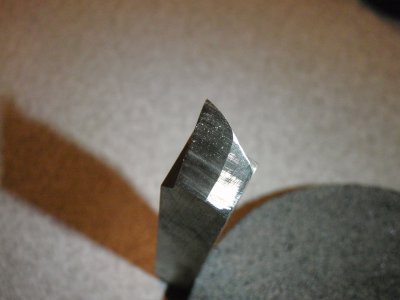
doesn't look like very many. ( it ground down my old HSS bit nice, *maybe I can use it for
a tool grinding wheel... hummmm)
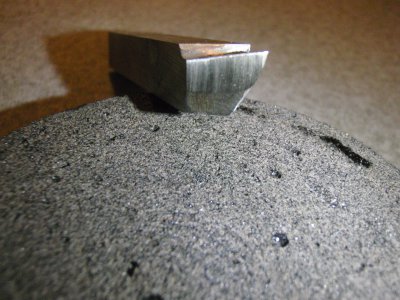


Not too bad, the scratches in the bottom of the cup transferred to the epoxy.
I chucked the puck in the lathe and faced it to see how many air bubbles were inside,
doesn't look like very many. ( it ground down my old HSS bit nice, *maybe I can use it for
a tool grinding wheel... hummmm)


Sharky,
Thanks for the information.
Chad did a great job of listing all of the components and especially how to get the proper aggregates inexpensively. The next step is the recipies to put it together.
My goal is to add mass, strength, rigidity and dampening to an existing lathe and mill, not to create major components from scratch.
Arvid
- Joined
- Feb 17, 2013
- Messages
- 4,406
My goal is to add mass, strength, rigidity and dampening to an existing lathe and mill, not to create major components from scratch.
A little over two years ago I filled the column of my HF 44991 mini-mill with EG. Here are a couple of random notes I recall from the process:
Everything I read seemed to point toward using a range of sizes for filler materials. I had a supply of glass beads (for bead blasting) and some aquarium gravel (nice and clean!) That covered small and medium. To get "long distance" strength, I used a bunch of screws I'd had sitting idle in plastic bags. IIRC, these were stainless steel 4-40 machine screws about 3/8" long. I also added some black drywall screws about 1" long (be sure to get the dry-looking ones, not the greasy/oily kind!) Adding steel screws also increased the weight/density of the EG.
BE SURE to do full sized a test batch, using all the actual ingredients! Check that it's neither too runny (excess unfilled epoxy floating atop the EG will be of low strength) or too stiff (tends to trap air and not fill small features). It's probably best start with a slightly runny mix, then add more of the finest filler (KEEP TRACK OF AMOUNT!) until you get what you want.
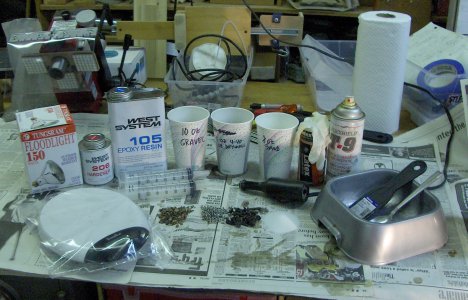
A polyethylene dog food dish and some tablespoons from Goodwill were perfect for mixing - hardened epoxy comes off the dish easily, and the spoons are cheap enough to throw away after a use or two.
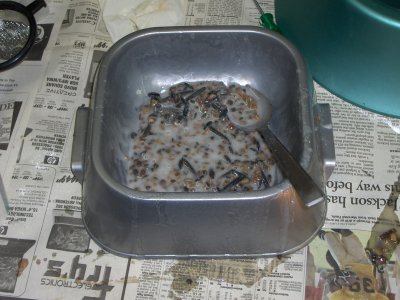
I was really surprised at how well West Systems epoxy wets out the filler materials. You don't need vigorous mixing to get a uniform batch, and this helps prevent air bubbles. I used the slow hardener (206), so I'd have plenty of time to mix thoroughly, let it rest and de-air a while, then spoon into place, and de-air/vibrate (see below) before the next batch.
I used a scale to weigh the fillers for each batch of EG, staging individual components in paper cups until ready to mix. A pair of plastic 2 oz "Catheter tip" (long conical end) syringes were used to measure the epoxy and hardener. IIRC, I did the fill with about 3 batches.
For a makeshift "concrete vibrator," I jammed a length of SS tubing onto the end of a vibratory engraver.
Large volumes of epoxy, especially the rapid curing type, will often generate a LOT of heat when curing. Using the slow hardener helped avoid this problem. Matter of fact, it was a bit cool in my garage, so I used a 150 watt floodlight bulb to warm the column and help the epoxy cure overnight.


