Does this look like it'll work?

Here's an update for all of you who've been on the edge of your seats waiting to find out what happened. Lol
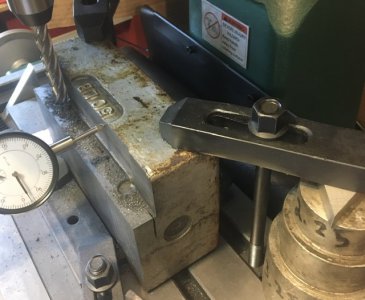
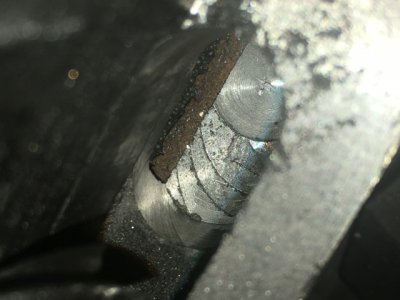
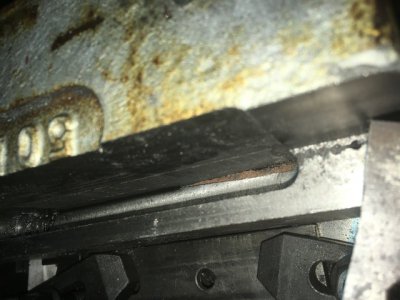
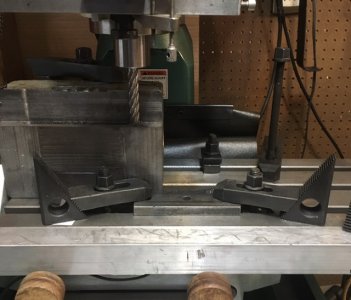
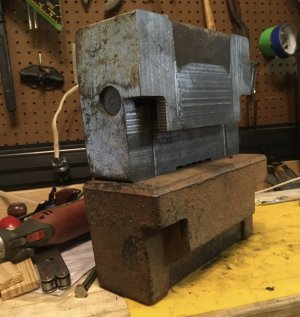
I used the horizontal band saw first. Then bought some extra long end mills. I tried plunging with little success. Unfortunately I'm as patient as I am stubborn. So I spent a few days slowly, carefully....painstakingly plunging 3/4" deep with the goal being a 1/2" wide by 1.25" deep by 9" long pocket. Finally I decided to take a stab at feeding right to left at .020" DOC. That worked extremely well. Except when the end mill hit something hard In the work, the clamps and fixturing collapsed, and the work started traveling across the table independent of the table. There's a picture below. I ended up getting my pocket done after maybe an hour except for one hard spot that just won't be machined. The piece isn't done yet, but the difficult portion is over. Due to the pieces purpose, I don't think this evidently unmachineable section will be a problem. There's also a void in the casting, which was full of tiny black balls that look like what I imagine gunpowder to look like. I'll take a picture if anyone actually is interested.
 

Attachments

  • A804C07B-B7A8-4D1E-A898-1FA2A8CB7E8A.jpeg
    A804C07B-B7A8-4D1E-A898-1FA2A8CB7E8A.jpeg
    104.2 KB · Views: 41
  • 584A32DA-78B1-408A-9656-28D88B32D210.jpeg
    584A32DA-78B1-408A-9656-28D88B32D210.jpeg
    75.7 KB · Views: 30
  • F7B791E9-066C-4BB2-84A3-E0C42B564B93.jpeg
    F7B791E9-066C-4BB2-84A3-E0C42B564B93.jpeg
    89.8 KB · Views: 37
Here's the very benign looking picture taken right after I smashed the emergency stop button.
 

Attachments

  • 1C575E86-3345-4178-9C76-ED8FFA84DE13.jpeg
    1C575E86-3345-4178-9C76-ED8FFA84DE13.jpeg
    98.3 KB · Views: 38
Yeah! Not only that, but I had been warned on the forum to put stop blocks down. And I had put on on the left side. I didn't get loose, but once the other clamps let go, it was overpowered as well I guess.
Anybody remember that hard spot I mentioned? Sawzall with a bimetal blade took care of it. Here's the not yet deburred result with it's dimension donor. This is an obsolete antique tractor weight. Dad wanted one for himself. He didn't care if it was taller, or if the slot was exactly the same. But I tried to make it right. It's ok, right?
 

Attachments

  • 816E8E1A-AA14-4E76-AC9A-9258165690EE.jpeg
    816E8E1A-AA14-4E76-AC9A-9258165690EE.jpeg
    108.4 KB · Views: 18
  • 94B69286-EDB5-47D8-8A22-AF85AE5CD37D.jpeg
    94B69286-EDB5-47D8-8A22-AF85AE5CD37D.jpeg
    127.1 KB · Views: 20
Here's the very benign looking picture taken right after I smashed the emergency stop button.
I know it's hard to tell from the photo but it appears the hold down bars are bearing on the edge of the part instead of having the force out at the tip of the bar.

1632693216369.png
The toe end of the bar has a little slope that is meant to be the contact area and the tail end seems to be lower than the toe instead of being a little above the height of the part to get the toe in contact. Apologies if I'm wrong about what I'm seeing.
 
You could be right. I've taken it apart now, but it looks that way from the picture. That one stayed put though. It was there for something to register against if I had to take the part out and put back in.
I looked back at all my pictures, and I think I must be wrong about having used a stop block. I don't see that clamp I thought slid. Not only that, but I'd have had to move it the 9" or whatever back where it came from. So I bet I added the stop block after the malfunction. It's been on the mill table for 2 months, so it's possible I just didn't remember it right. I could have sworn I had one on the left though. Who knows?! I'll try to make sure I set up those clamps better next time. Thanks!
 
that's a big piece of work, nice job. With clamping stuff it's always fine until it isn't :) It's best to think of how things could go wrong and then set it up to prevent that. Also a shallow cut with a 1/4" endmill is very different to a 2" deep cut with a 1/2" endmill. Got to make mistakes to gain experience!
 
I know it's hard to tell from the photo but it appears the hold down bars are bearing on the edge of the part instead of having the force out at the tip of the bar.

View attachment 379829
The toe end of the bar has a little slope that is meant to be the contact area and the tail end seems to be lower than the toe instead of being a little above the height of the part to get the toe in contact. Apologies if I'm wrong about what I'm seeing.

So I have been wondering when you clam something like that what kind of torque do you put on the clamping studs? I've never seen anyone actually clamping stuff down, I see it after it's clamped. I'm assuming just a feel but tight.
 
So I have been wondering when you clam something like that what kind of torque do you put on the clamping studs? I've never seen anyone actually clamping stuff down, I see it after it's clamped. I'm assuming just a feel but tight.

But curious about this aswell but I think it is really part dependent.

I do very little work using work clamped to the table I try to use my vise in any situation I can. I’ve even made fixtures to bolt a large part to the table instead of having to clamp it with typical step clamps.

I have clamped one part in the last few years and I was a little worried that it would move but I was taking very very light skim cuts and that was all. So I used 2 3/8 bolt and didn’t torque them too hard. That held the part down safely and I was able to Machine it.


I have had a few parts pull out of a vise and pop off a vacuum Chuck and that almost always gets nasty quick.

I’m alway on the line if I think it’s clamped hard enough vs not distorting the vise. Experience I the only way I think to master it.
 
So I have been wondering when you clam something like that what kind of torque do you put on the clamping studs? I've never seen anyone actually clamping stuff down, I see it after it's clamped. I'm assuming just a feel but tight.

It is, IMO, part dependent... depending on the size/weight of the part, what type of setup, part material, what type of machining (light cuts, heavy cuts, cutting interrupted surface, etc), everything should be factored in.

A while back, I needed to skim a bore on the end of a Hendey lathe headstock... it was an 'iffy' setup... I needed a bigger mill table...

20201224_183309.jpg

20201224_183358.jpg

I had this clamped with two ½" studs... that's all I could get on it... I had the clamps *TIGHT*...

It worked out fine... the 'pucker factor' was pretty high, though.

-Bear
 
Back
Top