Cross slide not square to spindle

My 6" Atlas has flat ways and the surface that controls the perpendicularity of the cross slide to the spindle axis is at the back side and above the apron, in contact with the front vertical surface of the ways. It could be lapped or scraped to correct any non perpendicularity issue. Before doing so, I would confirm that the ways aren't worn and creating the problem. I would also check the carriage gibs and cross slide gibs for proper adjustment.

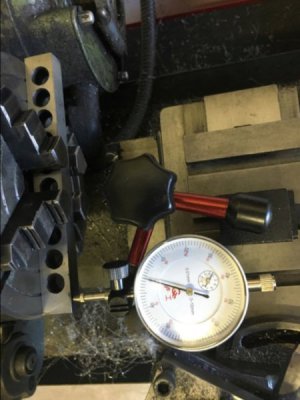
To measure perpendicularity, I make a skim cut on a flat plate and sweep the surface with a DTI. This will provide a measurable indication of the amount of deviation. I would do this at least at two points along the ways to check for wear in the ways. If you get consistent values at the two points and you have a variation in your sweep readings, there is likely a wear issue with the carriage.
 
Another way to measure the error is to take your facing cuts to the center until you are getting consistent metal removal from the outer edge all the way to the center. Stop your final cut about 5/16" past center. Lay the disk on a flat surface and use a straight edge and a feeler gauge to measure the error, if any.
 
I had a similar problem (http://www.hobby-machinist.com/threads/cross-slide-facing-adjustment.44572/) and when I took the carriage off it became obvious that it had worn at the guiding surface and the cross slide was no longer at 90deg to the bed. I machined the carriage back to perpendicular and fixed the problem.
The test is to fix a parrallel across the chuck, indicate it and then turn the chuck 180deg and adjust the parallel till you get the the same reading without moving the crossslide. Then feed the crossslide in and see if the parallel is ... parallel to the crossslide travel.
A1682BCE-DC7B-4B8E-BB0F-B31AF3743B39.jpeg
 
These all look like good ideas although I doubt I’ll be hand scraping anything unless it is really bad.
I can see what appears to be clamps that attach the head stock to the bed and I was wondering if there was some adjustment there.
It is probably more likely that the slides are worn.
When I first got the lathe the slides were so tight I could not move the cartridge or the cross slide to the full extent of their travel.
I cleaned out all dried goo, oiled it nicely and adjusted the gibs as tight as to allow travel along the full length of the slides.
There are now some spots that are a bit looser than others.
I didn’t think about how head alignment would also effect boring parallel. I think that is actually not to bad.
So more testing required :)
My current project will require facing a 5” diameter. My material already has a flame cut hole about 1”.
So I won’t be able to test right down to the Center but I think I’ll get a good indication.
The parallel in the chuck also looks like a great test. I might clamp one to a face plate and shim it as required.
It may be some weeks before I get “hobby” time to do these tests. I’ll post back here with results.

Thanks for all suggestions
David
 
I have now talked to four people in the industry and none of them say the cross is made/set-up to be minutely out of square. It should be 90°. If your/a lathe does not cut flat and square then it’s worn, made wrong or flexed or something. Maybe a manufacture(s) back decades ago used that practice. And then the saying has stuck to the wall and folks today say it like it’s done today…Dave
 
Nothing is 90 degrees +- nothing. Its always +- something.
If the cross slide move toward the tailstock as it moves to the center, the part will not sit flat. It will tip and wobble. Nobody wants that.
The opposite error will sit on the outer rim nice and stable. That is almost as good as a part that is truly flat and perfect from edge to center.
The lathe is designed to
A) have really small tolerances.
B) tolerances are all on one side of 90 degrees. That means the nominal design is NOT 90 degrees.

Because of A the nominal design is REALLY close to 90 but it is NOT 90.
 
Wow lots of variables in this situation. Rigidity comes to mind for most. Swinging a fly cutter ,,,vibration central,,, lots to consider the ways adjustments table lockdown ,,with movements,, in any direction. One reason I hated using mine for milling it works buts sure a PITA,,,. I suspect with all things considered that these all are the reason.
 
Good video here about checking the cross slide and more.
 
Ok, let me be the bearer of bad news, as every comment so far has dealt with trying to fix your problem. For starters, your machine is old. Maybe when it was designed, the engineers thought they could do 2 things with the same machine, but it's not a milling machine, and certainly not built to run a 3" single point fly cutter that creates an interrupted cut, whacking the front of the part being machined every revolution. (no matter how sharp that cutter is, or how fast it's turning.) To be honest, I wouldn't run a fly cutter in ANY machine, unless the material I'm cutting is soft and even then at a minimal depth. Every revolution of that cutter against the front of the part is moving SOMETHING, and when the cutting tool goes over it, it springs back, hopefully to the original spot you clamped it, but in reality, the cutter is just doing an interrupted cut in reverse when you go over it. In other words, it goes in one way, and comes out another. Anything that moves on that LATHE, or any other machine has slop, and no matter how much of it you take up with adjusting the gibs and by splitting nuts, it will still have slop. That's why it's able to turn. You sound like your expecting accuracy and a microfinish, but in reality, it ain't gonna happen. That's why grinding was invented.
 
Hi Everyone,
I'm in no way expecting miracles or a nice finish. I know it isn't a milling machine and at this point I can't afford one nor do I have room for one.
I also only have single phase power out on the farm which limits me getting a nice mill, and that isn't going to change any time soon.
Having said that I'd say the step on the trailing cut is about .015" at a guess. I haven't measured it and it is significant.
I only set the swing of the cutter to 3" so I could exaggerate the problem. I could run up and down with and end mill and it would not be noticeable.

I know it's old and worn (like me)
I'm just trying to get the best out of it. My best estimate is that it was built in the mid 1930's
What can I say. It's a hobby :)

I'll post again once I have taken some measurements.
David
 
Back
Top