Cleaning up a tired old carbide grinder

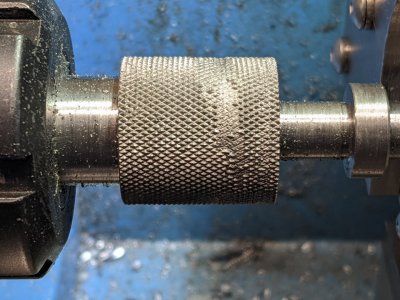
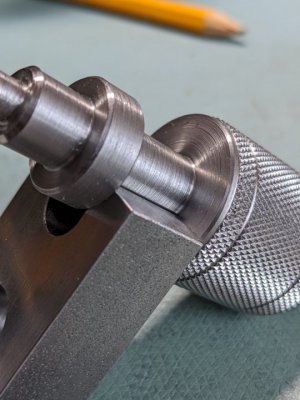
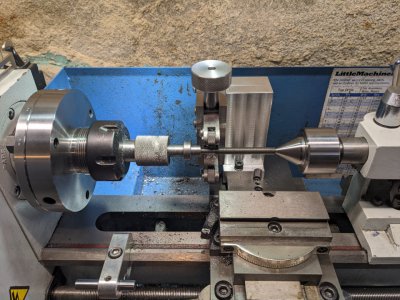
Made the screw, but had knurling failure. Managed to rip out some of the knurls. However, the screw itself isn't bad. I'll cut of the bad knurls and re-knurl, with a little less pressure and a faster feed rate. The knob diameter isn't critical. Never had a bad knurl like this. Then again, this is 12L14, and haven't knurled it much. The knob on the knurler was made of 1144 and knurled by the same knurler. It came out great.
PXL_20220130_013119733.jpgPXL_20220130_013008612.jpg
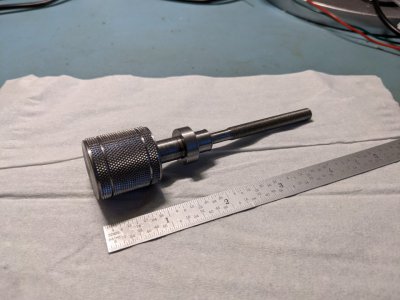
The thread of the screw is 1/4-40, all single pointed. Ran a die over it, but it barely removed anything. Modified the shaft to 10 mm in sections to keep this from getting too spindly. Was kind of fun to make, and a challenge for me. Next photos should have better knurls I hope.
 
So managed to pull this out of a dumpster. Cut off the knurl and redid it with a slower RPM, lots more stinky sulfur oil and well lubed knurling pins. Came out ok. Added a couple of rings to the knurl for some interest.
PXL_20220131_215308849.jpg
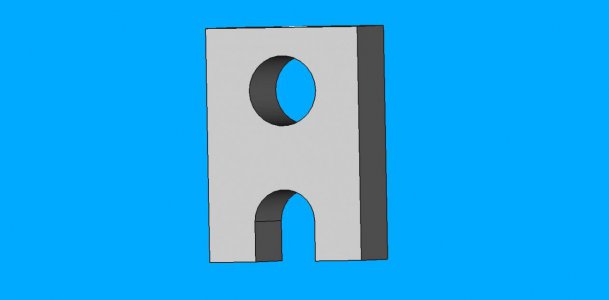
Next part will be the bracket that holds the diamond point and straddles this screw. I can accommodate the small dimensional errors in the screw with the bracket by fly cutting the surface to fit.
bracket.jpg
 
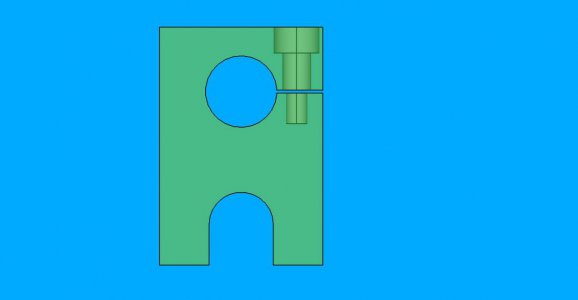
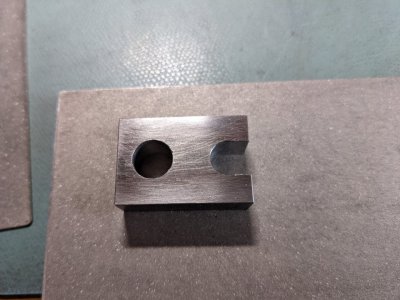
We can do a little better than the sad gumby above. How about a slit in the block and a countersunk screw to clamp around the diamond tool?
transparent_clamp_with slit_and_screw.jpg
Learned how to do a Technical Drawing in FreeCAD, will machine it from the attached pdf. Enough messing around with computers, down to the shop.
 

Attachments

  • techdraw_dresser_block.pdf
    203.7 KB · Views: 1
I like that better than a set screw but make a screw for it with a handle so you don’t need a tool. I don’t think the counterbore is necessary or even desirable (assuming a permanent, tool-free screw).
 
Some minor issues. Diamond point tool is actually slightly larger diameter than 7/16", due to plating. It's a hair over 0.001" larger than 7/16". So I will need to bore out the hole just a touch. I remeasured the flange to flange gap on the screw using an adjustable parallel and found it to be 12.8 mm, not 12.7.

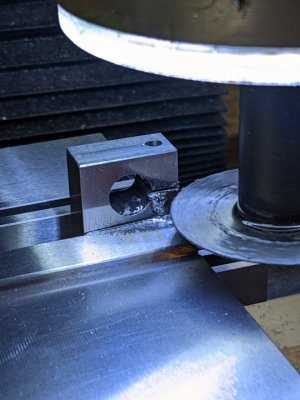
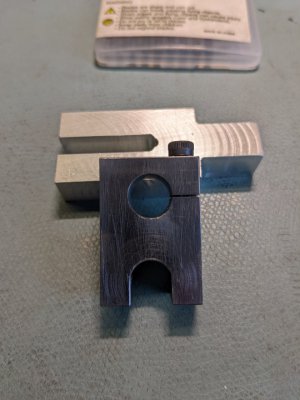
Flycut the gumby to 12.8 mm thickness from 5/8" thick stock. Stopped at an indicated 12.811 mm. Wasn't quite trusting of the mill to take off that 0.011 mm without overshooting. Have shaved down the thickness using some diamond flats. Poor man's surface grinder. Took longer than expected, but it now just slips in up to the slot. Need to open up the slot a little bit. Used a 3/8 end mill, and the diameter of the mating piece is about 9.99 mm. Looks like I should have machined an undercut on the screw, as there might be interference at the flange fillets. Think I will fix that by radiusing the gumby edges slightly with a file.
PXL_20220202_145059592.jpgPXL_20220202_145842036.jpg
 
I imagine discovering things like the corner-radius interference will be lessons that stick with you in future designs. While this project is perhaps some serious overkill, at least the dresser will be a joy to use from both its beauty and precision.
 
I imagine discovering things like the corner-radius interference will be lessons that stick with you in future designs. While this project is perhaps some serious overkill, at least the dresser will be a joy to use from both its beauty and precision.
I would have been happy to find something already done. But I didn't see anything that seemed like it would work well with my grinder. Perhaps I could have found such a tool, if I knew what to even call it. However, I don't have a need to buy one now. Thanks for showing me the picture of yours!

Designing and making this has been fun. Undoubtedly a ridiculous application of unwarranted precision, but it is teaching me things about fit, that I didn't fully appreciate before. Bored out the hole for the tool so there's a snug fit. Learned from the last time that cutting the slit is the last operation. That way if you need to open up the hole it is easier. Last time I had to use a lap which was pretty messy. This time, I just used the boring head. Had to open up the bore about an additional 0.05mm since the embossed numbers on the diamond tool had burrs that were catching on the bore. In retrospect, I should have stoned them off, but at the time, I didn't want to mess with the plating. Since I have the clamp built in, I don't care if there's a few thousandths of rattle.

Opened up the flange slot, a few tenths of a mm at a time, measuring the gap with adjustable parallels. Cut measure, fit. As it stands, the screw goes into the flange, but is too tight. The screw needs to be able to rotate easily in the clamp block. I'm about 0.01 mm off, according to my mike. Now polishing the faces of the gap to get it to fit.

With time, I will have more confidence in being able to get the fit I'd like by straight machining. It would be faster. But I'm not in a race, and I'm not being paid for piece parts. So plodding along with fitting and enjoying the journey.
PXL_20220202_194659420.jpg
 
I like that better than a set screw but make a screw for it with a handle so you don’t need a tool. I don’t think the counterbore is necessary or even desirable (assuming a permanent, tool-free screw)
Why isn't a counterbore ok? Dust and swarf? Don't think this will get adjusted much. Primarily in the initial setup. I understand a handle being nice, but the handles often get in the way. Also the M4 handles that I saw were only 30mm long. For the moment, I haven't counterbored, just an M4 SHCS sticking out the top.

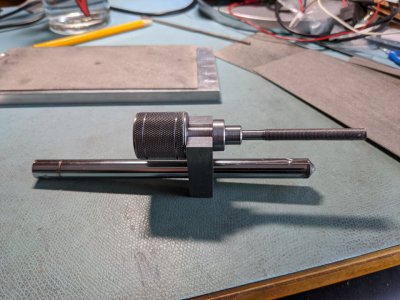
Last night, finished the fitting of the screw to the clamp block. Some light surface finishing and a drop of machine oil did the trick, along with more breaking the sharp radii. Seats all the way into the slot and there's no play that I can detect.

Today, drilled and tapped Gumby to give him an M4 hat. Also gave him a slice with an 0.020" slitting saw. First time using this Sierra American saw arbor, which has a nice low profile. Broke all the sharp edges with a triangular file on all four sides. Cut off a screw to fit the block. For the moment, this piece is done.
PXL_20220203_172620621.jpgPXL_20220203_182328804.jpg
Next piece to figure out is the cast iron block.
 
Why isn't a counterbore ok?
Oh, I just meant that there isn't much point to it if you have a handle on there, and it adds operations to both the clamp block and the handle. I think you're right that you won't need to adjust that much at all. Table tilt may change the slot distance from the wheel, which would require straightening the table to dress; but that depends on where the axis of table tilt is.

You just have the main block left?
Yes. Been machining the cast iron to size today.

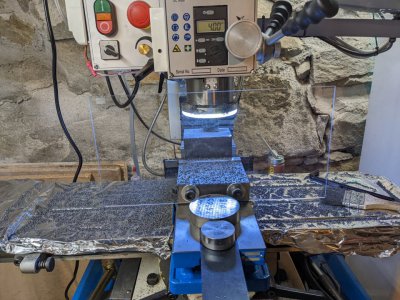
Had to make a quick plastic shield to keep the chips and powder off me. Never machined cast iron before. It's as messy as they say! Also put down aluminum foil on the mill table to help the cleanup. Used a fly cutter on the cast iron, the finish is ok.
PXL_20220203_214031717.jpg
Have to do the ends. Don't have an end mill with 2-1/4" LOC to take a single side pass. So I will have to stand the block on end and attempt to square it. Probably use the fly cutter again, since it works pretty well. This is the little Sherline fly cutter with the Valenite carbide inserts.
 
Last edited:
Back
Top