- Joined
- May 27, 2016
- Messages
- 3,480

Do you have an extra dowel pin to use as a spacer? In the first picture, there seems to be a rectangular block. Could you use the block? It seems close to the right width.@rabler : Indeed - spot on! No way to get the anvils down onto the pins. Relative measure is wanted.
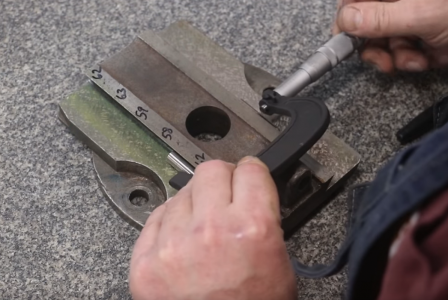
You can see one of the attempted gauge blocks standing loose behind the micrometer.
The measure across pins is around 40.5mm, or about 1,6 inches.
That's too much for a 25mm micrometer, but would be OK for a 25mm-50mm micrometer.
The problem is the minimum distance to span from the left side pin, to the end of the obstruction, is about 61mm (or 2.4 inches).
That much is beyond a 1" to 2" span. This is the sort of measurement where one wants to see consistency to within at least a couple of tenths.
I don't have a "tenths" micrometer that will do 2" to 3".
If I use a really big gauge block, I do have a 75mm-100mm micrometer.
It's even a reasonably good one, reading 0.01mm, which is about 4 tenths resolution, so still not quite up to this job. Keith Rucker's increment variations were marked in tenths. For me, even the "small" side of the micrometer can't sit right on the pin.
I will find a way. It's just that sometimes, one wishes things would work out a little better..
View attachment 395576
I did mention that there is 2.4 inches from left side pin to edge of obstruction.Do you have an extra dowel pin to use as a spacer? In the first picture, there seems to be a rectangular block. Could you use the block? It seems close to the right width.
As for not having a 2" - 3" micrometer (50-75 mm) that's a solvable problem. You can get one that reads to 0.0001" for not that much. I bought a set of micrometers a while back, 0-1, 1-2, 2-3, 3-4, reading to tenths. Not as nice as a Digimatic, but still, quite useful.
@rabler : Indeed - spot on! No way to get the anvils down onto the pins. Relative measure is wanted.
You can see one of the attempted gauge blocks standing loose behind the micrometer.
The measure across pins is around 40.5mm, or about 1,6 inches.
That's too much for a 25mm micrometer, but would be OK for a 25mm-50mm micrometer, if it would get in there.
The problem is the minimum distance to span from the left side pin, to the end of the obstruction, is about 61mm (or 2.4 inches). That much is beyond a 1" to 2" span. This is the sort of measurement where one wants to see consistency to within at least a couple of tenths.
I don't have a "tenths" micrometer that will do 2" to 3".
If I use a really big gauge block, I do have a 75mm-100mm micrometer.
It's even a reasonably good one, reading 0.01mm, which is about 4 tenths resolution, so still not quite up to this job. Keith Rucker's increment variations were marked in tenths. For me, even the "small" side of the micrometer can't sit right on the pin.
I will find a way. It's just that sometimes, one wishes things would work out a little better..
Leaving behind my previous world of microns and nanometres, it is in this forum that I start learning about what is usual when making stuff with lathes and mills. I expect to make most stuff to within about 12 or 20 microns. That would be around 0.0005" to 0.0008". Most of us are happy to have stuff within about a thousandth inch, except for certain critical things, like spindle run-out, or oil film clearance, and gauge blocks and micrometer's truthfulness.Share with us your need for accuracy...
Do we really need a tenths mike? Seems to me a normal eye can distinguish at least half thou, maybe even 1/4 thou, or if it's close to one line, half the thickness of the line. And the purpose of the measurement? To compare both ends and the middle of the dovetail? or to make a mating part? I see the need if the first, the second gets a gib, any way. Do you have a bind in the middle of travel? this could be from wear, but it would be loose in the middle, where the most wear is, not binding.
I don't mean to be mean/nasty, but sometimes tenths are over valued here.
