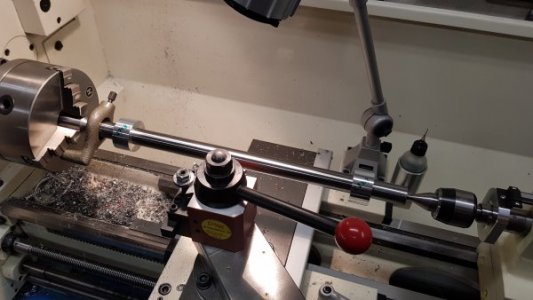
When reading an unsupported test bar with a DI out 12 inches from the head stock I get .0007" TIR, .002" up and .002" toward operator. The bar is 2" OD with the MT-5 end plugged directly into the spindle bore. The lathe is a Grizzly G4003G. Would this be considered sufficiently aligned?
-
Welcome back Guest! Did you know you can mentor other members here at H-M? If not, please check out our Relaunch of Hobby Machinist Mentoring Program!
You are using an out of date browser. It may not display this or other websites correctly.
You should upgrade or use an alternative browser.
You should upgrade or use an alternative browser.
Alignment Specs
- Thread starter epanzella
- Start date
As far as I know, there is no accepted industry standards of accuracy for headstock alignment; I could be wrong here. Most of us want it as close to zero as possible; I think 0.002" is excessive but only if it is really that far out.
Can I ask a few questions?
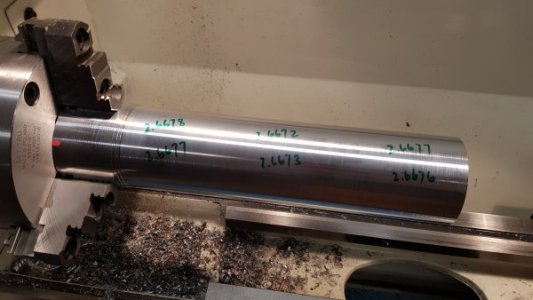
Taking very light cuts and measuring the differences in diameter at both ends is, to me, the simplest and most accurate way to do this. Then you simply move the headstock to minimize the differences in both ends of the bar. You do need to use a sharp HSS tool for this test so you can take depth of cut in the 0.001" -0.002" range and I suggest you use a softer material like 12L14 in a 6-8" length. If you prefer, you can use the 2-collar method to reduce the amount of cutting you have to do.
I'm sure there are other methods out there. I would accept maybe a half-thou over an 8" run. My personal lathe has less than a tenth over 8".
Can I ask a few questions?
- Have you leveled the lathe?
- What is your spindle run out?
- Have you put the test bar on V-blocks to confirm it is straight?
- Have you measured the test bar to confirm it has a consistent diameter?
Taking very light cuts and measuring the differences in diameter at both ends is, to me, the simplest and most accurate way to do this. Then you simply move the headstock to minimize the differences in both ends of the bar. You do need to use a sharp HSS tool for this test so you can take depth of cut in the 0.001" -0.002" range and I suggest you use a softer material like 12L14 in a 6-8" length. If you prefer, you can use the 2-collar method to reduce the amount of cutting you have to do.
I'm sure there are other methods out there. I would accept maybe a half-thou over an 8" run. My personal lathe has less than a tenth over 8".
The TIR at the spindle is about a tenth or less. . The needle on a .001 DI quivers a bit @ 70 rpm but really doesn't move enough to read anything. The TIR 12 inches out @ 70 rpm is .0007. It's a factory MT-5 test bar. Sweeping the 12 polished inches of the bar shows me .002 up and .002 towards the operator at the unsupported end of the bar @ 70 rpm. I set the lathe up 6 years ago by turning my own bar but I didn't have the factory test bar at the time.
What is a "factory" test bar? I have not heard of these before. Are they supplied by Grizzly?
I have a MT5 test bar but one of those from India commonly found on ebay. I never use it though. I first level the lathe then I take a test cut on a 3" OD piece of aluminum (unsupported by the TS) with a sharp cutter. Then I tweak my leveling feet to take out any taper. If I can't reduce taper I would then proceed with aligning the headstock but I have not needed to yet. Once I'm happy with that I then dial in the tailstock.
One debate is that a solid MT5 test bar is heavy & sags at the unsupported end. Makes sense as my MT5 is heavy & I did not think about that when I purchased it. I did recently try my MT5 bar and had .002" runout at the unsupported end. Then I supported it with a center (TS already aligned) & the runout was gone. But like I said I never use it, been sitting in the tool box for years and it was only $50. I may purchase a MT3 test bar in the future & see how much it sags compared to the MT5 test bar.


Run out readings taken under power are typically unreliable so I'm not sure what the numbers mean. How accurate is the factory test bar? I'm not being difficult, believe me. I just don't trust a bar until I confirm it myself. I especially am suspicious of readings taken 12" from the spindle; gravity alone will alter that.
Just in case you don't already have this, here is a photo from the Grizzly inspection record for the 4003G lathe.
Sorry for the poor quality of photos so here is a link to a typical sheet.
 www.manualslib.com
Sorry for the poor quality of photos so here is a link to a typical sheet.
Grizzly G0509G Inspection Record (Page 2 of 4) | ManualsLib
Attachments
Last edited:
By "factory" test bar I mean a test bar purchased not shop built. It's center drilled on both ends and has a morse taper #5 machined on one end to plug right into the spindle taper with no chuck or sleeve. I sweep it both sttationary and @ 70 rpm to make it easier to average out the runout. The readings are the same either way. .002 up and .002 towards the operator.
Thanks TOZ. That spec sheet is what I was looking for. I see I have some work to do.Just in case you don't already have this, here is a photo from the Grizzly inspection record for the 4003G lathe.
Sorry for the poor quality of photos so here is a link to a typical sheet.
Grizzly G0509G Inspection Record (Page 2 of 4) | ManualsLib
www.manualslib.com
What if you mark the high side of the test bar in both positions, remove, rotate 180 deg. and reinsert the test bar.By "factory" test bar I mean a test bar purchased not shop built. It's center drilled on both ends and has a morse taper #5 machined on one end to plug right into the spindle taper with no chuck or sleeve. I sweep it both sttationary and @ 70 rpm to make it easier to average out the runout. The readings are the same either way. .002 up and .002 towards the operator.
Then see if the high spots still correspond.
When using the test bar you are suppose to find the highs and lows in the bar and find the meadian. Orientate the bar then take your readings. From memory the bar should point towards the operator no more than .0008 and should be point up .0008 at 12” from headstock. Same as the tailstock and this is to account for sag and toolpressure. I use a mt3 bar so it can be used in tail or head.


