- Joined
- Jul 26, 2011
- Messages
- 4,142
Click THREE times on the pictures to greatly enlarge them. I was asked to make this by the management of Williamsburg as an inducement to get Mr. Brinkley to stay on another year as head of the Raleigh Tavern Society. That is a group of large donors(over $10,000 a year,I think). Since it is largely a social group,he was a big draw,and brought more large donations into the museum.
I worked very hard on this project for 4 or 5 months. I think it was in 1986 or 1987,not too long after I accepted the newly created position of Master Toolmaker. Mr. Brinkley collected scientific instruments.
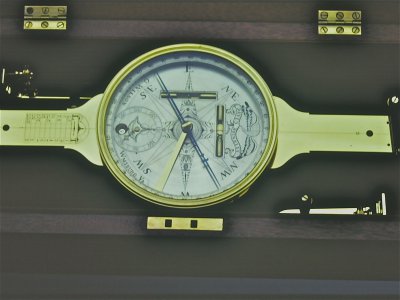
This was copied directly from an 1802 Chamblee compass made in Winchester,Va. I made some rudimentary patterns to have the ring and the vertical "sights" cast from the same 260 alloy brass that the rest of the compass was made from. The engraved face was "dead silver" plated by moving a cotton ball with silver plating solution in it over the surface. A wire connected to a few small batteries was imbedded in the cotton ball. The body of the compass was grounded.
The engraving was filled with black mastic on the original. I used black artist's acrylic paint from a tube. I was in too much of a time pinch(as usual) to experiment with old recipes for mastic fillers,nor did I want to find the filler falling out after a few years.
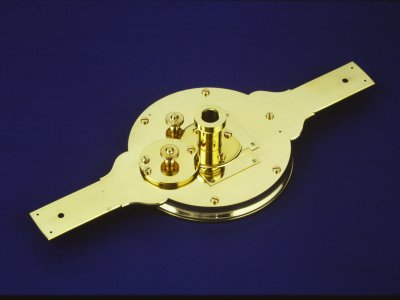
There is a counter that rotates seen in the dial. A small round window shows the number of "chains" (a surveyor's distance measurement) that have been payed out. A ratchet mechanism operated from the back of the dial clicks the numbers into place.
I made the glass vials for the 2 levels by melting the end of tubing. Then,I bent the hot glass slightly. Most vials were sealed at the other end with putty. Sooner or later this putty dries out and the fluid leaks dry. I melted the other end of the tubing and pulled it into a short neck. Then,I put in turpentine,which seemed to stand the heat best without boiling off when I melted the neck shut. Then it was sealed forever.The vials were enclosed with thin brass covers that have a pierced cover,with a built in brass"cross hair" in the center,filed from the solid brass.
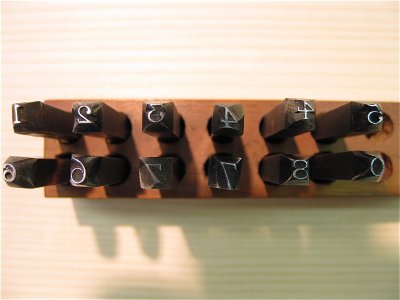
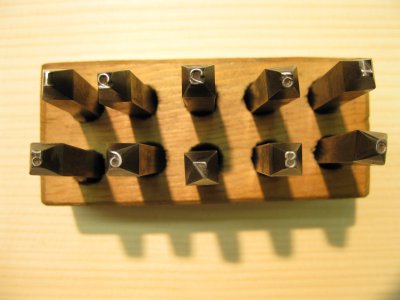
One of the great failings most makers of reproductions make is in using modern,rather ugly Gothic stamps (no serifs) when numbers or names is needed. I copied the numbers exactly as seen on the original,making a set of stamps which I still have. The original used a #2 with a closed loop 2. I used that on the compass,but personally I don't like the closed loop 2,so I made an alternative 2 in the proper style for the period just to have on hand. This set is the set seen above the other set which I accidentally posted (I can't tell from the tiny pictures seen in the photo management views).
The compass was hand polished for several days with leather hand buffs. 9 days if I recall. This is how they did it in the 18th.C.. It was the only way to prevent smearing the engraved plate on one of the arms,where the surveyor could mark notes that were later rubbed off. The arches seen above the engraved scale is in reality composed of very tiny punch dots,which were a bit "nervous" to do. I wish I had a closeup of it.
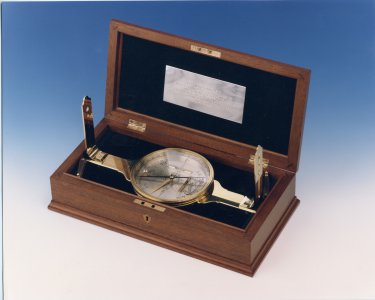
The compass is coated with a hand brushed gold colored lacquer to enrich the color,like brass horns have. The finish is better than the original,which had a working finish. This compass has a presentation grade finish on it,with no filing or other scratches left at all.
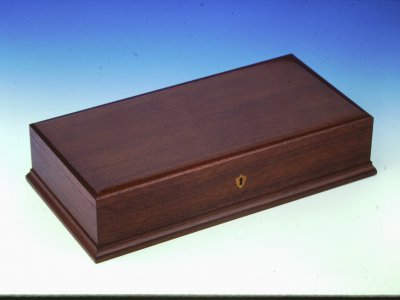
The tall sights are taken off when the compass is stored in the case. They are laid in fitted nooks,and little ebony arms are swung over them. They have small brass knobs that you might be able to make out. The picture is rather dark,with the dark green broad cloth lining.
The fire blue,hardened steel needle was magnetized. Hardened steel stays magnetized longer than soft. They would have to be re magnetized at intervals by drawing a lodestone over the glass. The thin brass arm extending to the center of the dial,under the needle,was screwed up against the needle's hub,to keep it from banging about during transport which was bumpy at best. It kept the needle from becoming de magnetized by flopping about.
The little screws were nice. Like on the original,I made them complete with "built in" washers turned on their bottom sides. I was able to exactly reproduce the double knurls on the knobs with my good selection of knurls. I'd have made them if necessary.
The hole in the bottom view of the compass was very close to perfectly fitting a #2 Morse taper reamer,which I used. I did not make the tripod . An original was not given to me to copy.
THE BOTTOM picture shows the number stamps made for the compass. The top ones,and the bottom ones look a little crude,but they are copies of hand made stamps from the era. The top set of stamps has 2 figure 4's,one is a more primitive type. It has a regular and a long 7 and 6.


Last edited:

